Take a Closer Look – Close Reading Historical Images

Teachers are looking for resources for online instruction. So I am reposting lessons from my Social Studies Methods Course at the University of Portland’s School of Education. See original post here.

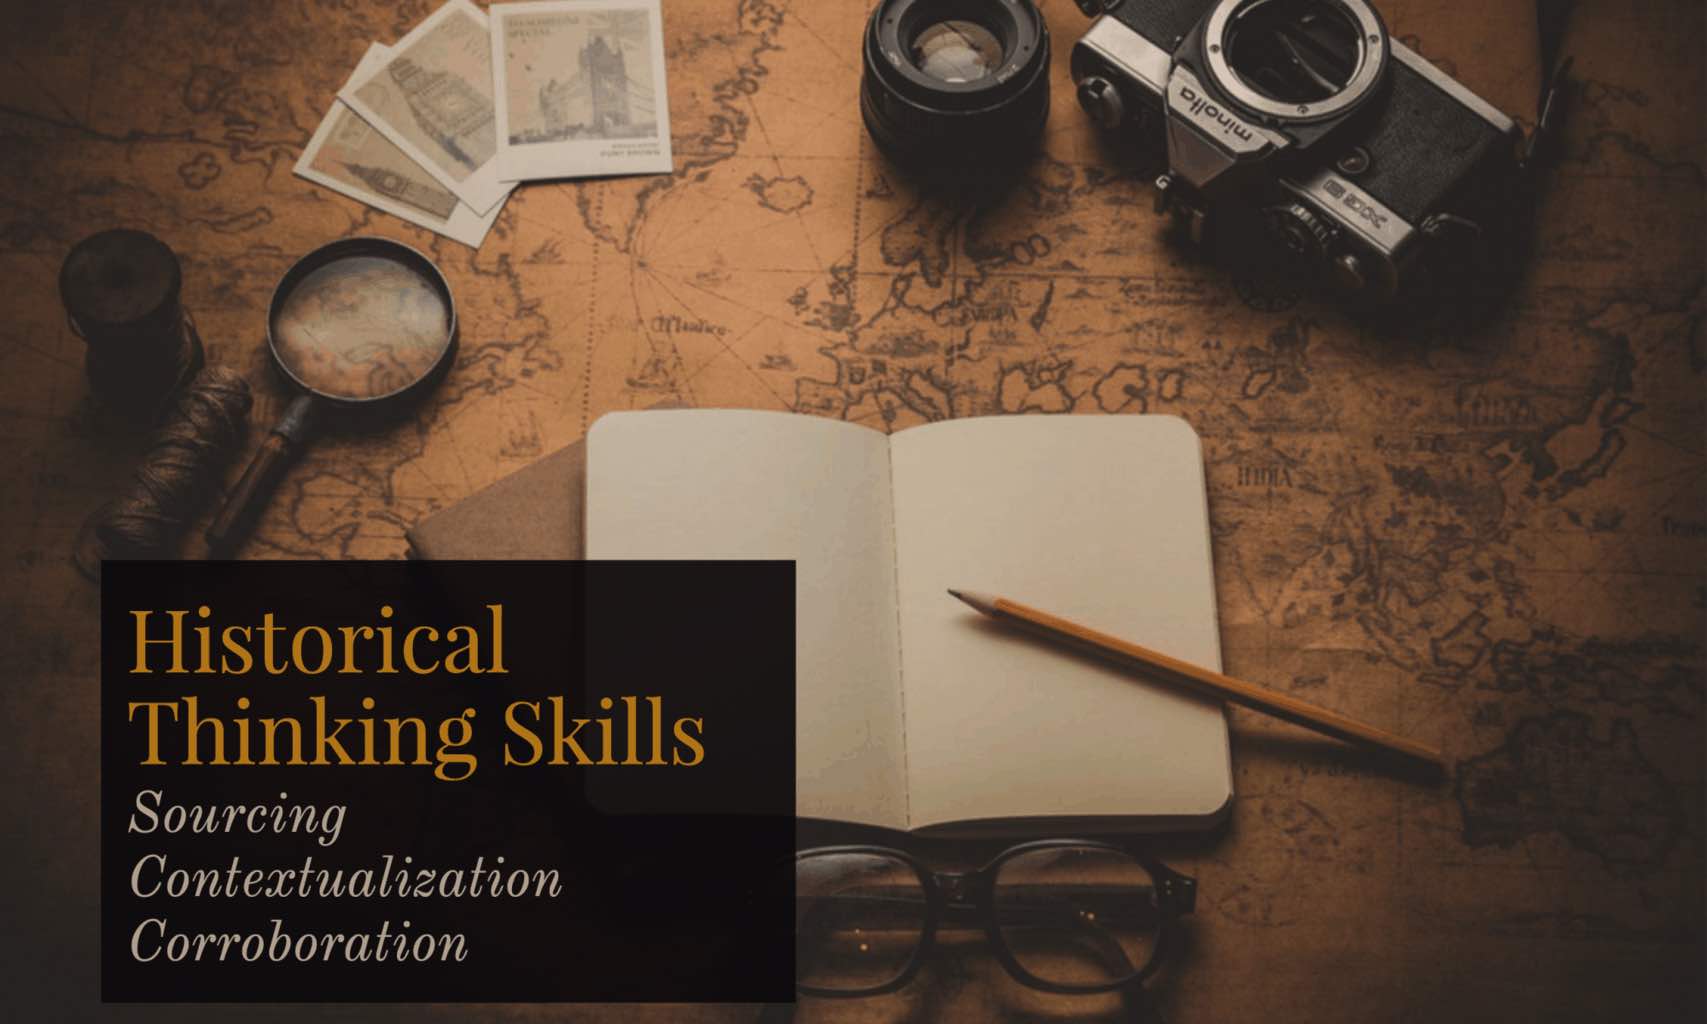
Today’s class will focus on finding and curating historical content – in this case images. Our focus will be on sourcing material that is in public domain using our historical archive resources.

Most materials are in the public domain if they were produced before 1923. I see this as roughly equivalent to everything that happened in the world up to and including World War I! If you’re looking for newspaper articles in Chronicling America, for example, you will note that coverage ends in 1922. 

Primary sources produced by the federal government are normally in the public domain both before and after the magic copyright date of 1923. That explains why we as teachers can use the fabulous oral history interviews of former slaves collected between 1936 and 1938 by workers from the Federal Writers’ Project.

Class Session

Class will open with a discussion on strategies for supporting remote learning – both in our course and our student placements. 

Next, Peter will share some information on public domain and Creative Commons. He will also share strategies for searching using a selection of historical archives

Students will then practice:

  1. find a historical image
  2. download it
  3. get citation information and source URL
  4. adding image to practice post
  5. include citation with active hyperlink back to source in image caption 

Lastly, Peter will introduce this week’s assignment and some strategies for working with WordPress to create learning activities base on close readings of historical images. 

Assignment 2 

IMAGE DETECTIVE CHOICE 1: (INSPIRED BY CROP IT LESSON)

Being able to find and curate historical source material is a foundation of historical thinking. This activity merges three Instuctional goals: finding / curating historical sources, looking closely at historical sources and using WordPress tools to add images and hyperlinks. It will help students learn how to find material for future lesson design activities. 

Here’s some sample student work from Fall 2019. 

  1. find 3 historical images
  2. for each image: provide full image with citation in hyperlink back to source
  3. then add a of crop area of each image to show one of the following clues (add clue in the image caption) Tips on how to crop an image
  4. Put all content into a post. Give it a clever title. Include a featured image.
Possible questions:
  1. who or what this image is about.
  2. where this takes place.
  3. when this happened or was created.
  4. what is the creator’s point of view or purpose.
  5. something I have a question about

Example: Image with two crops

African American Soldiers in an Automobile Source
When? It’s an upside down 1919 NYS license plate. I think they are returning Black WWI soldiers in a parade.
These Black soldiers are being honored in a parade. Knowing 1919 is in the Jim Crow / KKK era, I wonder what else faced them back in America?

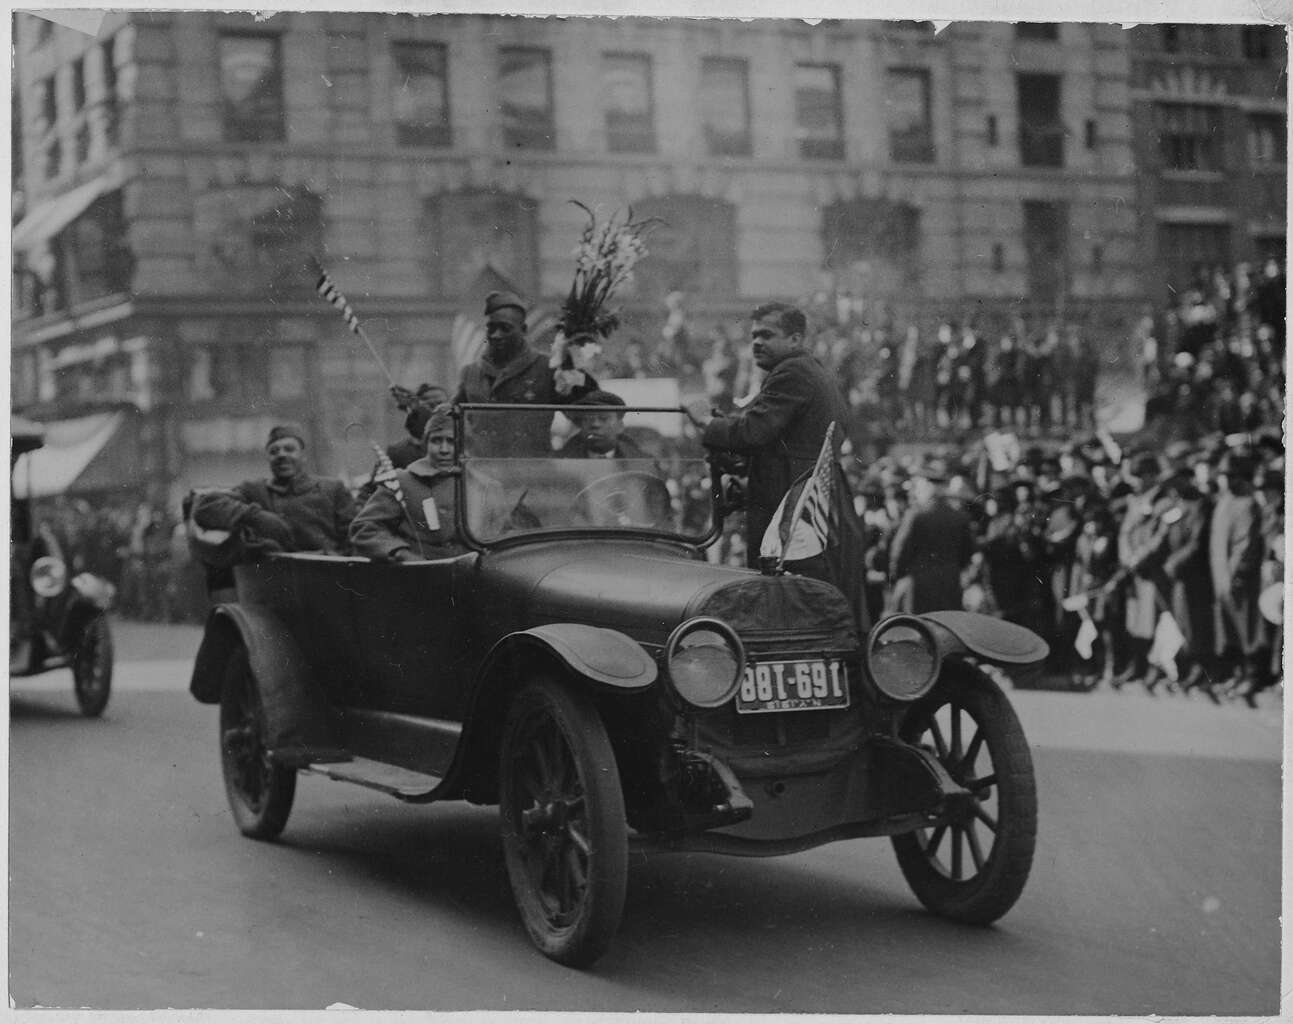
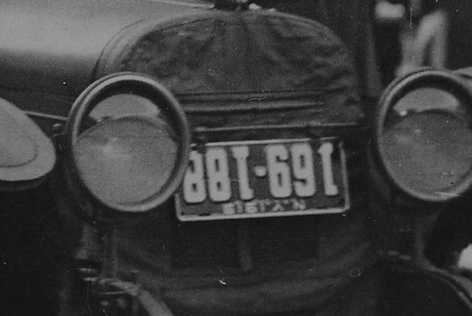
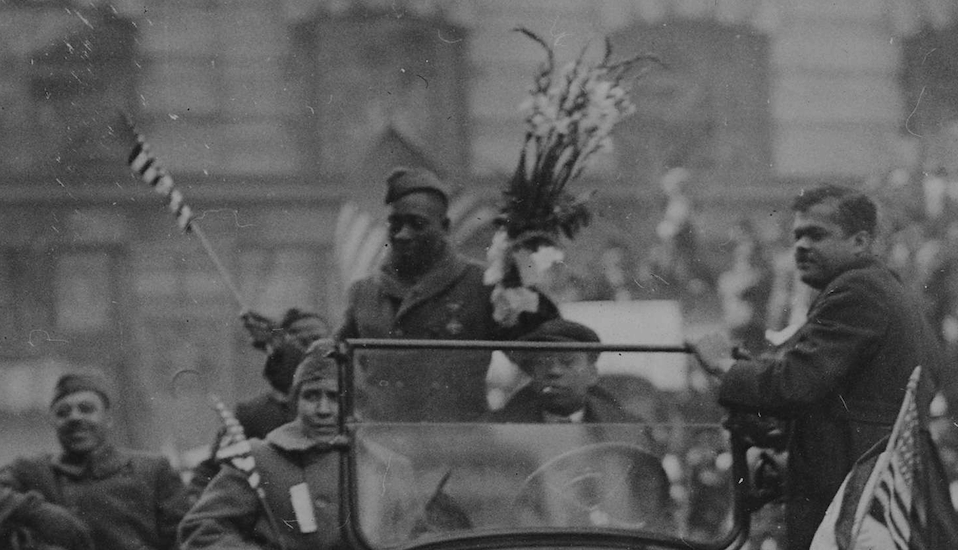
IMAGE DETECTIVE CHOICE 2: CREATE AN IMAGE COMPARE

WordPress now has a built in “Image Compare” block. Find a two suitable images to compare and use the compare to explore continuity and change. 

Do the image compare for two sets of images. So you will have two separate “image compares” with guiding questions for each.

Possible questions exploring continuity and change:
  1. what is the same?
  2. what is different? 
  3. what do the similarities and differences tell us?
  4. how are they explained by historical events / trends?
1897 topographic map of Portland, OR compared to Google Maps
Possible questions raised by comparison:
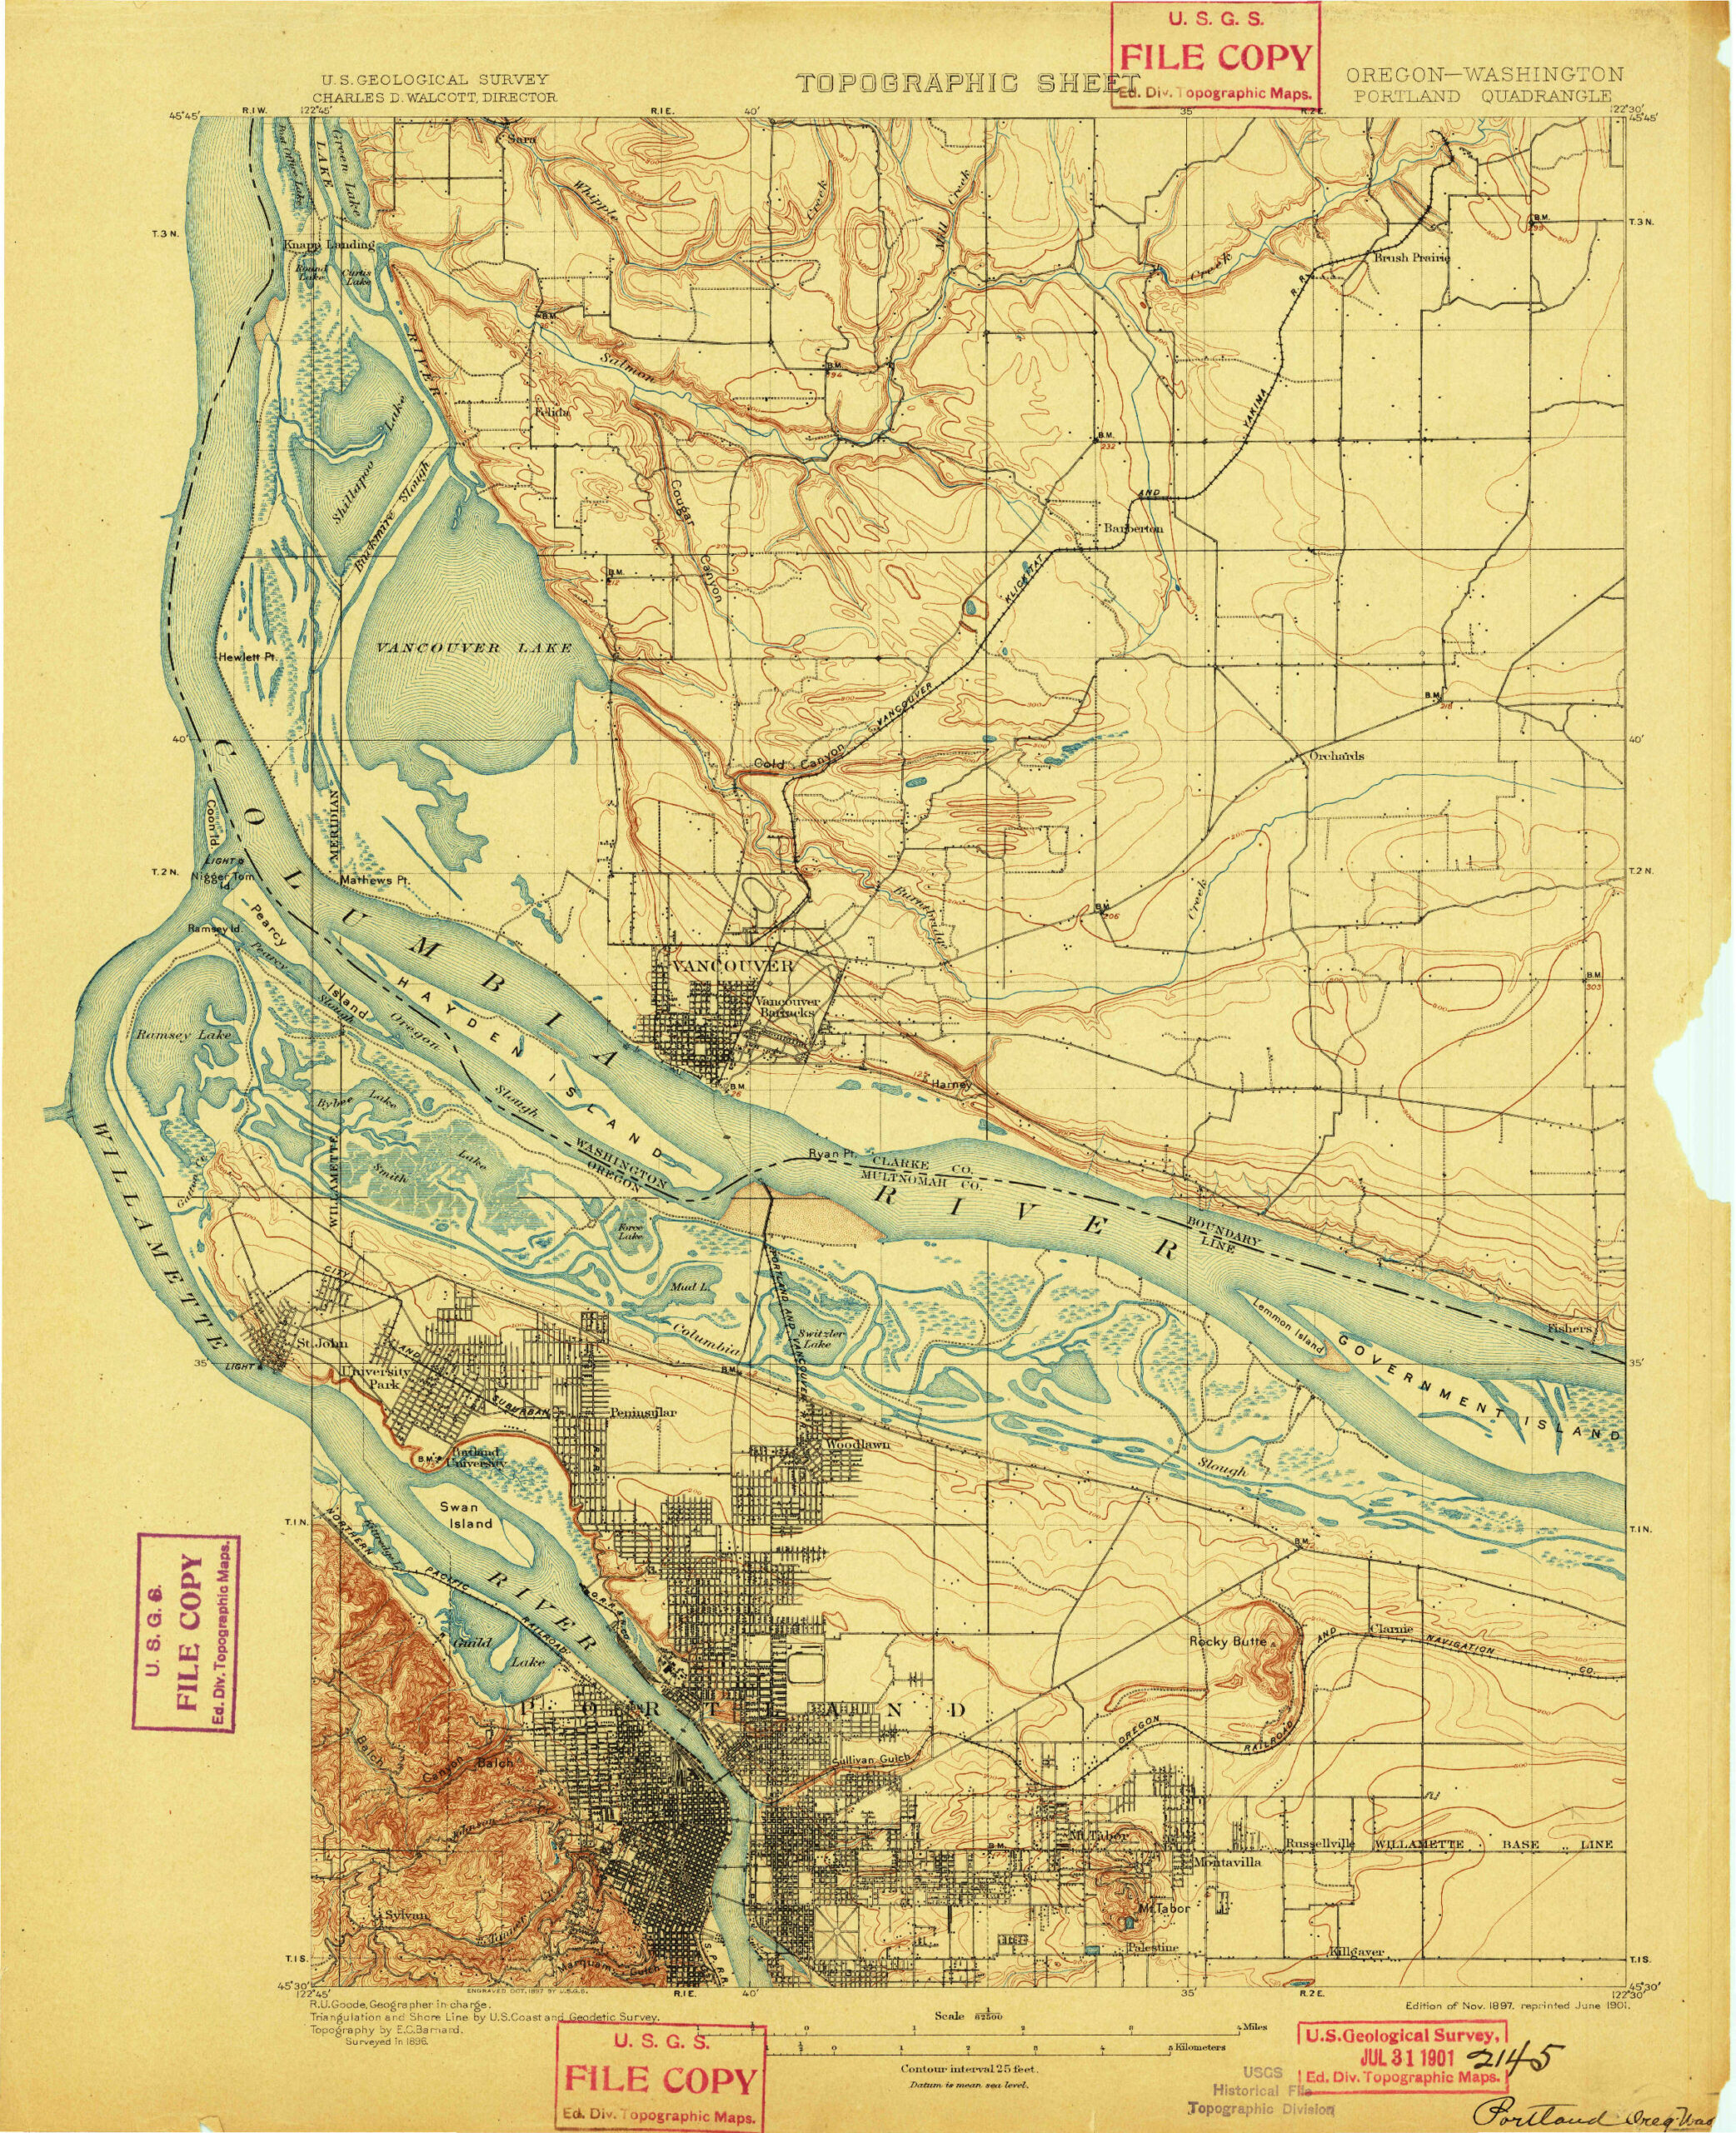
  1. How has geography shaped the development of Portland?
  2. Why is PDX airport likely in its current location? How is that location both and asset and a liability?
  3. What’s the history of Vanport? How did geography intersect with race and history to cause its demise?

Resources

Note that this post uses JuxtaposeJS to create the same image compare (it was before it came to WordPress). So ignore that aspect and focus on examples of comparative images and my technique for getting best image alignment. I used Google slides in video. But same technique would work in Apple Keynote. 

Here’s a video where I demonstrate how to align the images and export as image files using Google slides. Ignore the fact I was using JuxtaposeJS. I start it about a minute in.
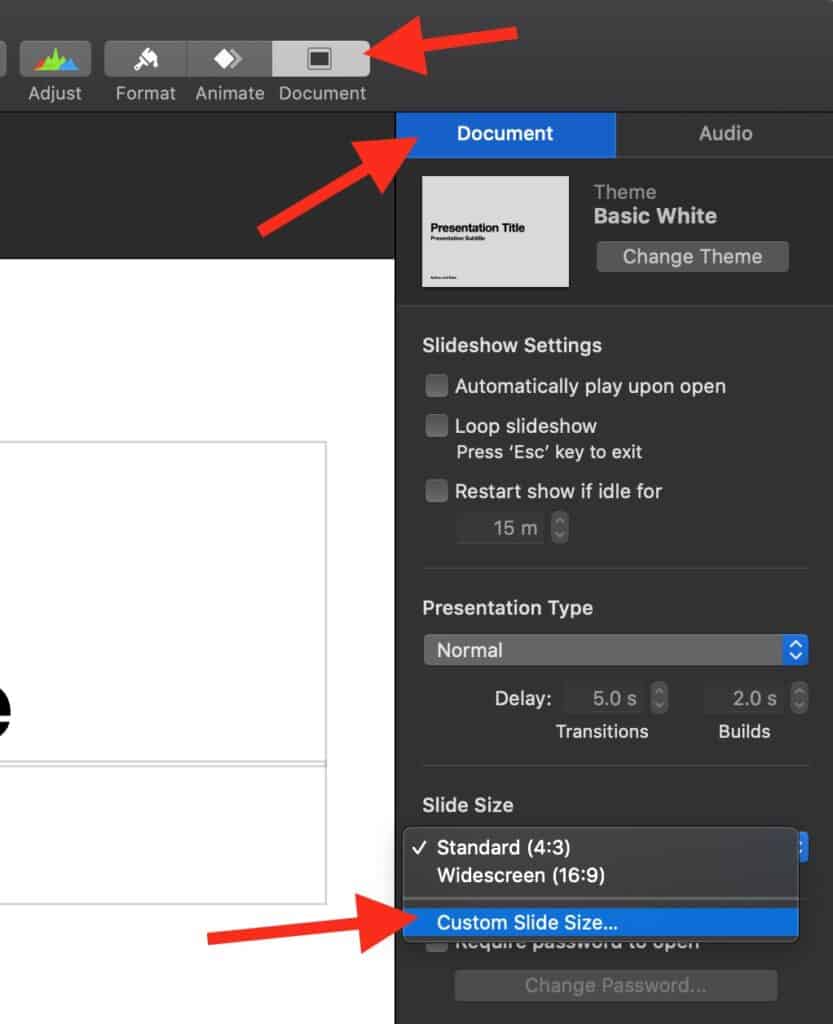
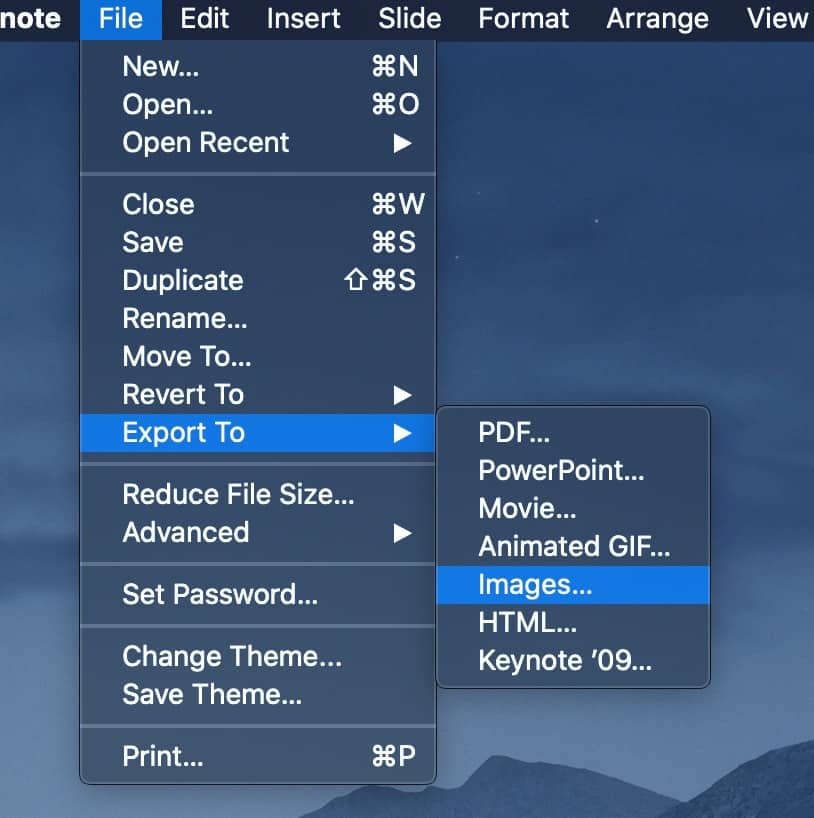
Here’s how to get Keynote into a portrait shaped size for comparing portrait images. Set custom size to 768 width by 1024 height
In Keynote change document format to a vertical portrait shape
Here’s how to align images. 

Click on image. Then open Format window. Click on Style. Then adjust the opacity slider to where you want it. Once you have images aligned, remove all opacity. Duplicate the slide with one image on each.

Click on image. Format:style: opacity
Click on image. Format:style: adjust opacity
Then export the two slides as images to use in your image compare
Export slides as images

Feature image uses photo by Clay Banks on Unsplash

Fight Racism with VR

Fight Racism with VR

These virtual and augmented reality programs allow the user to shift their point of view and experience the legacy of segregation in America. Students and teachers can “step inside” these immersive environments and feel the weight of systemic racism. These cutting edge approaches can inspire the next generation in America’s fight for social justice.
Descriptions by creators.

I am a Man VR

I Am A Man” VR Experience is an interactive virtual reality experience set to the historic events of the African- American Civil Rights Movement. Users will witness the 1968 Memphis Sanitation Worker’s Strike and the events leading to the assassination of Dr. Martin Luther King, Jr. using the Oculus Rift VR headset. The VR project was created by Derek Ham and won an award for funding through the Oculus Launch Pad program.

Traveling While Black

Traveling While Black is a cinematic VR experience that immerses the viewer in the long history of restriction of movement for black Americans and the creation of safe spaces in our communities.

Academy Award winner Roger Ross Williams and Emmy Award-winning Felix & Paul Studios’ film transports you to historic Ben’s Chili Bowl in Washington DC. The viewer shares an intimate series of moments with several of the patrons of Ben’s as they reflect on their experiences of restricted movement and race relations in the U.S.

1,000 Cut Journey


1,000 Cut Journey is an Immersive Virtual Reality experience in which participants embody a Black male, Michael Sterling, experiencing racism as a child through disciplinary action in the classroom, as an adolescent encountering the police, and as a young adult experiencing workplace discrimination.

Mapping Amache

Mapping Amache: The Amache Internment Camp is located near Granada, Colorado. It is where over 10,000 Japanese-American citizens and persons of Japanese ancestry were forced to live from 1942-1945. It is also called Granada Relocation Center.

This weblog is intended to follow along with the long-term project of mapping this one square mile of earth where so much history took place. The basic map of Amache has been developed over the last few years. There are layers for things like roads, boundary, housing blocks, barracks and so forth. The challenge is to present this information in a way that makes it useful, accessible and honors the people who lived there.

http://www.mappingamache.com/about/

Featured image credit
Girl at the March on Washington with Banner 8/28/1963
National Archives National Archives Identifier: 542030

Socratic Seminar for the Covid Classroom

Socratic Seminar for the Covid Classroom

As teachers struggle to navigate the new landscape of the Covid classroom, I’m reminded of a Socratic seminar model I used years ago while teaching AP history and government. It blended instruction in both full class and smaller seminars in way that could be a useful model to decrease the density of today’s classroom.

What drove my seminar model was PBL approach with weekly research tasks – though I had yet to hear the term “project-based learning.” My experience using this approach back in the 1980-90’s convinced me that advanced placement can be much more productive than the traditional AP model of lecture, read, memorize and test.

While this seminar approach produced great results on AP exams, its prime outcome was fostering students’ responsibility for themselves as learners. Covid-19 is upending our traditional classroom models. Instead of simply trying to find news ways to deliver the same stuff, we should leverage this disruption to refocus teaching and learning in ways that engage and motivate both students and teachers.


The Socratic Seminar Model

As we look for ways to blend virtual learning and meet live in smaller classes – this model could be modified by substituting an online session for the full class large group. Seminar size and frequency are adaptable to the setting.

Class size typically ran between 24 – 36 students. All students in the class would meet one day a week in a large group session. This might be used for unit testing, or to introduce or conclude a seminar cycle with a lecture or full group discussion. The large group was also divided into 4 seminar groups of 6-9 students. Each seminar would meet with me one day per week. Thus each student met one day per week in seminar and another day in large group. During the remainder of their week, students worked independently or with their seminar group in preparation for the upcoming assignment. Today, we would call that “flipping the classroom.”

Seminar assignments built off the large group session and were project driven. Students in the seminar were required to present and defend their finding to their peers. I sat “outside the circle” as an observer – occasionally tossing probing questions into the group.

Of course, there were many weeks that were modified because of holidays and other interruptions – but you get the idea. Our high school was on traditional 8 period schedule. These AP classes were taught in a double period configuration of about 95 minutes for both the seminar classes or large group sessions.

My first experience was teaching one semester of AP US History while one of my colleagues was on leave. I focused on essential questions that fostered greater depth and relevance. So when we studied the Founding Fathers we didn’t focus on “Should the Constitution be ratified?” Our seminar revolved around a more enduring question – “How powerful should the national government be?” For more on that approach, see my post “Essential Questions in American History: The Great Debates.” 

After my semester of APUSH, I settled into my primary AP assignment – one semester of AP American Government / Politics and one semester of AP Comparative Government. There I used the seminar approach to give students guided experience in research, critical thinking, collaboration and presentation. 


Visualize the typical American government lesson. Teacher standing up front asking students to follow along as they go over the diagram of “how a bill becomes a law.”

Contrast that with one of my AP US Government seminars on the same topic.

Congress and the Lobbyists
This extended seminar will investigate the relationships between Congress and the lobbyists. You will develop an investigative report which will ultimately answer the question “Does Congress represent the needs of its public constituency (the electorate) or its financial constituency (its contributors)? Weekly seminar abstracts will be used to prepare Tabloid TV-style PowerPoint report in support of your investigation. To see the full seminar assignment click here.  

Students were assigned a member of Congress who sat on one of the major committees. Their task over the next few weeks included researching and developing the following:

  • Demographic / political profile of their legislator’s elective constituency.
  • Profile of their financial contributors.
  • Committee jurisdiction and major lobbyists.
  • Voting record on legislation of interest to their elective constituency and financial contributors.
  • Their answer to the seminar question with supportive reasoning.  
  • Presentation and reflection

Teaching Historical Thinking Skills

Historical thinking skills lesson

Teachers are looking for resources for online instruction. So I am reposting lessons from my Social Studies Methods Course at the University of Portland’s School of Education. See original post here.


Our class begins with a review of the Sam Wineburg reading and TEDEd flipped lesson Who is the historian in your classroom? (That will also provide a chance to discuss the efficacy of flipping content.  What are the challenges and opportunities for that approach?)

Today we begin our study of historical thinking skills based on the work of Sam Wineburg and the Stanford History Education Group (SHEG). We will focus on three key historical thinking skills – Sourcing, Contextualization, Corroboration. See Historical Thinking Chart  (pdf in English and Spanish at SHEG).

We will get inspired by some SHEG lessons from their collections Reading Like a Historian and Beyond the Bubble.

Here’s what a Google From looks like: Photograph – Zulu Chief
Here are some student designed SHEG-inspired lessons that are delivered using Google Forms
  1. Reconstruction Cartoon – Thomas Nast
  2. Photograph – “War is Hell” 
  3. Film clip – Charlie Chaplin film clip
  4. Political Cartoon – Votes for Women

IN CLASS PRACTICE 
Click image to go to curated collection of historical sources to practice using Google Forms | Source
ASSIGNMENT 3 | COMPLETED POSTS 19A-3

Design a mini lesson based on one of the historical thinking skills in a Google Form and embed into your next post. 

Google form lesson should include:

  1. Title
  2. Document to be considered – image or video (or short text passage)
  3. Archival source of document (be sure it’s in public domain)
  4. One or more questions for user to answer. 
  5. Instructional goal

Then get embed the Google form in post (more instructions below). Be sure your blog post has: 

  1. Title for your mini-lesson. Why not make it catchy? 
  2. Featured image (could be created with your archival photo)
  3. Embedded Google form
  4. Brief reflection on the mini lesson, historical skill or use of Google form in classroom

TECH RESOURCES FOR LESSON

More tips on using Google forms here

How to get an embed code for your Google form

How to HTML Snippets to embed your Google form into WordPress post. Note in this example I begin by getting the embed code from a Padlet. Once you have the any embed code on your “clipboard” you can use HTML Snippets in WordPress

Was the U.S. Justified in Dropping the Atomic Bombs on Japan?

Was the U.S. justified in dropping atomic bombs on Japan_

This semester my EdMethods students used Microsoft Sway for their final lesson design projects. This document-based lesson by Nicole Matier students examine a variety of source material in preparation for a debate.

Students will use these sources to construct an argument to debate the question: Was the U.S. justified in dropping the atomic bombs on Japan?

After you read these documents you are going to create a thesis statement in response to the essential question. Be sure to collect evidence from the text to support your thesis statement. When doing this consider whether the evidence you are choosing appeals to a reader through ethos, pathos or logos.

For a direct link to the Sway click here
More lessons in this series.
Click navigation tab in lower right to to scroll and eliminate cookie notification.