How to Add Scalable Vector Graphics (SVG) Images to iBooks Author

iBA SVG enlargedHere’s another great iBooks Author (iBA) “how to” – cross posted from Dr. Frank Lowney (Projects Coordinator, Digital Innovation Group @ Georgia College). See Frank’s original post a watch his demo video here. Frank writes:

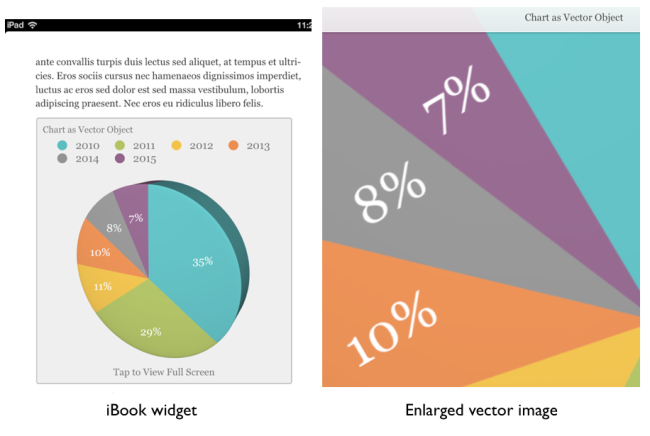
The primary advantage of Scalable Vector Graphics (SVG) files is that a very small file can be scaled up to yield large images without the aliasing (jaggies) that appears when a bitmapped graphic is scaled up. SVG files are resolution independent, usually non-photographic and carry the suffix *.svg. There are lots of free SVG files available on the Internet and there are many applications for creating SVG files such as the free, open source Inkscape. For an excellent primer on vector graphics, see this Wikipedia article.

However, it is not possible to use SVG images directly in iBooks Author. If you attempt to drag and drop an SVG file onto an iBooks Author project, nothing will happen. You’ll get no error messages or feedback of any kind. Similarly, apps in the iWork suite (Pages, Keynote and Numbers) will also refuse to accept SVG files. Since it is important to keep the size of iBooks Author output low for easy downloading and to avoid the 2 GB limit in the iBookstore, we need to pursue this further.

The iBooks Author application has its own Text, Shapes and Graphs menus with which a number of vector graphics can be created. Another option is to use the vector graphics created by Keynote, Numbers and Pages. These can be copied and pasted directly into an iBooks Author project. Graphics created in iBooks Author or any of the iWorks suite applications are vector graphics in PDF containers, not SVG files. PDF files can contain text, bit-mapped graphics and vector graphics. [The $99 OmniGraffle application is a considerably more sophisticated graphics toolset and is capable of exporting both SVG vector drawings and PDF vector images. The latter are compatible with iWork suite and iBooks Author.]

That’s useful but there is an Internet full of already drawn SVG images that are in the public domain or CC licensed. It would be a shame not to have access to that vast library of free vector images. The trick is to use this free on-line conversion service to convert SVG to PDF and then drag and drop that PDF directly into an iBooks Author project or into one of the iWork apps or OmniGraffle for further manipulation.

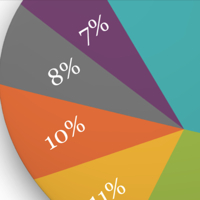
Download an *.ibooks file here that shows how vector graphics created in iBooks Author compare with vector graphics converted from SVG files.

Vector image creation - Cheat Sheet
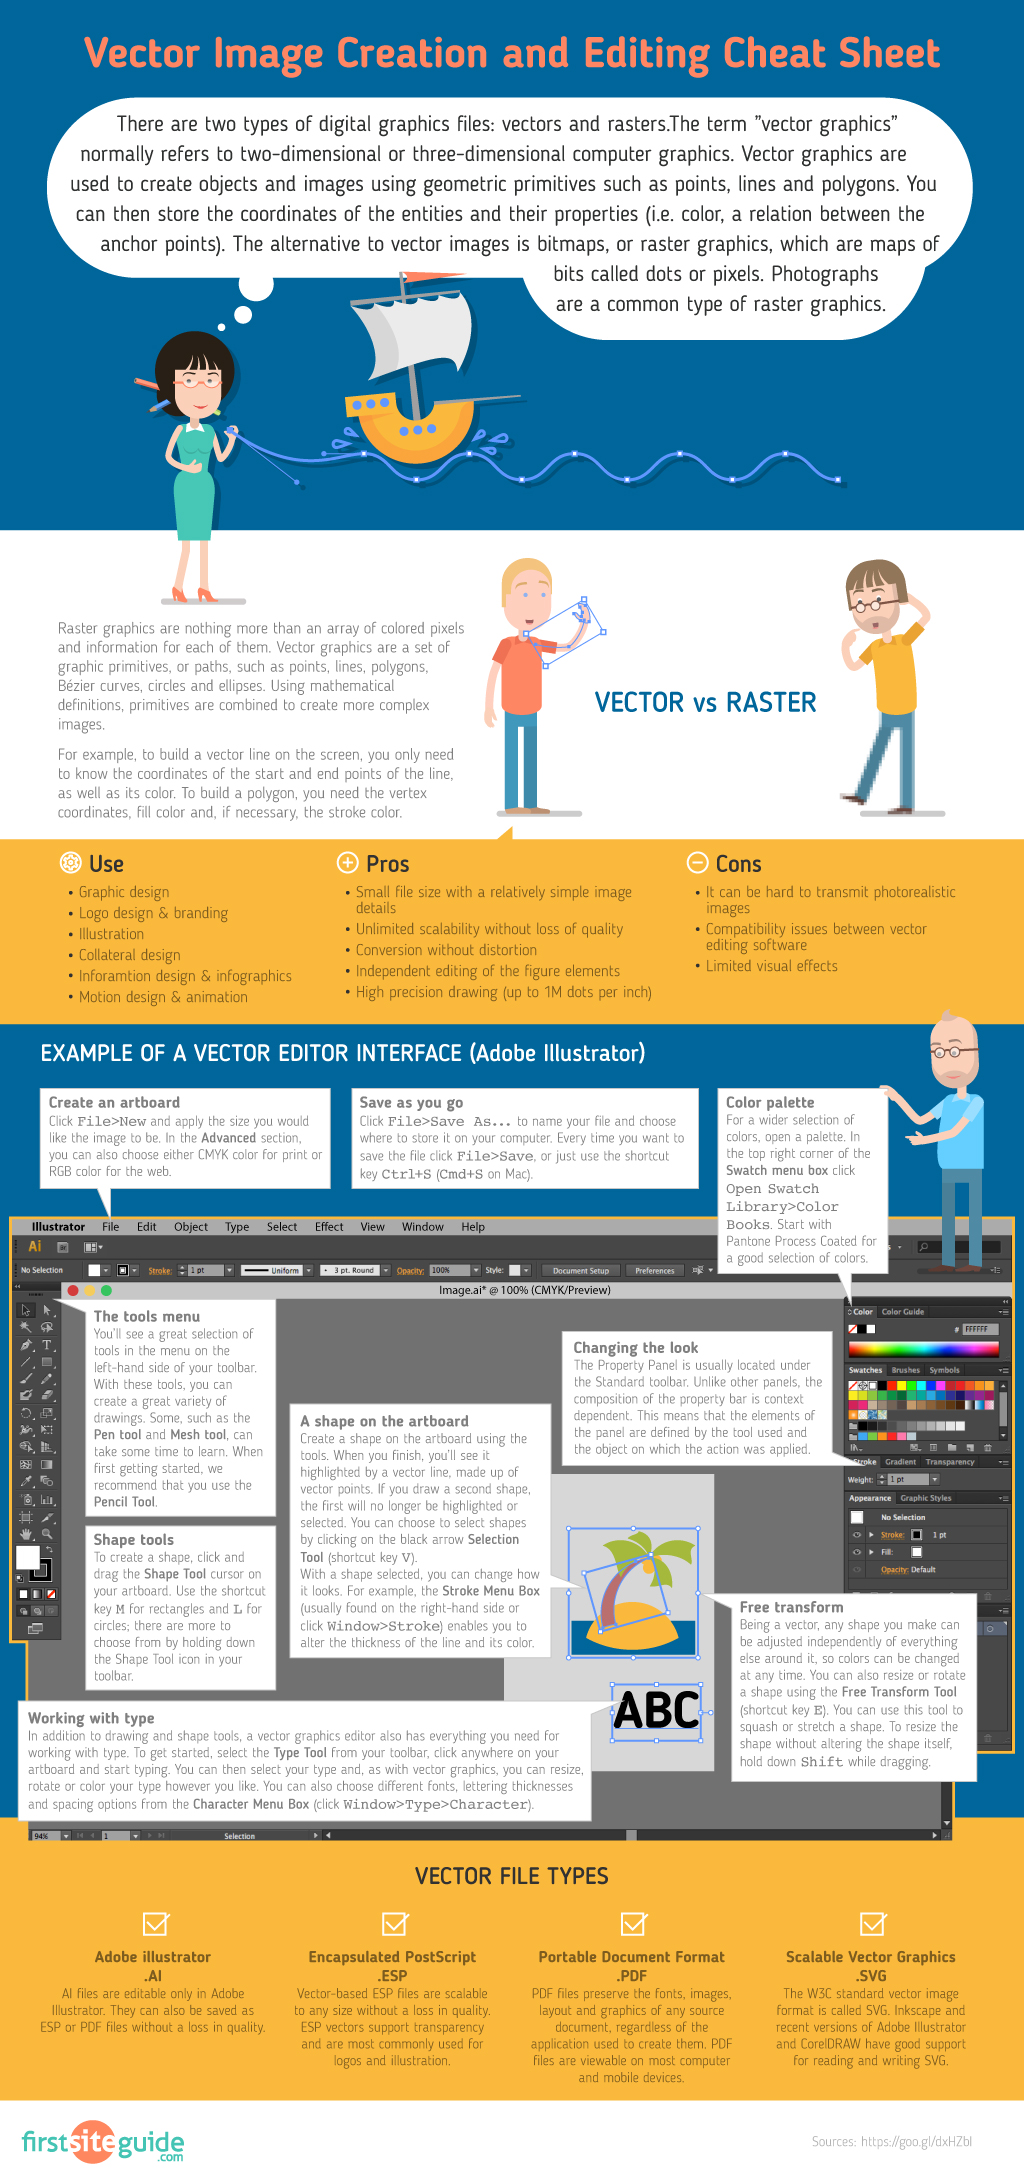
Vector Image Creation and Editing – Cheat Sheet was created by First Site Guide Team>.

Teaching Big History

Big historyI just registered with the Big History Project – an online course that weaves scientific and historical disciplines across 13.7 billion years into a single, cohesive, science-based origin story. I always was a big picture guy. Here’s a link to the course guide and more about about the Common Core aligned program from the projects FAQ

What is big history?
Big history weaves evidence and insights from many scientific and historical disciplines across 13.7 billion years into a single, cohesive story. The course highlights common themes and patterns that can help us better understand people, civilizations, and the world we live in. The concept arose from a desire to go beyond specialized and self-contained fields of study to grasp history as a whole. Big history explores how we are connected to everything around us. It provides a foundation for thinking about the future and the changes that are reshaping our world.

What is the Big History Project?
The Big History Project LLC (BHP) is an organization focused on bringing big history to life for high school students…. BHP is sponsored by Bill Gates, separately from his work with the Bill & Melinda Gates Foundation.

For more on the Big History approach watch “David Christian: The history of our world in 18 minutes”

How is the course delivered?
All of the content is available online. A completely web-based model ensures the content is up-to-date, relieves schools of the need for costly textbooks, and also helps teachers engage students by providing approachable, media-rich materials that can be used in different ways. Pilot participants and anyone who requests a username and password is able to access the course. Students and teachers are issued a personal login to gain access to a specialized site that houses all courseware and content. It is up to each individual teacher to determine optimal approach to using the site. For example, in-class time may focus on group projects or discussion, with students absorbing online content for homework, or the site may be used as a core element of the in-class experience.

How is my school supported and what does it cost? 
Our goal is to ensure that big history is taught effectively with no cost to schools. We provide, free of
charge:

  • All content and courseware
  • Free PD/teacher training program
  • Access to core project team for support, assistance and feedback
  • A teacher and school subsidy to cover any direct expense and provide support for teachers

Most importantly, a spirit of partnership imbues everything we do. Our singular goal is to get big history in the hands of educators and students, we promise to listen and collaborate accordingly.  In return, we expect schools to collaborate and communicate with us to improve the program. Specifically, this means: incorporating BHP courseware, content and assessments into the lesson plan, participating in professional development activities, and regularly updating the project team about what is happening in the classroom.

How is the course organized?
Big history is broken down into 2 sections and a total of 10 units spanning 13.7 billion years. Within each unit there are between 20 – 30 specific content modules covering specific issues, topics, projects and assessments.
Section 1: Formations and early life: Theories and evidence of origins of the Universe, planet formation, elements, and life.
Unit 1: What is big history?
Unit 2: The Big Bang?
Unit 3: Stars & Elements
Unit 4: Our Solar System & Earth
Unit 5: Life

Section 2: Humans: The development of humans, civilizations, and key milestones in our progress.
Unit 6: Early Humans
Unit 7: Agriculture & Civilization
Unit 8: Expansion and Interconnection
Unit 9: Acceleration
Unit 10: The Future

How to Use iAD to Create an External Video Widget for iBA

iAd

The three iBooks in my WWII Homefront USA series started with an idea for single iBook. Then as I began to uncover so many long-forgotten videos,  I realized there was a trade off between creating a media-rich iBook and keeping the file size manageable.  I considered keeping file size smaller by simply linking to the videos from the iBook. (I would provide a hyperlink in the iBook and the reader would tap on it to be led to the video on YouTube or Archive.org.) But that required that the reader be on a network to view the iBook’s videos. And I didn’t think that a hyperlink was a very visually appealing approach.

Use iAd Producer to create a high quality HTML widget for iBooks Author without writing a single line of code.

So my single iBook project idea turned into three iBooks with file sizes running roughly 600MB each. I carefully edited the videos and used file compression – but the 13-18 videos in each iBook demanded a lot of file space.

I was pleased to hear that my go-to guy for iBooks Author –
Dr. Frank Lowney (Projects Coordinator, Digital Innovation Group @ Georgia College) had posted a video how-to for using iAd Producer to create external video widgets of iBooks Author projects. No coding required!

He agreed to let me cross post his work here with a slightly edited version of his original screencast. 

Frank posts – The iAd Producer application from Apple has grown considerably since its inception. Originally, it was a highly specialized application that created advertisements for mobile devices from Apple. Those iAds were composed of sophisticated HTML, CSS and Javascript.

Since that inception, it has been expanded to create iTunes LPs for music albums sold in the iTunes Store and iTunes Extras for video sold in the iTunes Store. These, too, rely upon HTML, CSS and Javascript web technologies. Most recently, iAd producer has added iBooks Author HTML widgets to its repertoire. Thus, the following screencast tutorial showing how easy it is to use iAd Producer to create a high quality HTML widget for iBooks Author without writing a single line of code.

This example focuses on creating an HTML widget that plays a video hosted on an external server. This keeps the size of your *.ibooks file down making for quicker downloads and avoiding becoming a burden to iPads already nearly filled to capacity with other books and media.

You can see Frank original video here - it includes comparison of various video strategies for iBooks Author. Download the example book to an iPad to get an even better view of how this looks and feels in the hands of your audience.

Download iAd Producer (free developer registration required)

I highly recommend  Frank’s iBook The Coming ePublishing Revolution in Higher Education
on iTunes. It’s an insightful guide to etextbook revolution – winners, losers, and the factors that will determine the outcome. (67 pages, 20 graphics, 28 media files, 25 video files and 5 interactive widgets.) A bargain at only $0.99!

DBQ Lesson Plan: Shopping with Historic Documents

Upchurch Family 1896
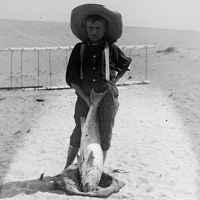
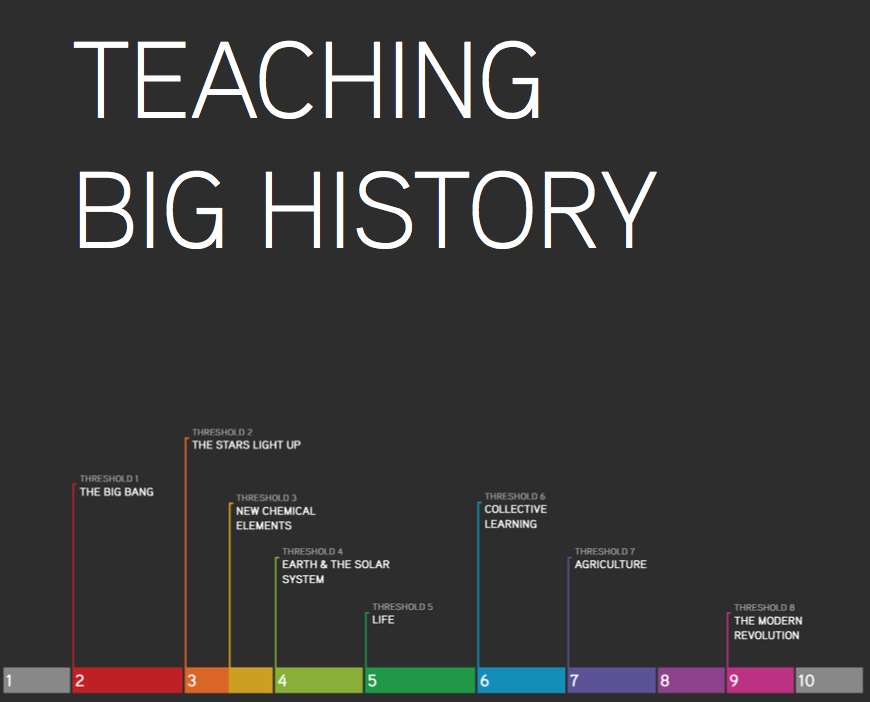
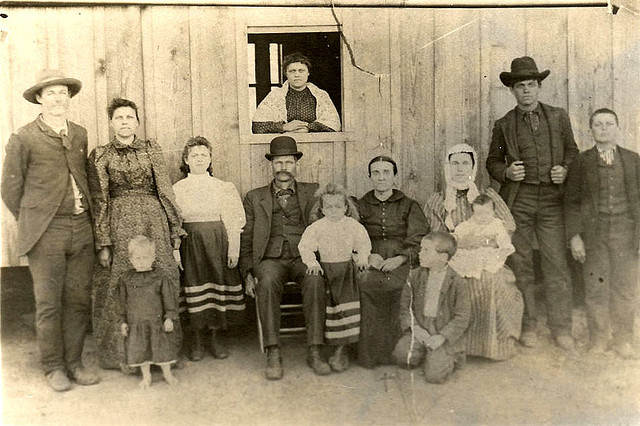
While exploring my Twitter feed I came across a very inventive 8th grade history lesson created by John Fladd ~ twitter@woodenmask

At the core of this lesson are some rich historic source material – the 1900 federal census, 1897 Sears Catalogue historic portraits and biographies.  John agreed to this cross post from his his blog Teacher Toys: Christmas Shopping Without a Flux Capacitor. I urge to visit his blog – he’s a great writer with many ideas to share. Readers should access his site to see additional resources for this lesson and correlation with standards. Note: John gathers student feedback via his GoogleVoice account, though students could submit their choices using other means.

1897 Christmas Shopping Project

  1. Each student chooses a photograph of an American taken in (or around) 1897 and reads a small secondary source statement about him or her.
  2. The student transcribes information from that person’s 1900 Federal Census form.
  3. The student chooses three Christmas presents from the 1897 Sears Roebuck Catalog – one for $1.00, one for $3.00 and one for $5.00.
  4. The student takes a picture of each of his or her choices, then calls my voicemail and records a message, describing one of his or her items.


Tom Tate,

Step 1 – The Photos

After trying several different approaches, I discovered that the easiest way to find photographs of Americans in 1897, was to type “1897” in Google Images and Flicker. As it turns out, there are a lot of people out there who like to share their antique photographs.

Almost every antique photo I found included some background information – “This is my Great Uncle Cyrus, who lived in Possum Flats, Arizona, who later went on to invent the electric pogo-stick…”

It is this secondary source information that allowed me to find census data for some of these people. I included a copy of this information to students in their document packets.

1900 United States Federal Census

Step 2 – Census Information

As it turns out, finding photos of people in 1897 isn’t as hard as finding information about them. I was able to find a 1900 Census form for about one picture in three using Ancestry.com. I downloaded the highest quality image of each that I could.

I had students transcribe the original forms onto a blank census form, provided by Ancestry. The idea behind this was to get students used to dealing with primary source information – reading the handwriting, thinking historically, etc… Having them copy the information also made it more likely that they would actually read it.

I discovered that the best way for them to read the original census forms was on a computer screen, so they could magnify sections as necessary. (As students chose their people, I downloaded all relevant documents onto their individual USB drives, for use at school or home.) We did the transcriptions in the Computer Lab.

One interesting lesson for the students was that bigger magnification doesn’t necessarily mean more legibility. Students invariably magnified difficult-to-read sections as much as possible, which tended to pixilate the writing and actually make it harder to read. I had to remind them several times to back off on their magnification to read entries better. They were deeply suspicious at first – this seems counter-intuitive – but eventually MOST of them decided I might know what I was talking about.

sears bikes 1897

Step 3 – Shopping

This step was probably the most fun for my students. By the time they had read primary and secondary source material about their particular person, they knew enough about them to do some thoughtful shopping.

In most cases. (Fourteen year-old boys, though, given a choice, will buy anybody a gun, under any pretext whatsoever.) I had them fill out this worksheet, which kept them organized and gave them a script for when they needed to make their recording.


Step 4 – Photographing and Recording

On the advice of a much-smarter and experienced colleague, I bought several goose-neck lamps to provide enough light for students to take pictures of their entries. (The students complained about a burning-insulation smell. I later discovered that there was a plastic warning-label inside each lamp that needed to be removed.)

I tried to come up with a graceful and elegant way for students to submit their photographs electronically, but in the end, the easiest solution was to have students bring the camera to me as they finished taking their pictures and I downloaded the images directly from the memory card in the camera. I borrowed digital cameras from two other classrooms and set up three stations. This worked pretty well.

At this point, my students had turned in two other projects via messages on my GoogleVoice account, so they had the mechanics of that down pretty well.

The End Product:

Christmas Shopping for 1897 from John Fladd on Vimeo.

Image Credits:
Upchurch Family 1896 flickr/Pioneer Library System

1900 Federal Census showing Harry Truman as 16 year old Ancestry.com

Tom Tate, son of Captain Tate’s half-brother Daniel Tate, posing with a drum fish in front of 1900 Wright glider Library of Congress  LC-W851-86

Sears Bike 1897 flicker/Slowe

Learn, Share and Win an Apple TV at edcampPDX

edcamppdx
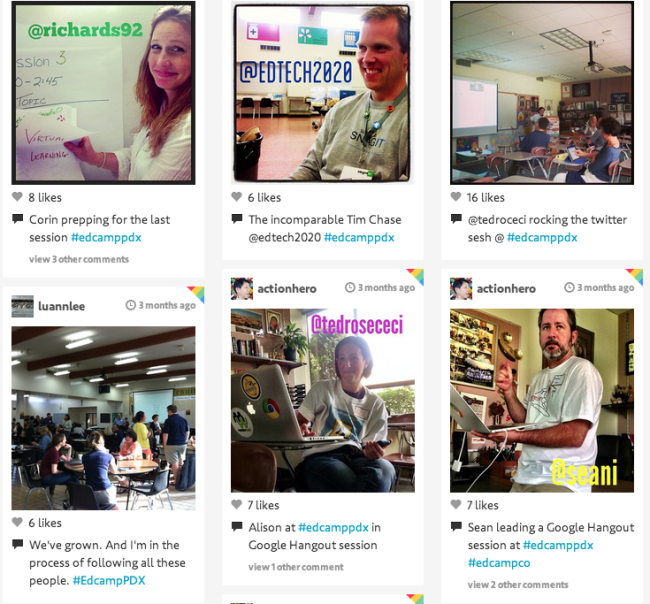
Calling all educators! Here’s your excuse to come to Portland Ore and have a great time while expanding your PLN. I’ll be there with a very talented group of Pacific NorthWest educators who are interested in sharing ideas for creating engaging classrooms. You’ll have a good time and leave with loads of great ideas for the classroom. 

Creative educators + free lunch + shot at an Apple TV + hanging out in Portland = best PD around

Join us for EdCampPDX, the FREE, unconference-style, collaborative, educator-driven, customized professional development day. Enjoy a day of sharing ideas, networking, and collaborating with your peers – teachers, administrators, pre-service teachers and anyone interested in teaching and learning.
Lunch is provided by an awesome sponsor. And yes, there are door prizes, including an Apple TV. 

Wednesday, August 7, 2013
9:00 to 4:00
at LaSalle Catholic College Prep
11999 SE Fuller Rd.
Portland, OR 97222 MAP

Photos from previous edcampPDX
Follow Twitter updates at #edcampPDX
Join the edcampPDX Google Group to network and keep up with our news and notes.

Here’s a few of the sessions we’ve got planned so far – but it’s an edcamp, so who know what else we’ll add when we get there?

  • Using apps such as Minecraft (coming soon to an ORVSD server near you!)
  • The new Google Maps, and Notablity in the classroom
  • Getting started with iBooks Author – bring your iPad and I’ll give you a copy of Recruiting Rosie – my latest iBook
  • Using iPads and Chromebooks with Vernier probeware
  • How to make a living in education outside the classroom
  • Thinking differently about education via SAMR (Substitution, Augmentation, Modification, Redefinition)
  • PBL lesson planning hack-a-thon
  • Creating a professional learning plan incorporating SAMR and CRCD frameworks
  • Speed-Geeking App share
  • What are the best tools to create infographics in the classroom? How do you incorporate them into the classroom?
  • How do we use high tech and no-tech strategies to keep our students engaged and self-selecting reading material? Discussion open to all grade levels.
  • EdmodoCon hookup
  • Learn how to use Celly
  • Beginning with Tech in Your Classroom
  • Your PLN is Yours!
  • The STEM Lab of the Future
  • Scoot and Doodle collaboration tool

Invite your friends, colleagues, and administrators by simply forwarding this email!
Sign up here and while you’re there, please add your session ideas on the session page.

Invite your friends, colleagues, and administrators! Hope to see you there!

Cool boots from November’s edcampPDX. But it’s summer, I’ll bet we’ll all be in flip-flops.

Cool boot optional