Textbooks Are Dead – Here’s 3 Reasons to Write Your Own

For years progressive educators have known the textbook was dead. Apple’s latest iPad Mini / iBooks Author event (October 23, 2012) suggests we are closing in on the tipping point that should hasten its demise.

I’ll let others critique the viability of the iPad as a textbook replacement in this era of shrinking budgets. Instead I’ll focus on how teaming iBooks Author (iBA) with the iPad can turn students from passive consumers of information, into active researchers, thinkers, designers and writers.

Since it’s release this spring, I’ve been working with iBA and networking with other educators doing the same. I’ve seen great examples of student-produced work such as this iBook by 5th graders.
I just published my first multi-touch iBook, Why We Fight: WWII and the Art of Public Persuasion which gives students a chance to work with historic films and poster art to critically evaluate the US government’s public relations effort during the war. I’ve already blogged about my reactions to using iBA, but let me use this post to offer three arguments for using iBA with students.

Crowdsourced Production
iBA (a free program) requires a Mac running OS X 10.7.2 or later, but that doesn’t mean that every student needs a Mac to contribute to the iBook project. All the classroom needs is access to one computer running iBA to create an iBook. (Use somebodies new Mac Mini?)

iBA accepts text from Microsoft Word and other text editors. Teams of student writers can do research and writing on a variety of computers (and devices) and send finished copy to the iBA production team. Images, audio and video files collected by researchers can be added to the eBook project with a simple drag and drop. If students have access to multiple Macs running iBA, it’s easy to consolidate iBA projects by copy / pasting chapters (or sections of chapters). Research, writing, and design can even be sequenced into a “flipped classroom” production model.

Broadcasting Your iBook
Terms of use for iBA require that iBA-created iBook that are offered for sale can only be sold through the iBookstore. But there’s no restriction on “free” iBA-created iBooks – circulate them any way you want.

While the iBookstore does provide accounts for producers of “free” iBooks, there’s a simpler way to distribute an iBook. Connect an iPad to the computer running iBA, click Preview, and the iBook is pushed to the attached iPad. Do the same on as many iPads as you choose. It’s also easy to export the finished iBooks file from the iBA program to an external drive or network and distribute the iBook to multiple iPads.

The ease of distribution means students can communicate with a broader, and more authentic audience than just their teacher and class peers. They can even bring their iBooks files home on thumb drives to be shared with families and friends that have iPads.

Design Thinking Meet CCSS Skills
Researching, writing, and designing an iBook provides an opportunity for students to hone a wide range of skills. Common Core State Standards require a host of literacy, critical thinking and writing skills that are essential to production. Project based learning (PBL) engages students with the opportunity to think like professionals while solving real-world problems. While the iBook qualifies as a project goal, don’t forget that the subject of the iBook could also give students a platform to tackle community-based issues.

Collaborating on an iBook draws from a wide range of creative skills – creating audio clips, producing illustrations, shooting and editing video. Because a variety of media can be included in an iBook, there are numerous opportunities for students of all ability levels and language proficiencies to be active contributors.

Digital technologies have put students in charge of the information they access, store, analyze and share. Most importantly the digital era has given them an expectation of informational choice. Creating an iBook harnesses all those motivational factors into an engaging learning experience. When students get to collaborate and work as adult professional do, we relinquish responsibility for learning to the student and provide them a valuable opportunity to reflect on both their process and product. That’s the foundation for a lifetime of learning.

Image credit/ author
Do Not Use iBooks Author to Author an iBook

After loads of research and design work, this week I eagerly uploaded my interactive, multi-touch book -“Why We Fight: WWII and the Art of Public Persuasion” for approval at the iBookstore.

A day after my upload, I received an error ticket for using the term “iBook” within my work.

Use of Apple Inc. Copyrighted Terms (Description) Books must not:
Use the phrase “iBook” to describe the book. iBooks is the trademark for Apple’s book reading software, and iBooks Author is the trademark for its electronic book creation software. Books created with Apple’s iBooks Author software and/or sold on the iBookstore should be described as a book, ebook, electronic book or interactive book, but not an “”iBook.”

Perhaps I’ll rewrite into something like “Here’s how to navigate this book on your Pad.”

How-To Tips for Working With iBooks Author

I’ve spent the last month creating my first iBook – “Why We Fight: WWII and the Art of Public Persuasion.” It’s in the “approval” process at the iBookstore. (Look for a post when it’s available).
I learned a lot about making multi-touch iBooks the hard way – trial and error. I thought I’d share a few tips for using iBooks Author (IBA). This post is not an IBA step-by-step. It assumes you are already a bit familiar with IBA.  Note: I have collected IBA how-to’s at this Scoop-It.

Carefully plan your pages

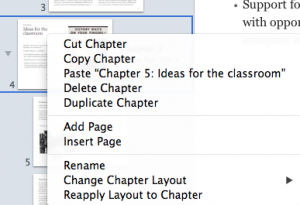
Here’s one big lesson I learned in IBA  - you can’t move pages. Chapters and sections of chapters can be easily re-arranged in an iBook. Just highlight them and slide to new location. You can also right click a chapter or section and cut, copy, duplicate and paste. You can even use those commands to move them between two different IBA projects that you have open. BUT moving pages is not allowed. I should note that my book had very little text and loads of graphics and widgets. So, for example, if I wanted my current page 10 to become page 5, I had to recreate pages 6-9 as part of the process. Lesson learned – plan ahead! (This is not a problem if you have a largely text oriented iBook. You could easily cut the text from page 10 and insert it into into a place in the flowing text that would put it at page 5.)

Size matters

File size that is. I planned a multimedia-rich look at the US propaganda effort in WWII. Lots of videos, audios and poster art meant that my iBook file was quickly becoming too large. I used video files from Archive.org that that were in mp4 format. IBA only accepts m4v format and it’s very picky about the types of m4v it accepts. I tried converting mp4 files using Handbrake (a very popular free app). IBA wouldn’t accept Handbrake converted m4v files. I used QuickTime player to convert by opening the mp4 and using QT File / export, but for some reason QT greatly increases file size when exporting.

My final solution to growing file size was three fold. One – I invested in Apple Compressor to convert mp4 to m4v and compress file size. Two – I used iMovie to edit some to the movies to tighten them up. Three – My planned iBook eventually got split into 3 iBooks of smaller file size. One other solution you could use would be to not put the video file in the iBook, but to link to it on YouTube via an embedded widget. (You can easily create a widget for that at a free site – Class Widgets).

Who wrote my iBook? 

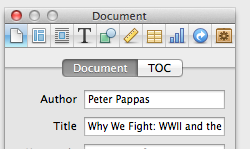
IBA allows you to preview your iBook by connecting an iPad and choosing File / Preview. It gives you the choice to either preview the entire book on your iPad or just preview the section you are working on. For the longest time, when I previewed my iBook it would appear on my iPad as “Author Unknown.” Finally, I figured out I needed to set the title and author in the “Document” section of the Inspector. Lesson learned.

Stylin’

I decided to use frequent stop and think prompts in the book to focus students on reflection. It was also away to reinforce CCSS skills throughout the book in a user friendly manner. I created a yellow post-it style text box and liked the way it looked. One I had the format I wanted I was able to copy and paste using the tool bar icons. BTW  - You can also edit / copy and edit / paste widgets. A nice way to move them around. 

Don’t mess with chapter image placeholders

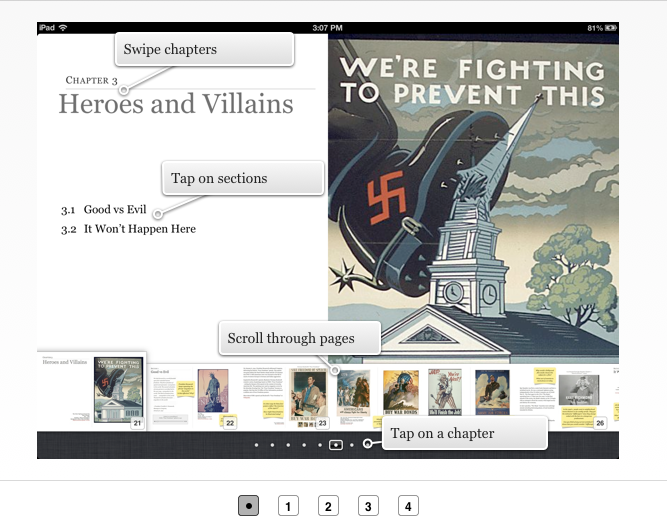
My iBook was loaded with media content, so I used the “Basic” template offered by IBA. One of the first things I did was strip it down to blank white pages. My mistake was revealed when I looked at my iBook in the “Table of Contents” view. I noticed that my chapter start pages lacked the graphics I had put on them. I finally figured it out.

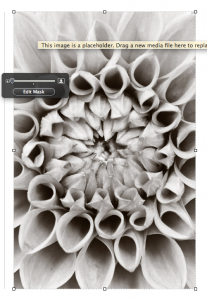
When you create a new chapter you are offered an image place holder on the right side of the page. Don’t delete it like I did. Instead, just drag your image into it. That way the image will appear in the ”Table of Contents” view. Once I deleted the image placeholders there was no way to get them back. You guessed it – I needed to create a “new chapter” and rebuild all the content. Ouch!

Customize layout for your widgets

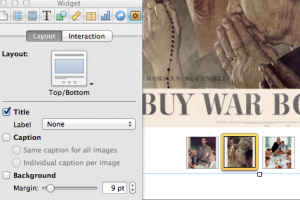
I was going for a very clean minimal look that would showcase the content. So I wanted my widgets to have minimal styling.

To do that  - go to Widget in the Inspector panel. Choose “Layout” tab and deselect background. Lots of other options for Label and Caption. You can also show thumbnails (as I did on the left) by selecting them in the “Interaction” tab.

Sneaking up on hyperlinks and bookmarks

You can hyperlink from the iBook to external links or create Bookmarks to jump between content within your iBook. Use the Inspector to create them. Here’s a few tips. You can only hyperlink from text. No image hyperlinks. You can hyperlink from any body text or text within inserted text boxes to URLs outside your iBook. Be sure to copy / paste you new URL into the Inspector or you’ll be creating a hyperlink to Apple.

Bookmarks are a bit fussier. First you need to turn some text in your iBook into a bookmark using the Inspector  - select the text and click on the + sign to add new bookmark. Here’s the catch – you can only create a bookmark from body text – you cannot bookmark text in a text box. Once you have anchored a bookmark you select some other text in your iBook and use Inspector to hyperlink to your bookmark.

Working with hyperlinks after you create them is a bit quirky. If you click on a previously created hyperlink in your iBook, it work. In other words you’ll leave the iBook and go to the URL in Safari. So you have to “sneak up” on hyperlinks. Click your cursor into adjacent text and use your keyboard arrows to navigate into the hyperlinked text. It will go active and you can use the Inspector to make changes. 

Where’s the Find and Replace?

IBA has a some good editing tools. You can use Edit / Proofreading to get to a reasonable proofreading panel. I found it useful. Looking for the find and replace feature? Use keyboard Command – F.

Students Create Augmented Reality History Tour

This guest post is written by Greg Wimmer, Central York (PA) High School. I met Greg at TechitU and was impressed by the projects skillful integration of technology and community involvement into the hIstory classroom. Greg’s guest post follows:

As the Advanced Placement exam season draws to an end in early May, I am always left with a month to explore the intricacies of US History with my students. I usually throw a big project at them to occupy their time and push their thinking in ways that I could not have done during the course. This past spring, however, my ideas were lacking and I was fishing for ideas from other faculty members. After speaking with one of our tech assistants, who is also a board member for the York County Heritage Trust, I reached out to Dan Roe, the educational director for the Trust. My goal was to hopefully devise a project we could complete in May. Through our meeting, I learned that the Trust had desired to push their walking tours in to the 21st Century. We explored several options, but decided that the students could write and produce movies for the Trust’s historic walking tours that could be accessed via – Aurasma – a location-based, augmented-reality smartphone app (or a device provided by the Trust). What happened to Aurasma?

The students were well aware of the project before May, but we unfortunately had no time before then to begin writing the script. In mid-May 2012, Mr. Roe joined my students for two days of collaborative writing. Their scripts focused on two major aspects of York(town) history: 1. York was the political center of the colonies during part of the American Revolution. 2. The Articles of Confederation were completed and signed in York, making it the nation’s first capital. Two groups (of approximately 6 students each) wrote competing scripts for both of the movies. Mr. Roe read the scripts for historical and contextual accuracy and made notes where appropriate. After rewrites were completed, they spent several days writing shot lists and preparing equipment for the shoot. With the exception of a “student on loan” from the TV production class, none of the students had prior experience with equipment or acting.

Students can do amazing things! It’s not until your own students complete a colossal project, that you truly begin to appreciate their capabilities. ~ Greg Wimmer

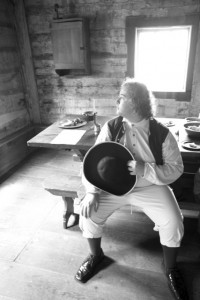
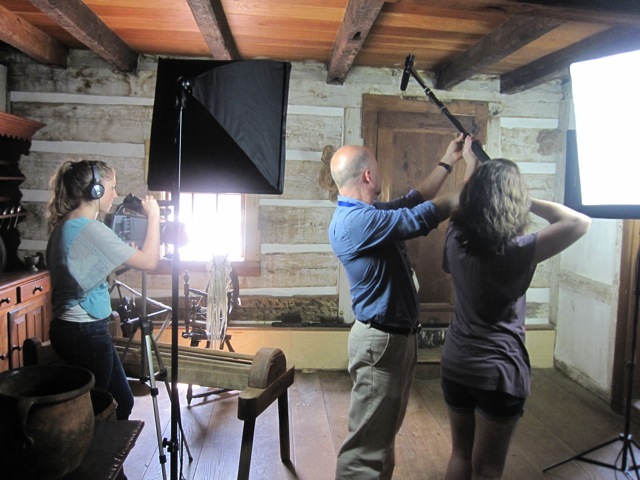
The first day of shooting took place at the Gates House and Golden Plough Tavern, both built in the mid-Eighteenth Century. Lighting and acting jitters proved to be the biggest hurdles, but we amazingly made it through all of the scenes in about 3 hours. While on set, the students were shocked with amount of detail involved with shooting such a short film. Their respect for film and movie-making increased dramatical over the course of the afternoon.

Filming for day 2 required the students to prep and shoot on the spot with random merchants in Central Market York. Two groups fanned out, asked for participation, and held up cue cards during filming. We also had location shoots scheduled for that afternoon, requiring students to set up and tear down several times. By the end of day 2, the students were exhausted and ready to get back to school.

Making Of Video

They spent the next week tying the project together. Two groups edited the videos separately, one group worked with Aurasma, and the other group prepped for the “making of” video. The groups that edited were shocked with the painstaking process of parcelling the movie together. They ran in to one or two continuity issues while piecing together scenes, requiring creative editing on their part. The two girls who worked on Aurasma ironed out the dilemma of image-based vs. location-based markers. They also took the liberty of creating a YouTube channel for the Heritage Trust as well as other accounts necessary to manage the videos and augmented reality program. The final group helped to create the raw footage for the “making of” video. They devised questions, created a set, and interviewed each of the students in class. They also interviewed Mr. Roe and myself for the video. They spent their final class presenting all of their videos, accounts, and reflections to Mr. Roe. He was thoroughly impressed with their final product and invited future classes to create more content for the Trust.

Lessons Learned:

Jump In – While I am very comfortable with iMovie, I knew little about the movie-making process required to complete “professional” videos. The Trust project gave me the opportunity to learn with the students and collectively tap our creativity. Two years ago, my AP students completed an archaeological dig at an early Nineteenth Century home behind our high school. I worked closely with someone from the Anthropology Department of a local university to organize the event. Going in to the project, I had zero knowledge on the processes involved in such a project. But that’s the point. Showing students that you can (gently) throw caution in to the wind and work together to create something unique and original.

Don’t trust technology and expecting the unexpected – When we returned to the high school at the end of the first day, we needed to download our video from the camera card to make room on the disk for day 2. Much to our surprise, NONE of the video files were there. After much jiggling and encouragement (and 45 minutes later), the computer read the files. I have honestly never watched a file transfer so closely in my life. In that situation, I would not have known how to tell students that their hard work was for nothing. Thankfully, things worked out!

Students can do amazing things! – Like many teachers, I spend a good deal of time looking at blog posts and twitter links to projects created by other classes. It is not until your own students complete a colossal project, that you truly begin to understand the their capabilities. At the same time, the students were giddy about their final product and recognized that teamwork in an academic setting makes for positive results.

Greg Wimmer is the Social Studies Department Chair at Central York High School. He’s in his 10th year of teaching – AP US History and Honors Global Studies. He describes himself as “a husband, father, teacher, and collaborator, I commit myself personally and professional to producing creative avenues for growth. Over the past 9 years, I have searched for new ways to build student understanding through collaboration and ingenuity.” Greg can be reached via Twitter@gregwim

Photo credits: Greg Wimmer

Flipped My Keynote

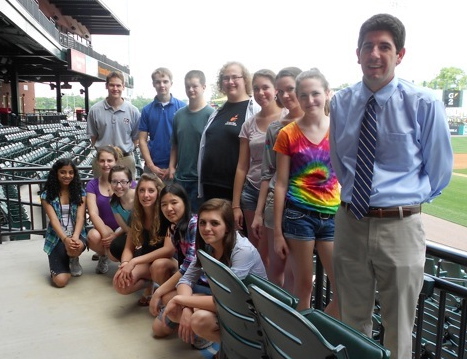
Tech.it.U is a premier educational technology conference (and Penn State grad course) designed to inspire and generate practical classroom ideas that “will help you teach with power and focus to impact students’ futures.”

“Thank you for making us think. You taught by example.”

I was asked to give the closing keynote on my Taxonomy of Reflection at this year’s, week-long conferenceKeynoters typically show up, explain their model, answer questions, etc. If all goes well, folks leave with an understanding of the ideas you pitched to them.

Transfer of content is easy in the digital age, it’s processing the learning that’s the challenge. So I elected to flip my keynote. Why not use one of the strategies I recommend to teachers? (My slide deck on flipping your class)

To flip my keynote, I gave Tech.it.U participants some advance reading about my taxonomy. Then I used my two hours – not to present, but to put them through a variety of experiences to provoke their reflections. For example, we studied a mid-19th century primitive painting to see how students “feel” when they are asked to construct meaning when they lack background knowledge. LearningCatalytics, a BYOD-based response system, made it possible to harness the power of peer instruction and compare our reflections. 

So how did “flipping” my keynote go? I asked participants to reflect on the experience. Here’s a few of their responses:

  • What a great end to the week. You had me engaged throughout the presentation. The hands on activities with partners, the discussions or arguments with peers, and the videos were perfect. Each of these items had me analyzing, applying, understanding, and evaluating information.
  • Wow! I loved how interactive this keynote was. My brain is on overdrive trying to think of all the amazing things I want to try first. You bring a plethora of fresh ideas and thoughts.
  • I truly appreciate that throughout your presentation you modeled the kind of instruction you proposed we use with our students. That is my favorite way to learn!
  • Very inspiring presentation. Great thoughts on ways to flip the instructional model. … My head is spinning with ways to implement some of these strategies.
  • What an engaging presentation! Learning catalytics is wonderful! I had so many “aha!” moments and it triggered many engaging lesson ideas.
  • I wish more people would champion the idea that students should be responsible for their learning and that teachers should be the facilitators of or catalysts for this to happen.
  • Wow, what a great thought provoking presentation. I love the idea of turning the responsibility of learning over to the students. I am going away with multiple ideas on how I can recreate myself as an educator for my students.
  • Thank you for making us think. … You taught by example.