How to Run an EdCamp via Zoom

How to Run an EdCamp via Zoom

I recently ran a edcamp style morning session for our incoming MATs at the University of Portland’s School of Education. Our session goals:

  • Provide a framework for students to explore ed tech in small project-based learning teams
  • Model a student centered learning space that takes the instructor out of center stage.
  • Reinforce that ed tech tools are more than bright shiny objects – they are a tools to inspire your student to investigate, collaborate, create, drive change and take action.

In advance, I created a Google site – “Pandemic Teachers’ Toolkit” that profiled ten free (or freemium) edtech apps. Each app page included a brief overview, how to log in, samples of the app in action, a how-to video on using the app, and instruction on how to get a sample project from the app to a Padlet showcase. The apps were numbered 1-10.

On the morning of the session, I logged in 42 students and I opened with a brief intro and an overview of the morning’s activities. I did a short presentation on the apps using Keynote with some screen shots that highlighted each app and what it could do. I then used Zoom’s built-in breakout group tool to create random groups of four students each. Each breakout group was assigned to explore their corresponding numbered app. The suggestion was for each student in the breakout group to explore the assigned app in parallel fashion and offer help to each other as needed. When they completed a product with the app they posted it to the corresponding Padlet along with comments on working with the app.

As Zoom host I was able to drop in and out of breakout groups offering support as needed. If anyone had a question they could message me via Zoom. After about 30 minutes of work time we all got back together and shared observations. For example – you can’t be in Zoom and Flipgrid simultaneously – the are both fighting over your camera. (Why didn’t I think of that?)

Then we repeated the process and I created 10 new random teams. Some student found themselves back at the same app. So they did not agree to join that group. I was quickly able to see that and assign them to a new group. Students spent about another half hour exploring the second app. They again posted their work and observation to the corresponding Padlet.

I should note that their app-posts were very clever and creative. And their comments were spot on. As a closer, I provided a Google Form exit ticket. Their responses demonstrated that they saw the experience as very valuable and that it achieved it’s goals.

Here’s a two of the exit questions and student responses.

What’s one thing you learned about yourself today?
  • I learned that I enjoy exploring new technology when it is explained well enough.
  • I love working on my own! It is my first choice when it comes to work options. However, I did need my partners at times so I’m glad they were there to help me!
  • I really enjoy meeting new folks outside my cohort! And I’ve become much more comfortable with online teaching over the summer term.
  • I am better at navigating new apps than I thought I would be.
  • I need to try something before I understand it, so I appreciated the time to do so.
  • I enjoy playing around with the different tools within an app to help me understand the best use of my creativity and instruction.
  • I learned that I’m actually a pretty quick learner with these different platforms, which makes me feel better going forward into the school year next year!
  • I liked being able to figure out to use the tools. I always find it more engaging to learn by doing instead of being told how to do things.
What’s one thing you learned about edtech today?
  • These things are free! And a lot of it is integrated with programs I already use. Great stuff!
  • I have a lot more free, realistic options available to me than I knew about before this morning.
  • I had heard of some of these online resources before but hadn’t used most of them – this was a cool opportunity to learn how to use these resources, I’ll definitely be incorporating some into my class.
  • How user-friendly most of the apps are….I was pleasantly surprised.
  • There are far more resources than I would’ve thought. They were all a lot easier to use than I would’ve thought, too! For someone who struggles with technology, they were surprisingly user friendly.
  • So many other options for distance learning! I’ll be spending some time just playing around with these apps/sites.
  • There are a variety of accessible edtech tools that I was previously unaware of that could make remote teaching more engaging.

Socratic Seminar for the Covid Classroom

Socratic Seminar for the Covid Classroom

As teachers struggle to navigate the new landscape of the Covid classroom, I’m reminded of a Socratic seminar model I used years ago while teaching AP history and government. It blended instruction in both full class and smaller seminars in way that could be a useful model to decrease the density of today’s classroom.

What drove my seminar model was PBL approach with weekly research tasks – though I had yet to hear the term “project-based learning.” My experience using this approach back in the 1980-90’s convinced me that advanced placement can be much more productive than the traditional AP model of lecture, read, memorize and test.

While this seminar approach produced great results on AP exams, its prime outcome was fostering students’ responsibility for themselves as learners. Covid-19 is upending our traditional classroom models. Instead of simply trying to find news ways to deliver the same stuff, we should leverage this disruption to refocus teaching and learning in ways that engage and motivate both students and teachers.


The Socratic Seminar Model

As we look for ways to blend virtual learning and meet live in smaller classes – this model could be modified by substituting an online session for the full class large group. Seminar size and frequency are adaptable to the setting.

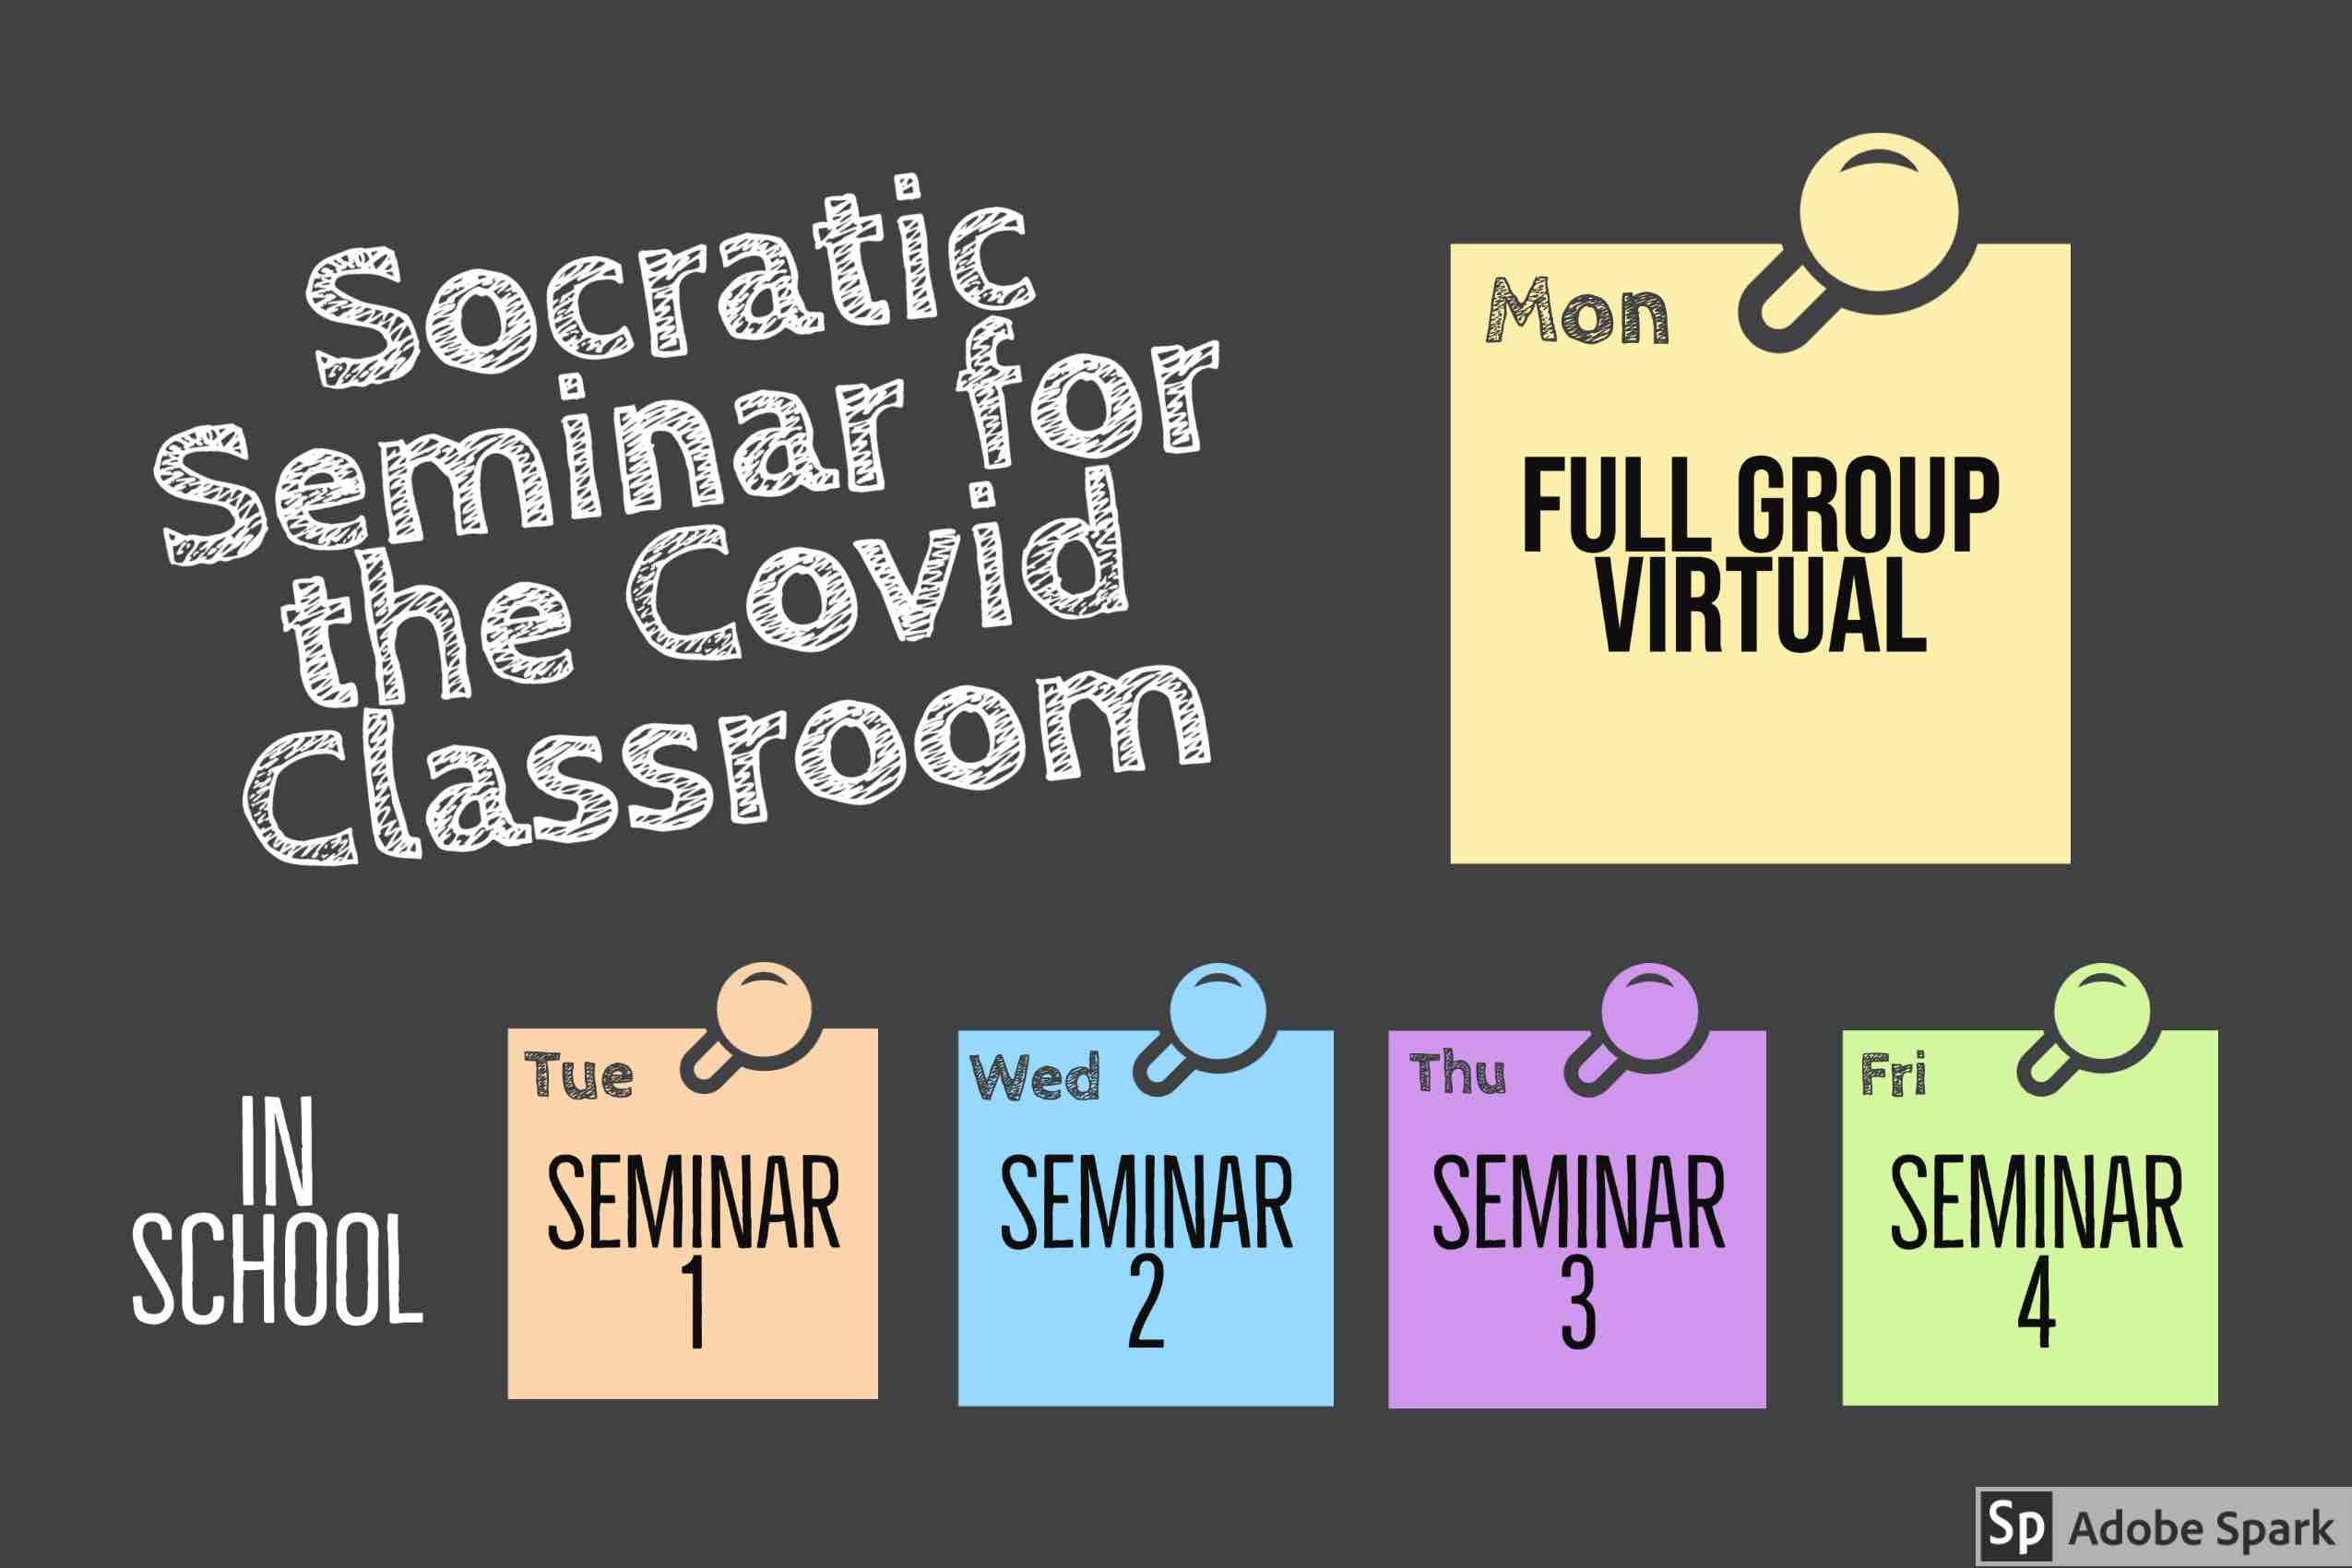
Class size typically ran between 24 – 36 students. All students in the class would meet one day a week in a large group session. This might be used for unit testing, or to introduce or conclude a seminar cycle with a lecture or full group discussion. The large group was also divided into 4 seminar groups of 6-9 students. Each seminar would meet with me one day per week. Thus each student met one day per week in seminar and another day in large group. During the remainder of their week, students worked independently or with their seminar group in preparation for the upcoming assignment. Today, we would call that “flipping the classroom.”

Seminar assignments built off the large group session and were project driven. Students in the seminar were required to present and defend their finding to their peers. I sat “outside the circle” as an observer – occasionally tossing probing questions into the group.

Of course, there were many weeks that were modified because of holidays and other interruptions – but you get the idea. Our high school was on traditional 8 period schedule. These AP classes were taught in a double period configuration of about 95 minutes for both the seminar classes or large group sessions.

My first experience was teaching one semester of AP US History while one of my colleagues was on leave. I focused on essential questions that fostered greater depth and relevance. So when we studied the Founding Fathers we didn’t focus on “Should the Constitution be ratified?” Our seminar revolved around a more enduring question – “How powerful should the national government be?” For more on that approach, see my post “Essential Questions in American History: The Great Debates.” 

After my semester of APUSH, I settled into my primary AP assignment – one semester of AP American Government / Politics and one semester of AP Comparative Government. There I used the seminar approach to give students guided experience in research, critical thinking, collaboration and presentation. 


Visualize the typical American government lesson. Teacher standing up front asking students to follow along as they go over the diagram of “how a bill becomes a law.”

Contrast that with one of my AP US Government seminars on the same topic.

Congress and the Lobbyists
This extended seminar will investigate the relationships between Congress and the lobbyists. You will develop an investigative report which will ultimately answer the question “Does Congress represent the needs of its public constituency (the electorate) or its financial constituency (its contributors)? Weekly seminar abstracts will be used to prepare Tabloid TV-style PowerPoint report in support of your investigation. To see the full seminar assignment click here.  

Students were assigned a member of Congress who sat on one of the major committees. Their task over the next few weeks included researching and developing the following:

  • Demographic / political profile of their legislator’s elective constituency.
  • Profile of their financial contributors.
  • Committee jurisdiction and major lobbyists.
  • Voting record on legislation of interest to their elective constituency and financial contributors.
  • Their answer to the seminar question with supportive reasoning.  
  • Presentation and reflection

Zoom Icebreaker: Virtual Name Tag

Zoom Icebreaker: Virtual Name Tag

I recently started the spring term teaching my edtech class via Zoom. I have 15 students, all but one, undergraduate education majors. Most know each other a bit from prior classes.

I had previously conducted one-on-one Zooms with each student, but I was still looking for a kickoff activity to start my first session.

A friend pointed me to this “face to face” icebreaker that I adapted to the virtual classroom. Inspired by: ID Numbers at Playmeo.

Here’s how:

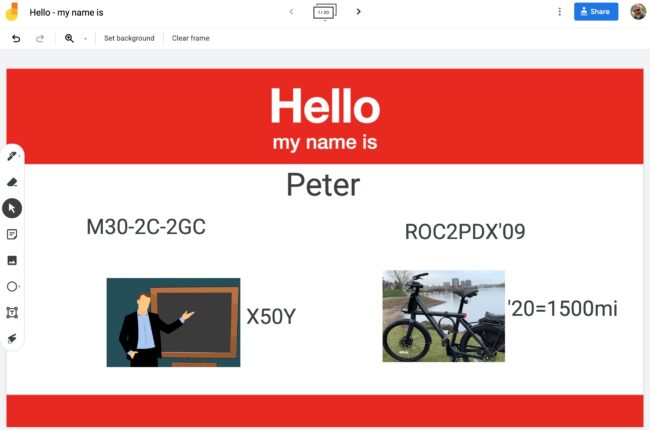
I created a Name Tag image (view / download below) to use as background and uploaded to Jamboard to share with the class during our session. Tip: You can add the background to your first Jamboard slide then use duplicate to create more. Then I added each student’s name to one card – so that every student had their own name tag to work on.

My Sample

Married 30 years, 2 children, 2 grandchildren.

Educator for 50 years

Moved from Rochester to Portland in 2009

In 2020, I biked 1500 miles (that’s my trusty VanMoof X2)

I shared this sample I made for myself and gave them this instructions:

  • Add to your name tag using shapes, symbols, characters, sketches, images (your own or clip art).
  • Don’t make it too easy or too hard.
  • Be creative and have fun.
  • Then we’ll all try to “read” your name tag.

Students spent a few minutes creating their name tags on their assigned card. Note: Good idea to have them turn off cameras until they’re done. Then we went through each card and tried to guess what students “wrote” about themselves. Note: Good to use both Zoom chat and verbal guesses to increase responses.

It went great – students had fun, a chance to be creative and to find out more about each other. The entire activity took about 25 minutes at a comfortable pace. A great way to kick off a virtual session. For larger sessions, participants could share in smaller breakout groups.

You can preview or download the name tag background I made:


Feature image photo by Chris Montgomery on Unsplash

How I Turned My Class into an Edcamp

Last week I ran a three-hour intro to edtech class for our incoming cadre of about 40 MAT students. In the past it been done lecture-style, but that’s not my thing. As a founding team member of #edcampPDX, I thought why not an edcamp?

We gathered in a large multi-use room and I opened with a few “get-to know-each-other activities” (this cadre has just started this summer). I gave a 30 min demonstration / lecture on “5 ideas for teaching in the digital age.” See handout on site.

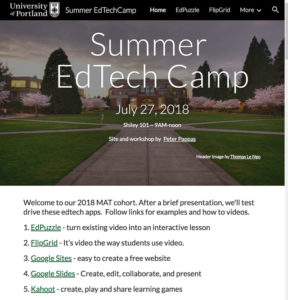
Summer Edtech Camp

Then I turned the group over to this Google site I had created. I split them into 10 teams and assigned them one of the 10 apps with the following instructions:

Click on the link for your app and you will see a demonstration of the app, a short “how-to” video and links to set up your account. Work with your team to figure out the app, create something using it to share back to the group via this Padlet and be prepared to tell the rest of the group what you liked / disliked about the app and how you could use it in the classroom.

They dug in and all were successful at creating content using their app and gave some “spot -on” critiques of the apps. I closed with a Google form “Exit Ticket” and here’s some of their responses to two of the questions:

What’s one thing you learned about edtech today?

  • That using technology as a teacher isn’t as difficult/scary as I thought.
  • Find ways to embrace tech in the classroom rather than ban it.
  • I learned the importance of “being less helpful.”
  • I learned about all these different apps I had never heard about before.
  • I learned about a lot of sites and apps I can apply to education and to also pad my student teaching portfolio.
  • It allows students to create/synthesize content that promotes higher order thinking.
  • That we need to create opportunities to create and not just consume when using technology.
  • There is more technological help out there than I thought.

What’s one thing you learned about yourself today?

  • That I’m still intimidated by technology, but less-so now.
  • It takes me a little longer to be creative.
  • I can do more than I thought I could do with technology.
  • I liked being able to engage with site in an interactive way and just messing around with it to figure out how it works.
  • That I can be more techy.
  • I work well in groups of people with similar ideas.
  • That if I don’t keep up to date, I’m going to be that teacher that does not know how to operate the projector or future equivalent.
  • That I am capable of using technology and do not need to be afraid of it in my classroom. This will help a lot when it comes to working with students who are technology driven.
  • I was scared to use technology in the classroom before but I realized today it is super easy. I can see myself using way more technology now.
  • I should teach myself more of technology.
  • I thought I wouldn’t like using technology in the classroom, mostly because I tend to be technologically challenge, and easily intimidated by it. However, today I learned that I can use lots of these sources. They are not to be feared!
  • I learned that I enjoy working on platforms that allow for multiple people to work on them at once. I found that to be really useful.
  • It takes me longer to figure out technology than my younger peers.
  • I used to think that I needed a tutorial to figure out technology, but I think it is beneficial to just work with the site.

Digital Storytelling with Sway

I’m always on the lookout for tools that make it easy for students to be digital storytellers. I just took Microsoft’s Sway for a test ride and I am impressed. (Sway is part of the Office365 suite and free for students and teachers.)

See student projects made with Sway

Here’s my first creation – “Progress and Poverty in Industrial America.” Direct link to Project.

I found Sway to be very intuitive and I figured it out without much need to go the Help section. I could easily add images, text and variety of digital content from my drive or other external sources. A built in search tools allows users to limit searches to Creative Commons. Once content is selected, the source citation (with link) is automatically added to your creation – a great feature for students working on their digital hygiene skills. 

There are some styling options that let you explore a few different looks. With some trial and error I eventually got the look and interaction I wanted. Sway has a long list of embed options that add external content to it’s native tools. I’ll be exploring those next. 

Sway has built-in collaboration options so teams of creators can work on the same project. Sharing tools make it easy to promote your work across social media and as you can see here – it’s easy to embed your Sway in WordPress. Designers can set permissions to allow viewers to export, duplicate, copy or print. Or set the project to view only. It even has a built in “Accessibility Checker” analyzes your project and shows where alternative text is needed.

Sway projects are responsive and look great on desktop, tablet or smartphone. Android and iOS apps allow you to design or edit via your smartphone. It provides minimal analytics. But one interesting aspect is it sorts your viewers by “Glanced”, “Quick Read” and “Deep Read.”