Self-Publishing: A How-To For Students and Teachers

Publishing with PowerPoint is a new book that guides teachers and students through the process of creating and publishing their own books. It’s written by three dear friends and former colleagues – Patricia Martin, MaryAnn McAlpin and Suzanne Meyer. For a few years I had the chance to collaborate with them on some student publishing projects. They’ve continued to hone their skills on broad array of innovative projects. Recently they compiled all they’ve learned into an easy to use guide to using PowerPoint as a book design tool and how to team PPT with the exciting new technology of on-demand printing. Publishing with PowerPoint – available at Amazon

Here’s their guest post detailing the book:

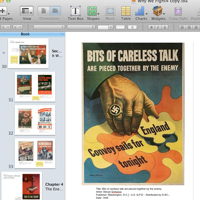
Publishing is an effective tool for getting students engaged and writing. The new book, Publishing with PowerPoint, walks the reader through a process of self-publishing that can be used in any classroom. PowerPoint is an effective book design software – it’s already on your computer and everyone know how to use it. Students find it easy to use PowerPoint templates and position a wide range of text and images on a PPT slide. Powerpoint slides can be quickly grouped and rearranged into book pages. Finally, converting PowerPoint slides into pdfs for publishing can be done with the “Save As” function. Visit Amazon Books / Publishing with PowerPoint to see the use of templates and layouts on the sample pages.

The teacher with a limited budget can print just one copy for the classroom. Parents can order their own copies online.

Publishing with PowerPoint was published through Createspace, an Amazon company, using the process detailed in the book. Once the slides were created, the authors merely converted the slides to PDF’s and sent the result to Createspace. For example, a 32 page, 8.5”X11” color book would cost its authors about $4.00 a copy plus $3.59 shipping and handling. (The shipping and handling costs are calculated at $3.00 per order and $.59 per item). Lulu, another popular on-demand publisher, would price a similar book at $13.42 plus shipping and handling.

The magic of on-demand printing is that the teacher with a limited budget can print just a single copy for the classroom. Both Createspace and Lulu offer options for easy distribution. PTAs or families who want copies can log in and order their own. No need for teachers to take book orders.

The thought of publishing with students might seem daunting - I’ve got too much on my plate as it is! But if you believe in the power of PBL and motivation of writing for an authentic audience, you’ll appreciate this detailed guide book.  It offers an overview of the resources necessary for successful publishing. Readers learn how to use PowerPoint’s built-in tools for template design, layout or page design, creating facing pages, and inserting images. The book is organized to walk the reader through the process, detail-by-detail, in the exact order in which the publishing process happens.


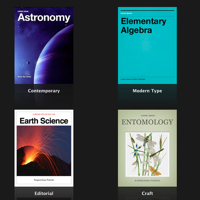
The second half of the book is devoted to content. Teachers will realize that content is actually the initial consideration whether looking at writing process or traits of writing. But, it seemed important to the authors that the book present the techniques of publishing (the new information) before reviewing the writing and organization of content for publishing (the prior learning). Using examples from our publishing experiences, the book includes a wide range of samples representing different grade levels, fiction or non-fiction, single-author or anthology that the teachers can use as models.

The book exemplifies the ease with which students can complete the writing process by publishing their work to a wide audience with tools available in a classroom. Hopefully the book will illustrate to its readers the versatility and creativity that PowerPoint can bring to the self-, or on-demand, publishing process. For the teacher who wants to publish electronically the book is an equally invaluable resource to enable students to produce a quality final product. Formatting pages through PowerPoint and creating pdfs work equally well for that application.

Teachers inexperienced with publishing and limited resources do not have to eliminate student publishing options. Publishing with PowerPoint and the use of economical self-publishing can bring this opportunity to any classroom.

Podcast: How to Use iBooks Author in the Classroom

My second podcast with Mark Hofer and David Carpenter for their series Ed Tech Co-Op was just posted. Go to Show 27: Peter Pappas and iBook Publishing (Dec 23, 2012) via Web | iTunes.

We focused on getting started with using iBooks Author (iBA) in the classroom. Here’s a synopsis of our discussion with some time markers to guide your listening.

We began with some comments on my iBook Why We Fight: WWII and the Art of Public Persuasion (screenshot above from iBook Author). (1:30) Mark noted how the book exemplified three key elements of universal design for learning – multiple representations of content, active learning strategies for students, and relevance for the learner. (5:30)

We discussed how an iBook can be designed to guide students in examining essential questions. (7:17) David noted content-curation advantages of teacher-produced iBooks over other learning management systems. (11:02) Then our discussion turned to iBA workflow specifics. (12:42) We discussed how to guide students in producing their own iBooks (17:30) and how student can find a more authentic audience beyond the classroom by sharing their book with their community and the world via iTunes. (19:32).

iBooks author projects are more than writing. They offer students the chance to create video, audio and visual content used in the iBook. (21:07) They also exemplify the best aspects of project-based learning and put a premium on preplanning and production-oriented decisions (25:40)

For tech specifics on using iBA see my collection of “how-to’s” – Publishing with iBooks Author 

My first podcast with Mark and David: Reflections on Teaching Strategies That Work.

Four Keys to Teaching Students How to Analyze

This week I’m presenting at the national AMLE conference (middle level education) in Portland Ore. Quite nice since I live here!

My session
Thursday Nov 8 at 8AM
#1111 – Teaching Students to Analyze? Motivate with Skills, Choice and Reflection.
Here’s a preview

True analysis is messy work, but that’s where the learning takes place.

My talk has two themes – first, it’s a reflection on how analysis is taught in the classroom. Too often teachers give students a Venn Diagram and ask them to compare. What looks like analysis on the surface is often no more than re-filling information from the source material into the Venn. Graphic organizer are great to help students understand a variety of analytic models, but they often constrain students into someone else’s analytic framework. 

Summarizing and comparisons are powerful ways to build content knowledge and critical thinking. But if students are going to master CCSS skills they need to design the model, find a way to express it to others, and have the opportunity self reflect on their product and feedback from peers. Get them started with graphic organizers, then show some courage and be less helpful. True analysis is messy work, but that’s where the learning takes place.

My session will utilize audience responders to first evaluate sample lessons in summarizing and comparing, then collectively develop critical benchmarks. Teachers will next be given frameworks for designing lessons which enable students to think like designers, to apply their learning strategies, share their conclusions and set the stage for self-reflection.

FlipNLearn: a foldable that students design, print and share.

Next, I will demonstrate how to meet these four keys to teaching analysis with FlipNLearn, a foldable that students design, print and share. It’s an innovative learning tool that students design on a computer, then print on special pre-formatted paper. The result – a clever foldable that flips through four faces of student selected text and images. FlipNLearn is a great way to give students a manageable design challenge that promotes teamwork, self-assessment and reflection. In 30 minutes, or less, they can produce tangible product that blends the best of PBL and CCSS skills in communication. If you can’t make my session, look for me at the IMCOM vendor booth #819 for free tips on Portland’s best pubs and grub.

Textbooks Are Dead – Here’s 3 Reasons to Write Your Own

For years progressive educators have known the textbook was dead. Apple’s latest iPad Mini / iBooks Author event (October 23, 2012) suggests we are closing in on the tipping point that should hasten its demise.

I’ll let others critique the viability of the iPad as a textbook replacement in this era of shrinking budgets. Instead I’ll focus on how teaming iBooks Author (iBA) with the iPad can turn students from passive consumers of information, into active researchers, thinkers, designers and writers.

Since it’s release this spring, I’ve been working with iBA and networking with other educators doing the same. I’ve seen great examples of student-produced work such as this iBook by 5th graders.
I just published my first multi-touch iBook, Why We Fight: WWII and the Art of Public Persuasion which gives students a chance to work with historic films and poster art to critically evaluate the US government’s public relations effort during the war. I’ve already blogged about my reactions to using iBA, but let me use this post to offer three arguments for using iBA with students.

Crowdsourced Production
iBA (a free program) requires a Mac running OS X 10.7.2 or later, but that doesn’t mean that every student needs a Mac to contribute to the iBook project. All the classroom needs is access to one computer running iBA to create an iBook. (Use somebodies new Mac Mini?)

iBA accepts text from Microsoft Word and other text editors. Teams of student writers can do research and writing on a variety of computers (and devices) and send finished copy to the iBA production team. Images, audio and video files collected by researchers can be added to the eBook project with a simple drag and drop. If students have access to multiple Macs running iBA, it’s easy to consolidate iBA projects by copy / pasting chapters (or sections of chapters). Research, writing, and design can even be sequenced into a “flipped classroom” production model.

Broadcasting Your iBook
Terms of use for iBA require that iBA-created iBook that are offered for sale can only be sold through the iBookstore. But there’s no restriction on “free” iBA-created iBooks – circulate them any way you want.

While the iBookstore does provide accounts for producers of “free” iBooks, there’s a simpler way to distribute an iBook. Connect an iPad to the computer running iBA, click Preview, and the iBook is pushed to the attached iPad. Do the same on as many iPads as you choose. It’s also easy to export the finished iBooks file from the iBA program to an external drive or network and distribute the iBook to multiple iPads.

The ease of distribution means students can communicate with a broader, and more authentic audience than just their teacher and class peers. They can even bring their iBooks files home on thumb drives to be shared with families and friends that have iPads.

Design Thinking Meet CCSS Skills
Researching, writing, and designing an iBook provides an opportunity for students to hone a wide range of skills. Common Core State Standards require a host of literacy, critical thinking and writing skills that are essential to production. Project based learning (PBL) engages students with the opportunity to think like professionals while solving real-world problems. While the iBook qualifies as a project goal, don’t forget that the subject of the iBook could also give students a platform to tackle community-based issues.

Collaborating on an iBook draws from a wide range of creative skills – creating audio clips, producing illustrations, shooting and editing video. Because a variety of media can be included in an iBook, there are numerous opportunities for students of all ability levels and language proficiencies to be active contributors.

Digital technologies have put students in charge of the information they access, store, analyze and share. Most importantly the digital era has given them an expectation of informational choice. Creating an iBook harnesses all those motivational factors into an engaging learning experience. When students get to collaborate and work as adult professional do, we relinquish responsibility for learning to the student and provide them a valuable opportunity to reflect on both their process and product. That’s the foundation for a lifetime of learning.

Image credit/ author

How-To Tips for Working With iBooks Author

I’ve spent the last month creating my first iBook – “Why We Fight: WWII and the Art of Public Persuasion.” It’s in the “approval” process at the iBookstore. (Look for a post when it’s available).
I learned a lot about making multi-touch iBooks the hard way – trial and error. I thought I’d share a few tips for using iBooks Author (IBA). This post is not an IBA step-by-step. It assumes you are already a bit familiar with IBA.  Note: I have collected IBA how-to’s at this Scoop-It.

Carefully plan your pages

Here’s one big lesson I learned in IBA  - you can’t move pages. Chapters and sections of chapters can be easily re-arranged in an iBook. Just highlight them and slide to new location. You can also right click a chapter or section and cut, copy, duplicate and paste. You can even use those commands to move them between two different IBA projects that you have open. BUT moving pages is not allowed. I should note that my book had very little text and loads of graphics and widgets. So, for example, if I wanted my current page 10 to become page 5, I had to recreate pages 6-9 as part of the process. Lesson learned – plan ahead! (This is not a problem if you have a largely text oriented iBook. You could easily cut the text from page 10 and insert it into into a place in the flowing text that would put it at page 5.)

Size matters

File size that is. I planned a multimedia-rich look at the US propaganda effort in WWII. Lots of videos, audios and poster art meant that my iBook file was quickly becoming too large. I used video files from Archive.org that that were in mp4 format. IBA only accepts m4v format and it’s very picky about the types of m4v it accepts. I tried converting mp4 files using Handbrake (a very popular free app). IBA wouldn’t accept Handbrake converted m4v files. I used QuickTime player to convert by opening the mp4 and using QT File / export, but for some reason QT greatly increases file size when exporting.

My final solution to growing file size was three fold. One – I invested in Apple Compressor to convert mp4 to m4v and compress file size. Two – I used iMovie to edit some to the movies to tighten them up. Three – My planned iBook eventually got split into 3 iBooks of smaller file size. One other solution you could use would be to not put the video file in the iBook, but to link to it on YouTube via an embedded widget. (You can easily create a widget for that at a free site – Class Widgets).

Who wrote my iBook? 

IBA allows you to preview your iBook by connecting an iPad and choosing File / Preview. It gives you the choice to either preview the entire book on your iPad or just preview the section you are working on. For the longest time, when I previewed my iBook it would appear on my iPad as “Author Unknown.” Finally, I figured out I needed to set the title and author in the “Document” section of the Inspector. Lesson learned.

Stylin’

I decided to use frequent stop and think prompts in the book to focus students on reflection. It was also away to reinforce CCSS skills throughout the book in a user friendly manner. I created a yellow post-it style text box and liked the way it looked. One I had the format I wanted I was able to copy and paste using the tool bar icons. BTW  - You can also edit / copy and edit / paste widgets. A nice way to move them around. 

Don’t mess with chapter image placeholders

My iBook was loaded with media content, so I used the “Basic” template offered by IBA. One of the first things I did was strip it down to blank white pages. My mistake was revealed when I looked at my iBook in the “Table of Contents” view. I noticed that my chapter start pages lacked the graphics I had put on them. I finally figured it out.

When you create a new chapter you are offered an image place holder on the right side of the page. Don’t delete it like I did. Instead, just drag your image into it. That way the image will appear in the ”Table of Contents” view. Once I deleted the image placeholders there was no way to get them back. You guessed it – I needed to create a “new chapter” and rebuild all the content. Ouch!

Customize layout for your widgets

I was going for a very clean minimal look that would showcase the content. So I wanted my widgets to have minimal styling.

To do that  - go to Widget in the Inspector panel. Choose “Layout” tab and deselect background. Lots of other options for Label and Caption. You can also show thumbnails (as I did on the left) by selecting them in the “Interaction” tab.

Sneaking up on hyperlinks and bookmarks

You can hyperlink from the iBook to external links or create Bookmarks to jump between content within your iBook. Use the Inspector to create them. Here’s a few tips. You can only hyperlink from text. No image hyperlinks. You can hyperlink from any body text or text within inserted text boxes to URLs outside your iBook. Be sure to copy / paste you new URL into the Inspector or you’ll be creating a hyperlink to Apple.

Bookmarks are a bit fussier. First you need to turn some text in your iBook into a bookmark using the Inspector  - select the text and click on the + sign to add new bookmark. Here’s the catch – you can only create a bookmark from body text – you cannot bookmark text in a text box. Once you have anchored a bookmark you select some other text in your iBook and use Inspector to hyperlink to your bookmark.

Working with hyperlinks after you create them is a bit quirky. If you click on a previously created hyperlink in your iBook, it work. In other words you’ll leave the iBook and go to the URL in Safari. So you have to “sneak up” on hyperlinks. Click your cursor into adjacent text and use your keyboard arrows to navigate into the hyperlinked text. It will go active and you can use the Inspector to make changes. 

Where’s the Find and Replace?

IBA has a some good editing tools. You can use Edit / Proofreading to get to a reasonable proofreading panel. I found it useful. Looking for the find and replace feature? Use keyboard Command – F.