Sequencing – An Essential Summarizing Skill

I’ve been experimenting with Dipity, a new website that allows you to build interactive timelines. Open a free account, create a new topic, and then upload text and images (from a file.) You can view your topic as an timeline or flipbook. You can even geocode your events and view the project as a map. You are allowed to set permissions for viewers and editing rights.  I created a sample timeline “How did the roles and rights of women change at the turn of the 20th century?”  Note: One drawback for classroom use – banner ads appear on the page and  I can’t vouch for what might show up.

Dipity allows you to configure the display of the topic and copy and paste the embed code into your page. You should be able to click the embedded image below.

Your Students Will Never Be Late for Class Again

Like all teachers, I struggled for years with tardy students – “But Mr. Pappas, I had to stop at my locker!” Then I took a lesson from fellow teacher – Tom O’Brien, the art teacher in the classroom next door. Tom had it figured out, and here’s what he taught me.

Stand at the door between classes and greet each individual student by name with a handshake as they walk in the room. It guarantees that every day you’ll have a positive connection with every one of your students. Student having a bad day?  Find our before they act out in class.  When the bell rings, the door closes and you promptly begin class. Students quickly realize if they are late, they don’t get a personal greeting. Try it  – it works!

image credit flickr/Earls37a

Start Your New School Year with Rigor and Relevance

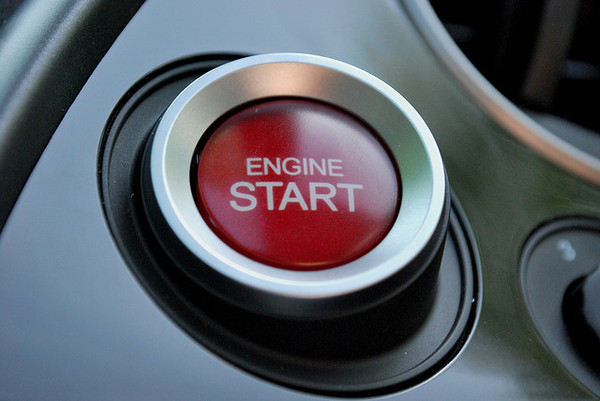
start the school year

As a social studies high school teacher, I faced over 25 years of the first day of school. When I first began teaching, I did usual thing – working through the class list (“do you prefer Patrick, or Pat?), a dry recitation of the class rules,  passing out the textbooks. Blah, blah, blah – think of the message it sent to my students.

As my teaching style evolved from the lecture / work sheet model into a more engaged learning environment, I redefined how I wanted to introduce my students to my course. I also came to understand that it was imperative that I get all my students to contribute a few comments to the class during those first few days. Very quickly classes learn which students are the talkers and non-talkers. Once those roles are locked in – it’s very difficult for student for break out of them.

So I did not waste the opening week of school introducing the course – my students solved murder mysteries. I took simplified mysteries and split them into 25-30 clues, each on a single strip of paper. (You can download one of the mysteries and rules from my website.)  I used a random count off to get the kids away from their buddies and into groups of 5-6 students. Each group got a complete set of clues for the mystery. Each student in the group got 4-5 clues that they could not pass around to the other students. They had to share the clues verbally in the group and that guaranteed that every student is a talker on day one.

While the students worked to solve the mystery – I concentrated on learning the student names. After I introduced the mystery, I bet them that by the end of the first class, I could go around the room and recite their names. While they worked on the mystery, I circulated getting to know students and their names. Another message – in this class, we’re all learners.

Over the next few days we would process their problem solving skills, group dynamics, differences between relevant and irrelevant information and introduce the idea of higher-order thinking like analysis, evaluation and creating. We might even have time to try another mystery to see if they got better.

By week two, I got around to passing out the textbooks. But by then I had already introduced them to what was most important about my class.

Image credit: flickr/pobre.ch

Students Can Create Videos to Teach Us “How To”

There’s an emerging genre of internet videos that fall into the category of “how to’s.” Lots of folks are offering up instructional guides for how to do everything imaginable from How to Chill a Coke in 2 Minutes to How to Fold a Towel.

Explaining “how to” requires students to research a subject, evaluate what’s important, and create a guide for someone else to follow. It gives them an opportunity to write for an authentic audience and purpose and use skills that rank very high on Bloom’s taxonomy.

If you want to get your students writing and shooting these videos here’s some suggestions:

1. Get the new Flip Ultra video camera – remarkably easy to use and only $114 at Amazon. Works with Mac or PC. I’ve been using one for a few months and I’m impressed with the sound and image quality and the simplicity of use.

2. Have students take a look at this ingenious “how to” done by Common Craft – no elaborate props or on-screen talent required. The Flip camera won’t be able to shoot as closely as the Common Craft video below, but students can easily recreate the look on a larger scale using the classroom white board and the optional Flip Ultra tripod ($14 at Amazon).

3. Post the video to TeacherTube – a safe alternative to YouTube.

OK – time to make a movie!

Note on editing. The Flip video comes with its own software that works with Mac or PC. Ingeniously, the software resides on the camera and works anytime you plug the Flip USB into a computer.� The Flip video files are created in an AVI format that can be edited on a PC using software like MovieMaker. Mac iMovie won’t accept the Flip video AVI format directly, but you can convert an AVI file to a (iMovie-friendly) m4v file format using free iSquint software. Students can design, shoot and edit the video, then do a voice over. That way they can focus on the visual message separately from the audio message.

8/08 Update: The latest version of Flip video software will allow direct import of files into Mac iMovie!

Teaching Innovation? Inspire Your Students with Maker Faire

Last month’s Maker Faire drew do-it-your-selfers from across the country to San Francisco to show off their creations. While the rest of us seem content to buy what we need, there is a dedicated community of tinkerers out there that is keeping the American tradition of backyard innovation alive. Why not showcase their work to inspire your students to think more creatively?

I’ve made the point that schools need to foster creativity to prepare our students for a future that will put a premium on adaptability. Innovation requires both a strong foundation in content knowledge and the ability to apply that knowledge in new ways – usually across a variety of disciplines. And it requires using all of Bloom’s skills from remembering through creating. Creating is not a skill limited to the gifted. It’s something that all students can do – think of it as a new combination of old elements.

If you’re looking to inspire your students, you might send them online to Maker Faire or it’s parent, Make Magazine (or the like-minded site, Instructables.) Even if you’re too timid to let them haul in old washing machine parts, you can give them the opportunity to do paper designs of their creations in the style of Rube Goldberg.

In the meantime enjoy The Best of Maker Faire 2008