How-To Tips for Working With iBooks Author

I’ve spent the last month creating my first iBook – “Why We Fight: WWII and the Art of Public Persuasion.” It’s in the “approval” process at the iBookstore. (Look for a post when it’s available).
I learned a lot about making multi-touch iBooks the hard way – trial and error. I thought I’d share a few tips for using iBooks Author (IBA). This post is not an IBA step-by-step. It assumes you are already a bit familiar with IBA.  Note: I have collected IBA how-to’s at this Scoop-It.

Carefully plan your pages

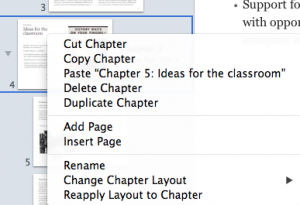
Here’s one big lesson I learned in IBA  - you can’t move pages. Chapters and sections of chapters can be easily re-arranged in an iBook. Just highlight them and slide to new location. You can also right click a chapter or section and cut, copy, duplicate and paste. You can even use those commands to move them between two different IBA projects that you have open. BUT moving pages is not allowed. I should note that my book had very little text and loads of graphics and widgets. So, for example, if I wanted my current page 10 to become page 5, I had to recreate pages 6-9 as part of the process. Lesson learned – plan ahead! (This is not a problem if you have a largely text oriented iBook. You could easily cut the text from page 10 and insert it into into a place in the flowing text that would put it at page 5.)

Size matters

File size that is. I planned a multimedia-rich look at the US propaganda effort in WWII. Lots of videos, audios and poster art meant that my iBook file was quickly becoming too large. I used video files from Archive.org that that were in mp4 format. IBA only accepts m4v format and it’s very picky about the types of m4v it accepts. I tried converting mp4 files using Handbrake (a very popular free app). IBA wouldn’t accept Handbrake converted m4v files. I used QuickTime player to convert by opening the mp4 and using QT File / export, but for some reason QT greatly increases file size when exporting.

My final solution to growing file size was three fold. One – I invested in Apple Compressor to convert mp4 to m4v and compress file size. Two – I used iMovie to edit some to the movies to tighten them up. Three – My planned iBook eventually got split into 3 iBooks of smaller file size. One other solution you could use would be to not put the video file in the iBook, but to link to it on YouTube via an embedded widget. (You can easily create a widget for that at a free site – Class Widgets).

Who wrote my iBook? 

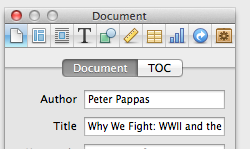
IBA allows you to preview your iBook by connecting an iPad and choosing File / Preview. It gives you the choice to either preview the entire book on your iPad or just preview the section you are working on. For the longest time, when I previewed my iBook it would appear on my iPad as “Author Unknown.” Finally, I figured out I needed to set the title and author in the “Document” section of the Inspector. Lesson learned.

Stylin’

I decided to use frequent stop and think prompts in the book to focus students on reflection. It was also away to reinforce CCSS skills throughout the book in a user friendly manner. I created a yellow post-it style text box and liked the way it looked. One I had the format I wanted I was able to copy and paste using the tool bar icons. BTW  - You can also edit / copy and edit / paste widgets. A nice way to move them around. 

Don’t mess with chapter image placeholders

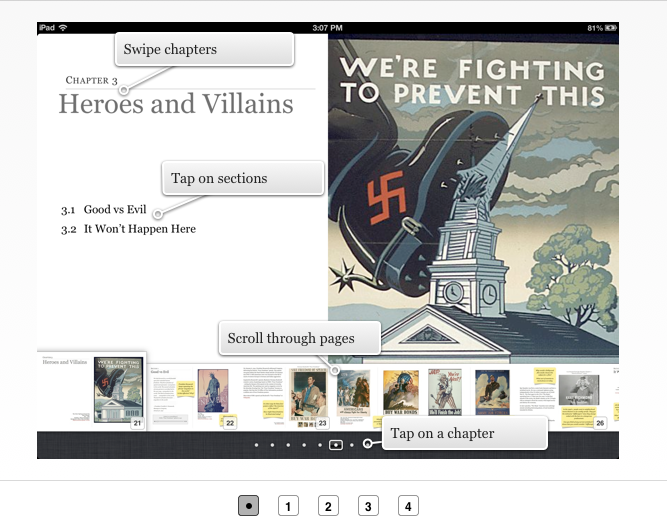
My iBook was loaded with media content, so I used the “Basic” template offered by IBA. One of the first things I did was strip it down to blank white pages. My mistake was revealed when I looked at my iBook in the “Table of Contents” view. I noticed that my chapter start pages lacked the graphics I had put on them. I finally figured it out.

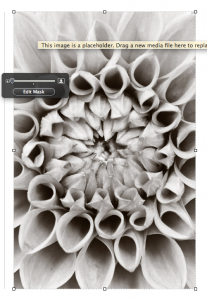
When you create a new chapter you are offered an image place holder on the right side of the page. Don’t delete it like I did. Instead, just drag your image into it. That way the image will appear in the ”Table of Contents” view. Once I deleted the image placeholders there was no way to get them back. You guessed it – I needed to create a “new chapter” and rebuild all the content. Ouch!

Customize layout for your widgets

I was going for a very clean minimal look that would showcase the content. So I wanted my widgets to have minimal styling.

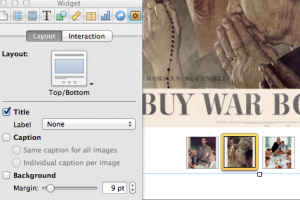
To do that  - go to Widget in the Inspector panel. Choose “Layout” tab and deselect background. Lots of other options for Label and Caption. You can also show thumbnails (as I did on the left) by selecting them in the “Interaction” tab.

Sneaking up on hyperlinks and bookmarks

You can hyperlink from the iBook to external links or create Bookmarks to jump between content within your iBook. Use the Inspector to create them. Here’s a few tips. You can only hyperlink from text. No image hyperlinks. You can hyperlink from any body text or text within inserted text boxes to URLs outside your iBook. Be sure to copy / paste you new URL into the Inspector or you’ll be creating a hyperlink to Apple.

Bookmarks are a bit fussier. First you need to turn some text in your iBook into a bookmark using the Inspector  - select the text and click on the + sign to add new bookmark. Here’s the catch – you can only create a bookmark from body text – you cannot bookmark text in a text box. Once you have anchored a bookmark you select some other text in your iBook and use Inspector to hyperlink to your bookmark.

Working with hyperlinks after you create them is a bit quirky. If you click on a previously created hyperlink in your iBook, it work. In other words you’ll leave the iBook and go to the URL in Safari. So you have to “sneak up” on hyperlinks. Click your cursor into adjacent text and use your keyboard arrows to navigate into the hyperlinked text. It will go active and you can use the Inspector to make changes. 

Where’s the Find and Replace?

IBA has a some good editing tools. You can use Edit / Proofreading to get to a reasonable proofreading panel. I found it useful. Looking for the find and replace feature? Use keyboard Command – F.
Have a Minute for the Shortest TED Talk Ever?

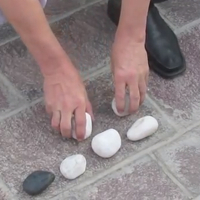
Who needs PowerPoint when you have a few stones for your infographic?
He even finds time to add a reflective question as a kicker. This talk ‘happened’ during a spontaneous interview with Hans Rosling, the famous TED speaker. Hans joined us at the TEDxSummit 2012 in Doha, April 15 — 20, Qatar for another memorable TED talk on global population predictions.

Students Create Augmented Reality History Tour

This guest post is written by Greg Wimmer, Central York (PA) High School. I met Greg at TechitU and was impressed by the projects skillful integration of technology and community involvement into the hIstory classroom. Greg’s guest post follows:

As the Advanced Placement exam season draws to an end in early May, I am always left with a month to explore the intricacies of US History with my students. I usually throw a big project at them to occupy their time and push their thinking in ways that I could not have done during the course. This past spring, however, my ideas were lacking and I was fishing for ideas from other faculty members. After speaking with one of our tech assistants, who is also a board member for the York County Heritage Trust, I reached out to Dan Roe, the educational director for the Trust. My goal was to hopefully devise a project we could complete in May. Through our meeting, I learned that the Trust had desired to push their walking tours in to the 21st Century. We explored several options, but decided that the students could write and produce movies for the Trust’s historic walking tours that could be accessed via – Aurasma – a location-based, augmented-reality smartphone app (or a device provided by the Trust). What happened to Aurasma?

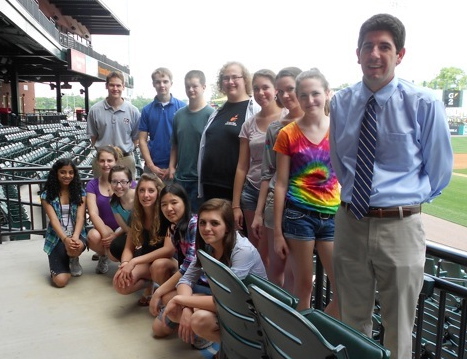
The students were well aware of the project before May, but we unfortunately had no time before then to begin writing the script. In mid-May 2012, Mr. Roe joined my students for two days of collaborative writing. Their scripts focused on two major aspects of York(town) history: 1. York was the political center of the colonies during part of the American Revolution. 2. The Articles of Confederation were completed and signed in York, making it the nation’s first capital. Two groups (of approximately 6 students each) wrote competing scripts for both of the movies. Mr. Roe read the scripts for historical and contextual accuracy and made notes where appropriate. After rewrites were completed, they spent several days writing shot lists and preparing equipment for the shoot. With the exception of a “student on loan” from the TV production class, none of the students had prior experience with equipment or acting.

Students can do amazing things! It’s not until your own students complete a colossal project, that you truly begin to appreciate their capabilities. ~ Greg Wimmer

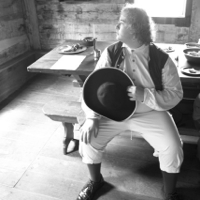
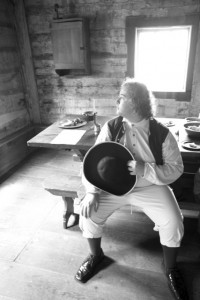
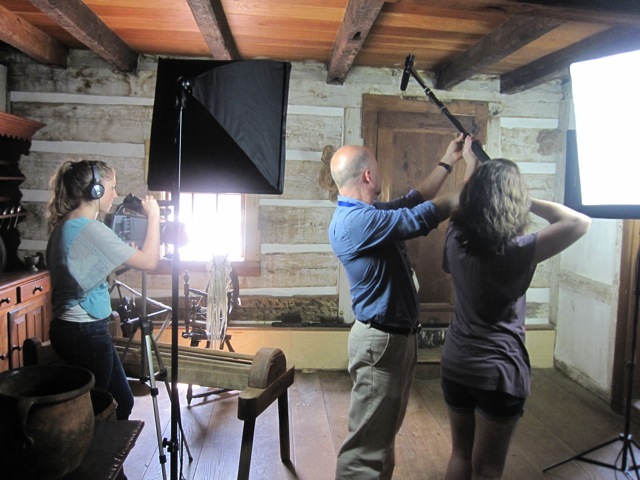
The first day of shooting took place at the Gates House and Golden Plough Tavern, both built in the mid-Eighteenth Century. Lighting and acting jitters proved to be the biggest hurdles, but we amazingly made it through all of the scenes in about 3 hours. While on set, the students were shocked with amount of detail involved with shooting such a short film. Their respect for film and movie-making increased dramatical over the course of the afternoon.

Filming for day 2 required the students to prep and shoot on the spot with random merchants in Central Market York. Two groups fanned out, asked for participation, and held up cue cards during filming. We also had location shoots scheduled for that afternoon, requiring students to set up and tear down several times. By the end of day 2, the students were exhausted and ready to get back to school.

Making Of Video

They spent the next week tying the project together. Two groups edited the videos separately, one group worked with Aurasma, and the other group prepped for the “making of” video. The groups that edited were shocked with the painstaking process of parcelling the movie together. They ran in to one or two continuity issues while piecing together scenes, requiring creative editing on their part. The two girls who worked on Aurasma ironed out the dilemma of image-based vs. location-based markers. They also took the liberty of creating a YouTube channel for the Heritage Trust as well as other accounts necessary to manage the videos and augmented reality program. The final group helped to create the raw footage for the “making of” video. They devised questions, created a set, and interviewed each of the students in class. They also interviewed Mr. Roe and myself for the video. They spent their final class presenting all of their videos, accounts, and reflections to Mr. Roe. He was thoroughly impressed with their final product and invited future classes to create more content for the Trust.

Lessons Learned:

Jump In – While I am very comfortable with iMovie, I knew little about the movie-making process required to complete “professional” videos. The Trust project gave me the opportunity to learn with the students and collectively tap our creativity. Two years ago, my AP students completed an archaeological dig at an early Nineteenth Century home behind our high school. I worked closely with someone from the Anthropology Department of a local university to organize the event. Going in to the project, I had zero knowledge on the processes involved in such a project. But that’s the point. Showing students that you can (gently) throw caution in to the wind and work together to create something unique and original.

Don’t trust technology and expecting the unexpected – When we returned to the high school at the end of the first day, we needed to download our video from the camera card to make room on the disk for day 2. Much to our surprise, NONE of the video files were there. After much jiggling and encouragement (and 45 minutes later), the computer read the files. I have honestly never watched a file transfer so closely in my life. In that situation, I would not have known how to tell students that their hard work was for nothing. Thankfully, things worked out!

Students can do amazing things! – Like many teachers, I spend a good deal of time looking at blog posts and twitter links to projects created by other classes. It is not until your own students complete a colossal project, that you truly begin to understand the their capabilities. At the same time, the students were giddy about their final product and recognized that teamwork in an academic setting makes for positive results.

Greg Wimmer is the Social Studies Department Chair at Central York High School. He’s in his 10th year of teaching – AP US History and Honors Global Studies. He describes himself as “a husband, father, teacher, and collaborator, I commit myself personally and professional to producing creative avenues for growth. Over the past 9 years, I have searched for new ways to build student understanding through collaboration and ingenuity.” Greg can be reached via Twitter@gregwim

Photo credits: Greg Wimmer

Reflections on Working with iBook Author

At the core of the creative process is the willingness to step back, reflect on what you’ve accomplished, ask how it’s going and then get back to working on it some more. So after a few weeks of using iBooks Author (IBA), I thought it was time to practice what I preach. I’ll use this post to explore my initial reaction to working with IBA framed with by thoughts on the reflective process. A good warm up for a keynote I’m giving on the reflective process in a few weeks.

Observe
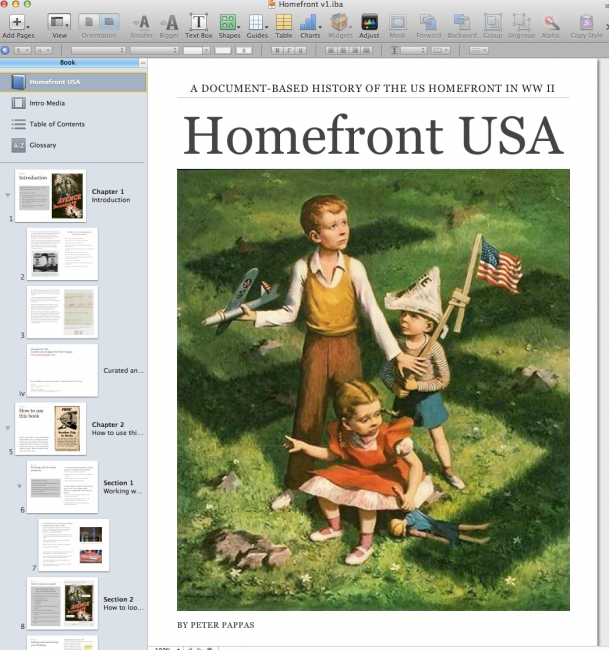
I got my first iPad recently (I skipped versions 1 and 2) and was very excited about using the new iBook Author program to create an iBook. As I took a closer look at IBA, I realized that while it presented some interesting opportunities, IBA had some notable shortcomings. On the plus side, it’s very easy to create an engaging mix of text, images, recordings, and videos. Perfect for my first IBA project – a document-based history iBook. I had already posted lessons on the homefront in World War II and realized there was a wealth of government films, posters and other artifacts that all fell within the public domain. So I got very excited about making an iBook that embodied my approach to empowering the student as historian.

Stay tuned for my finished iBook on Homefront USA. If you’d like to be notified when the book is finished, leave a comment below or send me a tweet @edteck. I’ll be offering a free sample for my beta testers. Here’s a sample of some of the great content that’s available. (1942) Walt Disney made this short film for the US War Production Board

Find patterns
While IBA supports a more interactive reading process – searching text, adding bookmarks, highlighting text, defining words – at the core IBA is designed for traditional instructional methods. For example, iBooks built-in note taking feature is designed to create flashcards (don’t you use flashcards to memorize stuff?). Its built-in test feature can only be used to create an objective questions – not the tools I was looking for to support critical thinking skills. There doesn’t seem to be away to copy and paste text from my books author into some other iPad program. I don’t see ways for students to share their thinking without leaving the iBook.

Videos are very interesting components of iBooks, but here’s the challenge. The more videos you put in the book, the bigger the file size of the book. Not only does iTunes place a 2 gig limit on the size of an iBook, but in practical terms no one wants to fill up their iPod with your book. One option is not embed the videos, and instead, link to them with a YouTube widget. That keeps your iBook’s file size smaller, but it means your reader will need to be online and not in a school network environment that blocks YouTube.

Ask for help
I spent a lot of time on Apple discussion groups reading IBA-related threads, and posting questions of my own. I posting a poll on Twitter to ask educators what they thought about the YouTube link vs embed the video question. Results – nearly 90% of them voted to embed the videos into the book. Reflection can be a social experience. Framing questions and sharing your progress forces you to construct models that capture what you’ve accomplished and better define the tasks that lie ahead. Hat tip to my friend and colleague Mike Gwaltney who took a look at my concept iBook and offered great feedback.

Share what you’re learning
As I found online resources for using IBA, I posted them to a collection I started at Scoop.it. My Publishing with iBooks Author began to attract viewers, many of whom proved to be great resources for me. As I tweeted out my new online resource finds, more leads came in and I found myself connected to a group of educators exploring the same topic. One contact, Luis Perez, made me realize that I wasn’t taking full advantage of the iBook’s accessibility features. He’s also working on ways to compress video size, and still be able to have caption videos for accessibility.

Motivate yourself with design thinking
Open yourself up to the cycle of planning, execution, reflection you might expect to see in an artist’s studio – it’s addictive. I find myself thinking about and working on this iBook all the time. (that’s why you haven’t seen any posts from me in a few weeks) The self-directed project provides all the essential elements of motivation. I chose the content, process, product and was doing my own evaluation. Through it all, I was exploring the frontier of what I knew and what I didn’t know. After all – this is why project-based learning works.
 

Flip Any YouTube Video into a Lesson with TED-Ed Tools

The folks at TED talks recently launched TED-Ed to serve the mission “of capturing and amplifying the voice of the world’s greatest teachers.” more 
In addition to developing a library of instructional videos, they’ve just added a free set of tools that allow teachers to create customized lessons from existing videos on TED, YouTube or YouTube for Schools. 

Open a free account at TED-Ed. Once you have selected a video, it will publish to it’s own unique URL. You can share the lesson with students and others via e-mail, Facebook, or Twitter. It will exist on its own unique page on TED-Ed, and you can decide who gets to see that page.

Screen shot of TED-Ed interface …  yes, that’s me in the ’80’s

In addition to framing a video for your students, you can create multiple choice and open-ended questions, and add additional readings or activities to each lesson you create. After you have shared your lesson, you can log in at any time to see who viewed your lesson, the number of questions they attempted, the answers they provided, and, in the case of multiple choice questions, the number of questions they got right (with their permission, of course).

Want to know more about flipping your classroom – see more posts on my flip tag.