How to Teach Summarizing: A Critical Learning Skill for Students

Close reading (in the Common Core) requires students to consider text (in it’s different forms) through three lenses: what does it say, how does it say it, and what does it mean to me? Summarizing is an essential skill for learning, but too often in school we simply ask students to “guess” what the teacher (or author) thinks is important.

An essential part of a summary is that it needs to be expressed to an audience. In life, we purposefully craft summaries for a specific audience (directions for the out-of-towner, computer how-to for the technophobe). In school, the tacit audience for most summaries is the teacher. Imagine how a student feels when asked to summarize a textbook passage for the teacher. In effect they have been asked to summarize one expert’s writing for delivery to another expert – the teacher.   “…and remember, be sure to use your own words!”

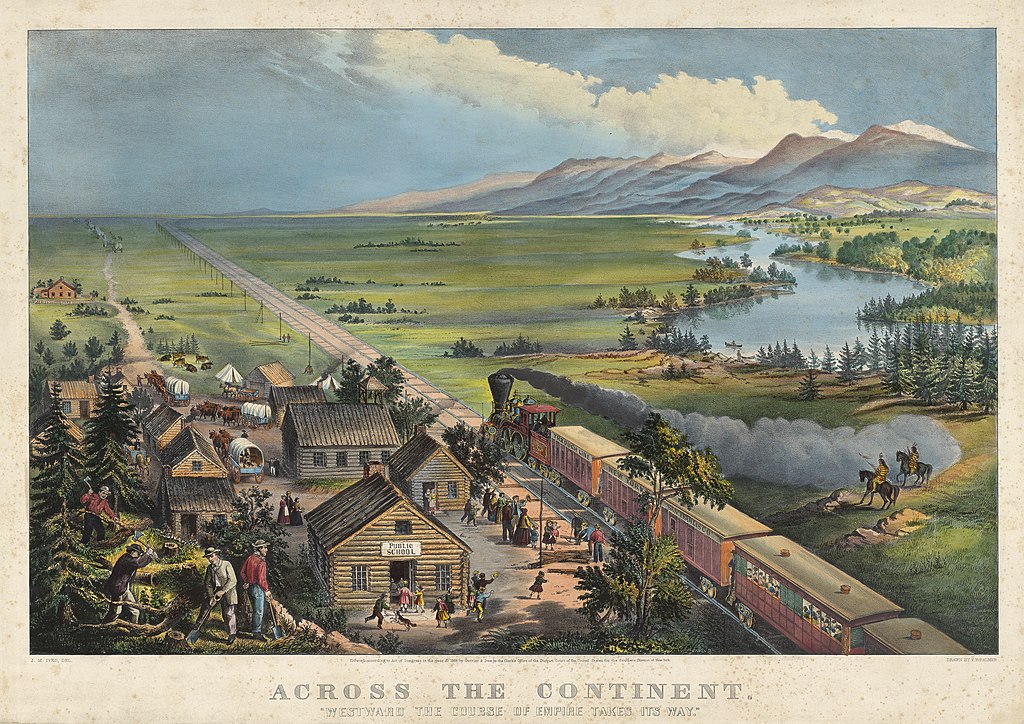
If students are going to learn to summarize they need to be given a chance to genuinely share what they think is important for an audience other than the teacher. Here’s a three step process I followed in a second grade classroom using a popular Currier and Ives print, “Westward the Course of Empire Takes Its Way.” (1868)   Link to larger image

Source

Step 1: Start with the concrete “right there” observations

I projected a digital image on the screen and asked student to talk about the people, things and activities they could identify. They replied, a train, native Americans, a village, people digging, steam from the train, houses, trees, a lake, maybe a harbor, a road, dry grass, covered wagons, poles, mountains, a school house, people working, people waiting for the train, a train track, etc ….

Step 2: Give students a chance to tell what they think is important.

I managed this aspect by asking each student to draw a picture of what they saw in the projected image. The details they included were what they thought was important. Here’s a few samples. Click to enlarge.

West 1
West 2


Step 3: Give students a chance to frame their summary into a narrative explanation for another audience. 

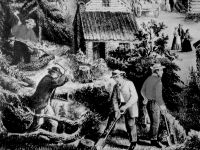
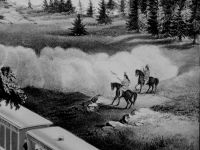
I digitally divided the image into multiple sections and photocopied them (in B &W) into packets of  image details. I gave groups of students the packets and asked them to work in teams to assemble the images into children’s “a story book” with a caption under each image.

Detail 1
Detail 2

Here are some of their captions: (spelling corrected) 

  • Water would come from the mountain and fill the lake. You could get fish and drink water. Water is very important
  • People were moving west. They moved by wagon at first, then but train, which is faster.
  • Life was tough. People had to do everything for themselves.
  • It maybe was lonely because people missed their friends back home.
  • The people were building a town. They could get wood from the trees. It was a small town at first.
  • The Indian see the people coming. They knew things were changing. They got sick from the smoke.
  • The school was different from our school. People had different clothes than us.
  • The train split the old life from the new life.

While summarizing has been shown to be one of the most effective strategies for building content knowledge, that gain only applies when students are allowed to make their own judgements about what’s important and frame their summaries for an audience. When we ask them to “learn” the teacher’s summary – they are reduced to memorizing “another fact.”

When we ask our students to create authentic summaries (with audience and purpose) we give students a chance to reflect on their learning. Instead of simply testing them for factual knowledge, students can be asked: 

  • What did I think was important?
  • How did I share that with my audience?
  • Did my summary match audience and purpose?
  • Is my summary accurate? 
  • Did I use my own words and style?
  • What did I learn from the activity?

For more learning strategies see my blog post: 18 Literacy Strategies for Struggling Readers – Defining, Summarizing and Comparing  

Essential Questions in American History: “The Great Debates”

Essential Questions in American History_ “The Great Debates”

I developed this series as part of my work with Prentice-Hall supporting Daniel Boorstin’s A History of the United States.

Originally it was suggested that I develop lessons on questions such as “Should slavery be extended into the territories?” I argued that most of these issues had been answered, and that it would be more engaging to frame the debates around essential questions. Thus the typical question – “Should the Constitution be ratified?” became “How powerful should the national government be?” Anyone following the reauthorization of NCLB or the proposed health care legislation knows the enduing relevance of that question.

The Great Debates feature consists of twelve debates, one for every unit of the text. Each of these debates contains an introduction that states the topic of the debate, examines the background of this issue, provides information about both the readings and the debaters, and discusses the debate topic from a contemporary perspective. Units feature the conflicting viewpoints of two or more historical figures or organizations and a worksheet that helps students analyze the debate through a series of comprehension and critical thinking questions. Download all Great Debates here

Essential questions / debates include:

Debate  1: How Should Society Balance the Need for Tolerance with the Need to Protect Itself?
Debate  2: How Powerful Should the National Government Be?
Debate  3: Who Should Be Allowed to Vote?
Debate  4: Should Women Have Equal Treatment Under the Law?
Debate  5: How Should Americans Treat the Land?
Debate  6: Has Industrialization Produced More Benefits or More Problems for the Nation?
Debate  7: Should the United States Pursue a Foreign Policy of Isolationism or Interventionism?
Debate  8: What Should the Nation’s Immigration Policy Be?
Debate  9: To What Extent Is the Federal Government Responsible for the Welfare and Security of the Individual?
Debate 10: Is Civil Disobedience Ever Justified as a Method of Political Change?
Debate 11: What Are the Limits of a Free Press?
Debate 12: How Much Should the Nation Invest in Defense?

Picturing the Story – An Interdisciplinary Approach to Culture, Environment, Language, and Learning

Fox and the Heron I’m pleased to served as an advisor to a new interactive resource for teachers and students. “Picturing the Story: Narrative Arts and the Stories They Tell” uses world art from the permanent collection of the Memorial Art Gallery dating from 1500 BCE to the 20th Century. Each work has a story to tell, either visually through imagery and symbol, or indirectly through custom and ritual. The stories reflect sacred beliefs, folk traditions, common human experiences, or unique cultural practices. 

Each work of art includes downloadable resources – the story that inspired it, the culture where it originated, the techniques used to produce it, as well as extensive lesson plans, activity suggestions, and recommendations for further reading. The lessons and stories are designed to be used at a variety of grade levels. 

Downloads resources include: 

  • Classroom Copy – Printable, condensed version of online materials, copy-ready for classroom use. 
  • Curriculum Connections – Organized by subject area:  Social Studies, ELA, Science, Art/Art History. Lesson extensions, children’s book recommendations, and activity suggestions, most with accompanying activity sheets.  
  • Learning Skill-based Activity Sheets:  Printable, copy-ready sheets that address specific learning skills, for classroom use with online materials or printed classroom copy. Includes skills such as constructing comparison, identifying context, recognizing sequence and many more.

Detail - Rama Sita and Lakshmana Return Every work of art has a story to tell. These stories can explain the unexplainable, teach a life lesson, or celebrate our common human experiences. Each work in this collection is approached from three different perspectives: 

1. Picturing the Story: Viewing a work of art while reading/hearing/seeing its associated story. The story is available as on-screen text, as an audio file voiced by a professional storyteller, in ASL video interpretation, or printable pdf version. In addition, an audio “guided-looking tour” of the work of art by a museum educator helps focus attention on important details and promote visual and verbal looking skills. 

2. Reading the Art:  Understanding the symbolism and references used in this work of narrative art. High-quality images of works of art, with zoom-able details, comparison or supporting images, and interpretive information connect elements of the work of art to its associated story.   

3. Connecting the Culture:  Exploring the cultural and functional context of this work of art. Historical and cultural context information, including maps, supporting photos, and other images, connect the work of art and the story to the cultural background, promoting document-based and inquiry-based learning.  Information addressing purpose or function of work, biographical information on artist (as available), geographical and environmental issues, and process and tools of creation allows the objects’ significance to extend into a variety of curriculum areas.

Details from: 
 “The Fox and the Heron”  Flemish, Frans Snyders ca. 1630-1640 
 “Rama, Sita and Lakshmana Return to Ayodhya”  Indian, Rajasthan, Rajput School ca. 1850-1900

Teaching with Historic Photographs: The Google LIFE Photo Archive

Google has posted ten million photographs from the LIFE photo archive on their online gallery of images. It's a great source of material for teachers and students who support a document-based approach to teaching history. 

While I wish that Google had done more to curate the collection with robust search tools and more specific categories, I think that teachers will find it to be an invaluable resource to enable students to "be the historian."

I've put together this quick guide to help you get started.

1.  If you are unfamiliar with the document-based approach to teaching history, you might want to start with a quick visit to my web site Teaching With Documents. There you find many resources including Document-Based Questions (DBQ) for  students grade 2 – high school. Of particular interest are these Student Analysis Guides and for more detailed analysis – my Reading a Visual Document: Guiding Questions. (55KB pdf)

2.  If you are interested in how historic documents can be used to support literacy and critical thinking, visit my sample:  Homefront America in WW II.  It shows how to improve content reading comprehension with source documents framed around essential questions that link the past and present. 

3.  Now that you have some instructional background in using historic photos – it's time to visit the LIFE photo archive hosted by Google. It's organizes images by era and subject. Once you click on an image you get a brief description and some labels (tags) that allow you to find similarly tagged images. 

Lange For example here's one of the archive photos taken by Dorothea Lange in the Migrant Mother Series. It makes a great contrast to the iconic photo she took that day that is more commonly reproduced in textbooks. (You might ask your students which of the five photos they would choose, and why?)

The LIFE archive includes this description with the photograph: Migrant mother Florence Thompson & children photographed by Dorothea Lange.
Location: Nipomo, CA, US
Date taken: 1936
Photographer: Dorothea Lange

And LIFE archive uses these labels for this photo: Lange, Dorothea, Mothers, Fsa Photographers, Us, Tension Or Worrying, American, Poverty, Florence Thompson, Photography By, Migratory, Farmers, California, Expressions, Agriculture, 1930s
4.  If you don't already use Cooliris, I suggest you download this free browser plug in. It presents the photos in a broad panorama that  allows you to scroll through many images.  I've embedded a short clip below of Cooliris in action, so you can see how it can transform your browser when searching for images and videos on Cooliris supported websites.

5.  And remember that all Google image searches allows you to specify image size with this drop down box in the upper left of the screen. 


Picture 2

Teaching American History Grant – The Student as Historian

This week I traveled to Waco TX where I conducted two days of training for an ESC Region 12 "Teaching American History" grant.  I had the chance to work with 5th, 8th and 11th grade teachers on techniques to move the focus of history instruction to document-based instruction. I used resources from my website "Teaching with Documents" and a variety of web 2.0 tools to help teachers see how they can create learning environments that allow students to do the work of the historian. On our second day, teachers used mobile laptops to develop their DBQ's and try out the various web resources.

The response from teachers was very positive. They wrote.

The best part of the workshop is that we had time to practice and digest the information were were using.

A good "kick in the pants" on some big picture ideas.

Made me revisit my own strategies…. Questioning strategies were repeatedly reinforced.

My head is spinning and I am giddy from all the resources and insights.

I need to reevaluate the way I teach. You gave me a lot to think about. 

Got me excited about what I'm going to do next in my classroom.