Save Instructional Time with Screencasts

Here’s a “case study” in lesson design that demonstrates the efficiencies of offloading information transfer via screencasts.

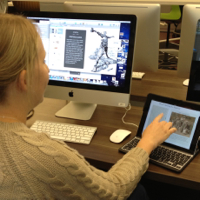
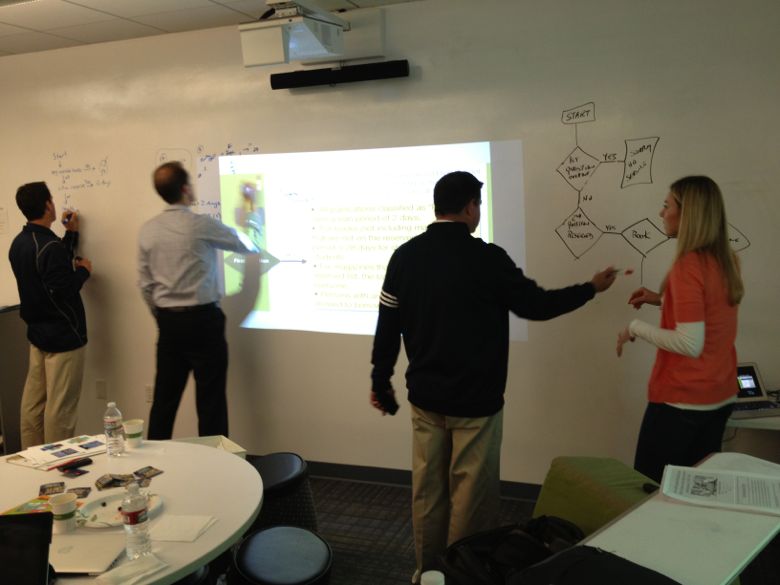
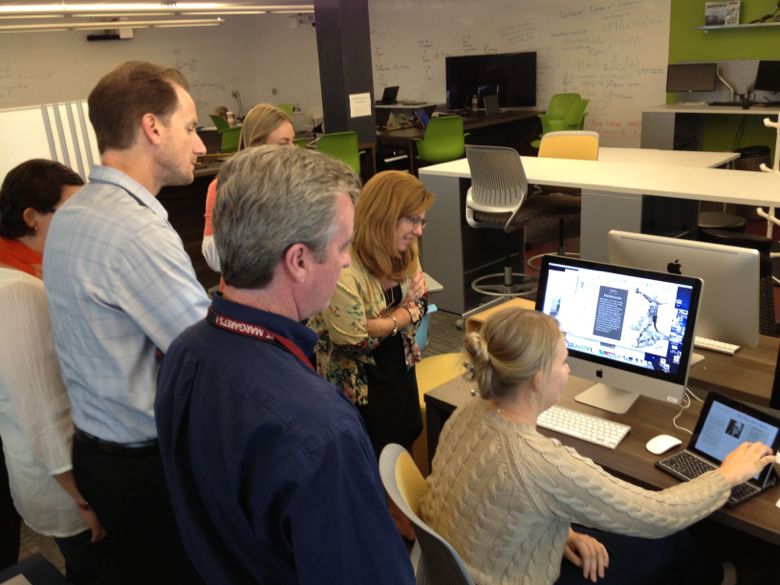
Setting: I’m currently teaching Alaskan Studies at University of Alaska Southeast’s MAT program. My course is teamed with a Multicultural Ed class. We have a cohort of 37 students in the first three weeks of their on-campus summer session. Our face to face class time is critical and we want the students to get to know each other before being sent out across Alaska on their student teaching placements.

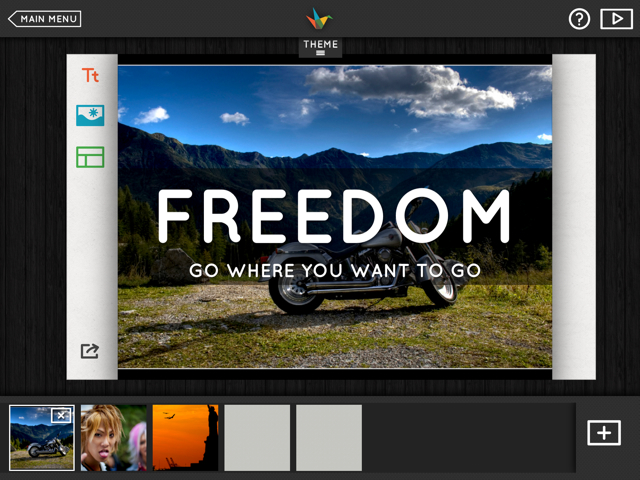
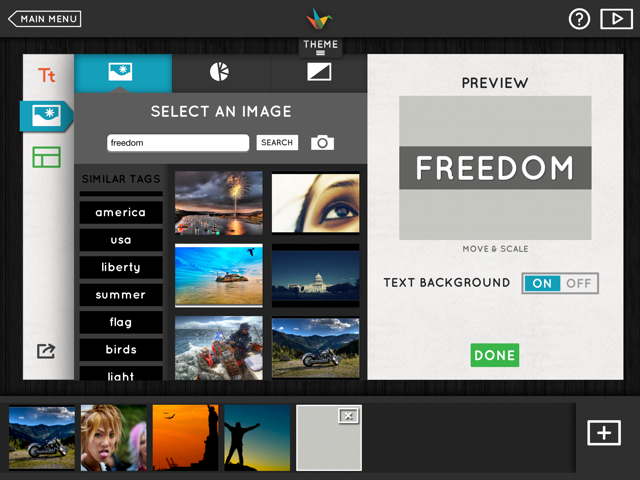
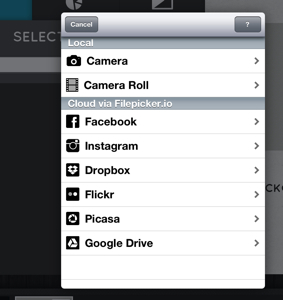
Goal: I wanted to open the course with a place-based activity that gave the students a creative way to share something about themselves. I decided to give them two PBL design options – creating a poetry-inspired Haiku Deck [ Lesson ] or a developing a geo tagged tour using Google MyMaps [ Lesson ]. During the same class, I wanted to get them introduced to WordPress and our course blog where they would be regularly posting.

All this was accomplished in a 3-hour class through use of short screencasts that explained each aspect of Haiku Deck, MyMaps and WordPress. Screencasts were made using Apple Quicktime Player and uploaded to a playlist on YouTube.

Bottom line: By investing about 45 mins to make screencasts (in advance), I freed up three hours of class time for student interaction and production.

You can view student products: Haiku Deck here and MyMaps here 

Here’s some student reactions to the workflow:

The “flipped” structure of this assignment was new to me, but eye-opening. Using YouTube and a course website to provide instruction without eating too much class time opens a number of possibilities for a teacher. Having that time instead for working on an assignment seems helpful for students, and it would free the teacher up to walk the room and help them individually with any problems they might be having. ~ Tim

This activity gave me a sense of fulfillment because I got to go at my own pace and actively create a project within a clear and manageable timeframe….The quick cadence of this activity was driven by Peter’s use of Youtube tutorials to deliver instructions and information about the project. This element all but cut out lecture time along with the inevitable (inferably painstaking) process of verbally answering repeated questions from students. In my experience as a student, verbal lectures and directions often cause me to get bored and then shut down, or to get lost and then shut down. The video clips smoothed over this issue and I anticipate utilizing this method in my future classroom. ~ Devin

It was fun, it has kept the entire class occupied for over two hours and I can see how this is an amazing learning opportunity and activity for the classroom. Allowing students a few different options to choose a way to creatively address a subject, giving them a set amount of time to accomplish the task and then providing a space to view their peers work in order to get ideas for the next activity. Brilliant. ~ Erin

Image credit: Flickr / eGuidry

Where I’m From: Using Haiku Deck to Visualize Place

Where-Im-fromHere’s a lesson I designed for use in my University of Alaska Southeast summer course – ALST 600. I’ll be working with nearly 40 preservice teachers in the secondary MAT program teaching Alaska Studies using a place-based approach that integrates good instructional practice and free ed tech tools across the curriculum. For more on this lesson click here

This lesson features a poem as a prompt for a creative reflection. It also integrates two tools for presentation of the reflection.

  1. After reading Where I’m From, students will use Haiku Deck to design a brief presentation that uses text and images to depict “where they are from.” The presentation should include a a title slide plus 6 slides which explore the place you’re from. Follow this link for ideas on Where to Go with “Where I’m From”
  2. After completing the Haiku Deck presentation, students will create a blog post that includes an embedded version of the presentation and a written response to the question:

What have I learned from this activity and how might I use the learning strategies and / or technology in my teaching placement?

Where I’m From” by George Ella Lyon

I am from clothespins,
from Clorox and carbon-tetrachloride.
I am from the dirt under the back porch.
(Black, glistening,
it tasted like beets.)
I am from the forsythia bush
the Dutch elm
whose long-gone limbs I remember
as if they were my own.

I’m from fudge and eyeglasses,
from Imogene and Alafair.
I’m from the know-it-alls
and the pass-it-ons,
from Perk up! and Pipe down!
I’m from He restoreth my soul
with a cottonball lamb
and ten verses I can say myself.

I’m from Artemus and Billie’s Branch,
fried corn and strong coffee.
From the finger my grandfather lost
to the auger,
the eye my father shut to keep his sight.

Under my bed was a dress box
spilling old pictures,
a sift of lost faces
to drift beneath my dreams.
I am from those moments–
snapped before I budded —
leaf-fall from the family tree.


Use Haiku Deck to Build Academic Vocabulary

Haiku Deck visualize

Haiku Deck is a great iPad app for building academic vocabulary – and its free. It provides a student-friendly tool for teaching common core vocabulary standards with motivation and creativity. Good defining skills are rooted in collaborative negotiation of meaning rather than memorizing glossaries and testing via two-column matching questions. The genius behind Haiku Deck is its simplicity – just type in text and use its built in search tools for related terms and images. With minimal design choices, student can focus on visualizing vocabulary and sharing their thinking with peers.

Haiku Deck add text
Haiku Deck add text

I’m not going to offer a Haiku Deck tutorial. It’s easy to learn, and has some thoughtful online help. Instead let’s look at the steps a student might use to visualize the term “freedom.”

  1. Create a new Haiku Deck.
  2. Type in the term or phrase.
  3. Tap the image icon and Haiku Deck displays a selection of high-quality and copyright-free images. Scroll down for more.
  4. Don’t like the images? The “similar tags” column offers related terms. Tap on one and the image selection updates.
  5. Select an image and the student is offered a chance to “add some additional text.” They could use that space to explain the association between the image and the term.
  6. Tap the + sign and create another slide following the same process.
Haiku deck search
Haiku deck search

I see so many options for using this app. Create decks of synonyms vs antonyms. Let students explore terms for a close reading, defend their choice of images, or contrast multiple meanings. Only have a few iPads? Let the students collaborate in a collective deck. Perhaps the first student picks the image and the next student curates the choice of image in the “additional text.” Have a term that doesn’t turn up any good image matches and you’ve created a chance to explore synonyms in the “similar tags.” Still can’t find relevant images for the term? Then you have a chance to speculate why the system isn’t turning up usable images. BTW – don’t worry about student using inappropriate words. Haiku Deck does a great job of screening those out.

There are lots of options for sharing student work. Completed Haiku decks can be saved to the web and viewed on any device. You can share decks via email or social networks. They can also be embedded in a blog or exported to PowerPoint or Keynote.

Common Core State Standards (CCSS) divide vocabulary among a variety of disciplines and grade levels. The standards focus on multiple meaning, context clues, figurative and connotative meanings and the impact of specific word choices on meaning and tone. Haiku Deck could be used to support all of these goals.

Digital History Workshop – Tech Meets Critical Thinking

I recently spent a few days working with the middle and upper school history department at St. Margaret’s Episcopal School, San Juan Capistrano CA. Shout-out to James Harris (chair) and the department for being great hosts and invigorating to work with.

Photo – teachers are challenged to design Yes-No Decision Diagrams and experience the difference between creating a sequence and merely memorizing one.

yes-noOur goal was a practical hands-on workshop that fused technology, critical thinking, and strategies for students to be the “historian in the classroom.” SMES has implemented iPads at the middle school, and they’ll will be following 9th graders to the upper school next year. We were focused on ways to use iPads for content creation, feedback and reflection. Throughout the workshop, teachers used their iPads to respond to activities via LearningCatalytics (LC) and had guided practice in producing and delivering LC questions. iPads plus student response via LC is a killer app for student engagement.

I created a resource website that gives all the details of the project – but here’s some highlights.

  1. How to select and craft historic documents into DBQs. Key takeaway – use documents that students can interpret with minimal background knowledge, or your just giving them another reading assignment with illustrations.
  2. Summarizing and comparison strategies that work. Key takeaway – are you really asking students to present what they think is important, or are you merely asking them to “guess what I’m thinking?”
  3. How to craft the iPad DBQ. Easy: Haiku Deck. Harder (but worth it) iBooks Author.
  4. Effectively curating information and sharing it with your team – How to use Evernote in the classroom.
  5. How to integrate statistical analysis into the history / social science classroom – nGram Viewer and GapMinder.

By the end of the workshop teachers had created a variety of DBQs using Haiku Deck and iBooks Author. Lots of ideas for using HistoryPin, Evernote, nGram Viewer and GapMinder. While it wasn’t a definitive tech training, I think they left with critical lens to reflect on their practice and enough knowledge about the programs to see their feasibility for use in their classrooms. Not to mention “high-fives” when they got to show off the first iBooks they created.

Photo – teacher demonstrates her newly created iBook on US Imperialism.
ibook-test

Here’s a few comments from the participants:

  • All of the examples and learning experiences you chose for us were right on the mark. They were relevant and forced us to reflect on our practices and the students’ experience when in our rooms. I have a lot to think about and a lot to change! Now if only it was the summer!
  • Liked the interaction and really appreciated the hands on aspects of the training. I appreciate that you focused on higher- ordered thinking because I think that sometimes I hear some folks talking about iPads as if they (in and of themselves) are going to foster higher levels of thinking. In my experience, you still have to work really hard to make sure the kids are engaging in meaningful ways!
  • Loved learning about learning catalytics. I will definitely start using this with the next unit, especially to focus on building reading comprehension skills with my sixth graders. The haiku deck will work to introduce units in a visual way and to have students demonstrate understanding. The main thing I focused on yesterday though was the need to be more deliberate in providing rigorous higher level thinking activities for students. I think I do a good job of this, but I want to do an audit on the curriculum to see where exactly I am providing these opportunities for students.
  • I am really enjoying so many aspects of this. It would be great for more SMES teachers to be involved. It’s practical and philosophical. The tone is upbeat and helpful and the flexibility of meeting us where we are at is terrific. There are certainly a few things I’ll do differently.
  • I really liked all of the concrete ideas of apps and teaching strategies I can use in my classroom. I feel energized to go back and change all of my units, which does feel quite overwhelming though! I feel like I am doing so much wrong, but then again, I am grateful that I have ideas for where I need to go.
  • I especially liked discovering Learning Catalytics and Evernote. I could see both being very applicable to the classroom. Learning Catalytics is the tool I have been needing in order to keep middle schoolers engaged. I have been looking for ways to help them become more active learners, and this will be an excellent tool for that purpose.
  • Really great day- I so appreciate your conversation about analysis! I am now thinking about new ways to increase rigor and I actually think it will make my class more enjoyable. This line stuck with me, “When do we stop modeling for students… and have the courage to be less helpful!?” I feel like I am always answering student questions with, “I don’t know… can YOU?” or, “I really hope you figure that out!” I know it makes my students uncomfortable, but I THINK it makes them uncomfortable in a way that helps them learn to be problem solvers. Thank you for sharing strategies with my colleagues to empower us to be more courageous in the way we deliver instruction to help foster more divergent thinkers

As James Harris, the department chair, later wrote me in an email - 

At dinner on Sunday, as we discussed the school, the department, and the needs of both, you mentioned the danger of “shiny objects” – educational technology pursued solely for the sake of it. I’ve always considered myself wary of ed. tech reps and their products. So often, in my opinion, the costs of hurriedly implementing their products – “critical thinking” activities over true analysis, etc. – often far exceed the limited gains they may bring. That is why I was so pleased with our time together and with the message you brought to our faculty. When you said that you were “all about what is simplest and most effective” to aid student learning, be that “a paper and pencil” or programs such as Learning Catalytics, I knew we were in great shape.

In following up with the department over the past 48 hours I can say confidently that your time here was a success on a variety of levels. First, and perhaps most importantly, you gently challenged us all to reflect on our own teaching practices and reconsider our definitions of “analysis”, “student learning”, and “rigor”. It is quite easy to fall into a pattern after several years of teaching with a certain model and our discussions this week on how best to challenge our students forced us all to reflect on our own strengths and weaknesses. Furthermore, your modeling of programs such as Learning Catalytics and Haiku Deck opened my eyes to one of the simplest, most reasonable fusions of traditional / technological pedagogy I have seen to date. Our faculty left so excited about the possibilities ahead of them yet reassured as to the value of their previous best practices.

Haiku Deck – Free Presentation App for iPad

haiku deck

I’m prepping for an “iPad in the Classroom” workshop and I thought I’d try Haiku Deck – a free presentation app for the iPad. It’s an impressive and easy to use tool for creating a knock-out presentation on the iPad – a great way for teachers and students to quickly share their ideas with the classroom and the digital world beyond. Here’s a deck I created in a few minutes. I used the same image but typically you’d have different images for every slide.

haiku select image

Haiku Deck relies on strong visual content and minimal use of text. Think Edward Tufte meets Pecha Kucha. Creating a slide is simple. Add some text – there’s not much room, so keep it brief. You can insert your own image from a variety of sources – take a photo with the iPad or grab an image from your iPad camera roll, Instagram, Google Drive or DropBox. Haiku Deck takes the words you’ve used on the slide and runs a fast search for Creative Commons images. It even adds the sources in the small font at the base of your finished slide. If you don’t like the search from the words you’ve used in your slide, you can type in your own search term.

When you’re done you have a variety of ways to share. You can project from your iPad or push out to the big screen via Apple TV. You can post to a variety of social media – like Facebook or Twitter. Email it as a PPT or Keynote. Embed it on your blog. Or just keep it private.

If you want to reorder a slide, press and hold down on a slide in the sorter view at the bottom of the screen. It will enlarge and you can drag it to another point in the deck. (Be warned that the app does not run on an iPad 1.)

I can’t promise that the Creative Commons search feature will play nice with your school web filter (actually I hope you don’t have filters). But I did harness my inner 8th grader to search on a variety of “naughty words.” You’ll see my test below turned up a variety of innocuous images and even mocked me with a “aww you are making me blush.” 

haiku search