When Google Couldn’t Help: How AI Helped Me Track Down an Elusive Image

George Tooker's "Government Bureau" (1956)

We’ve all grown accustomed to turning to search engines when struggling to remember a detail or fact. But recently I found myself in a situation where “Googling” was useless. I was trying to recall a work of art without knowing the artist, title, or even the country of origin.

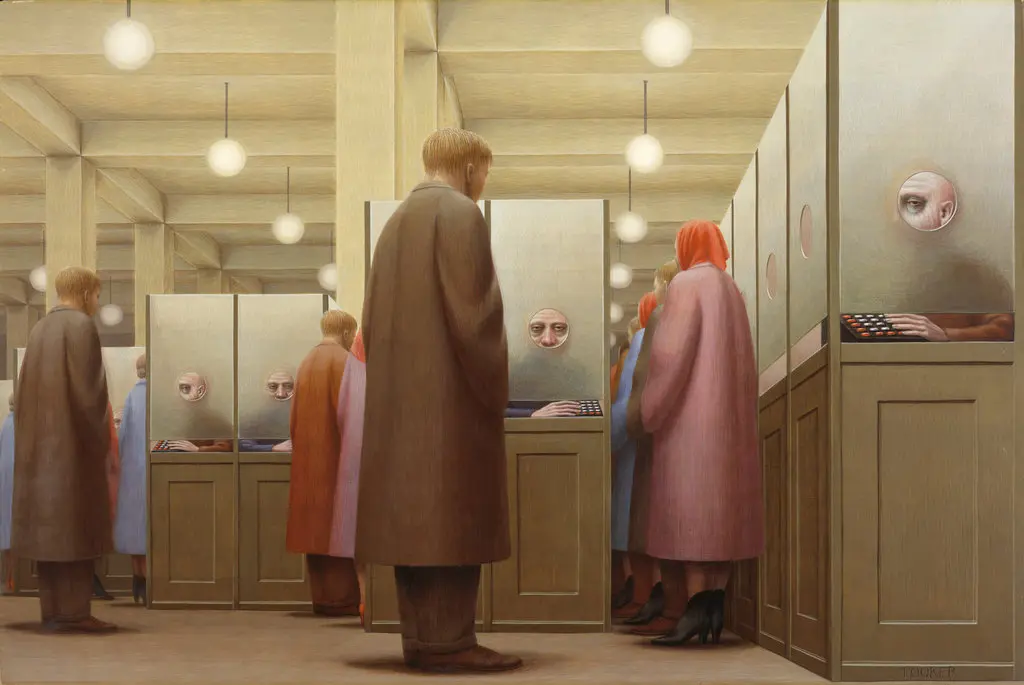
Note: At some point in my life I had seen George Tooker’s “Government Bureau” (1956) – a striking image (above) that had burrowed into my memory. But I lacked the descriptors that would work in a traditional text-based search.

Armed with nothing but a vague sense of the era and the artwork’s elusive “feel,” I turned to Meta AI for assistance. What followed was a bit magical—a journey through memory cubicles that led me to the masterpiece I sought.

It began with this prompt

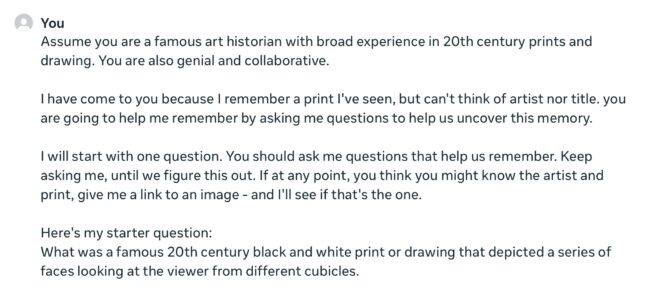
You’ll notice that my prompt tells Meta AI “who it is.” That’s a critical step in getting any AI to approach the task from a more specified perspective.

Next, I outlined the Q and A process we would use. This was essential, since I wanted the AI to ask follow up questions to narrow in on a solution. For fun, I gave it a bit personality – “genial and collaborative.” Also note that I incorrectly say it’s a black and white image.

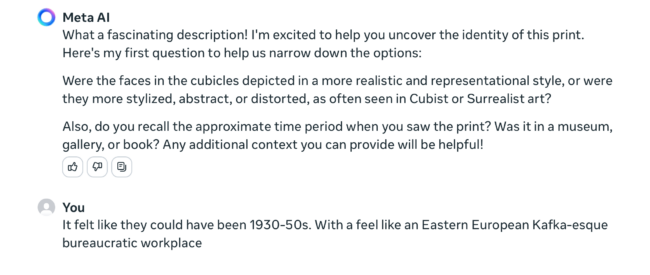
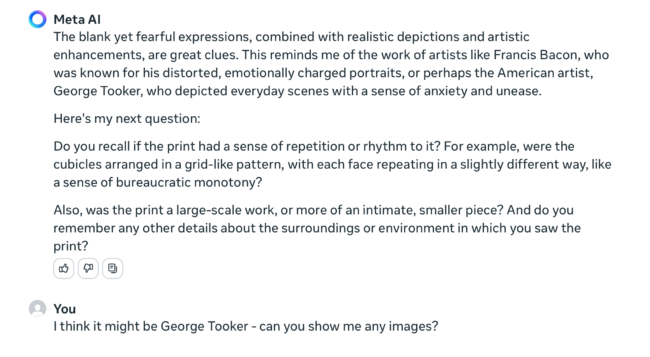
Here’s a screenshots of Meta AI’s first response- the questions were logical – style, time period and where I might have seen it.

My response gave a date range but really focused on how the “feel” of the image in my memory – I said “Eastern European Kafka-esque bureaucratic workplace.”

In its second response, Meta AI noted my “Kafka-esque vibe” (a clever rephrasing). It pointed me to artists like Grosz and Dix. (I checked those artists and didn’t see any possibilities) And it posed a few more questions on how I remembered the faces and tone.

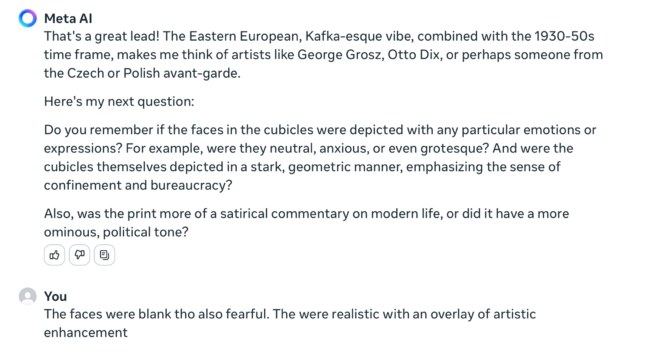
The best I could recall about the faces was they were blank and fearful. I added that the faces were “realistic with an overlay of artistic enhancement.” (Not the best description I’ve ever crafted.)

By Meta AI’s third response, it had correctly identified Tooker as a possibility.

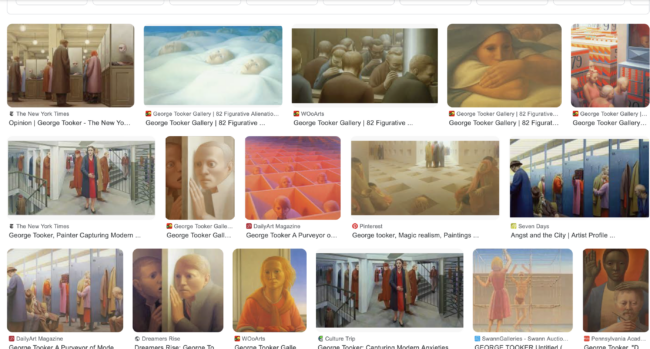
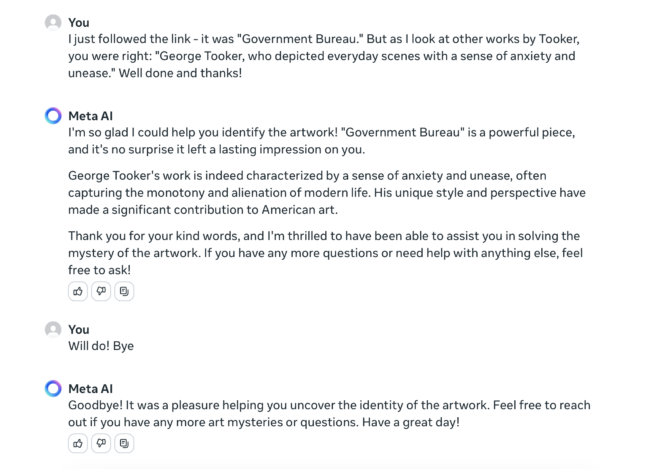
I suddenly remembered the artist and asked to see some samples. Meta AI then pointed me to Google search of Tooker works (below) and there it was in upper left.

I was so impressed, I congratulated Meta AI for solving my query in such short order. It seemed like the thing to do. After some pleasantries, we signed off.

Comparing AIs

After this success with Meta AI, I thought I’d try the same prompt with other leading AIs. Note: I pretended not to know the answer and kept my responses limited to just the information I gave to Meta AI on the first run.

I was using the free versions. Here’s how they compared:

  • Meta AI (above)- Identified artist in 3rd response and linked to “Government Bureau” in 4th.
  • MicroSoft CoPilot – Identified artist and suggested it might be “Government Bureau” in 3rd response.
  • Anthropic Claude – On it’s 9th response, it mentions Tooker but hallucinated a title he did not create.
  • Google Gemini – Keeps suggesting artists and on 6th response, it gave up and wished me luck.
  • Perplexity – gives up after 5th response. (But it did begin with a fun opening response: “clears throat and adjusts monocle. Ah, I believe I may know the work you are describing, my dear fellow! Let me ask you a few questions to jog your memory”
  • ChatGPT 3.5 – patiently guessed and seemed to get closer to style. But I quit after 11th response when its suggestions began to drift off track.

Here’s why AI beats a traditional search engine in this use case:

A traditional search engine like Google relies heavily on keywords and metadata. When you search for an image, it looks for matches based on text associated with images across the web, such as titles, descriptions, tags, and other textual content. This means you need to have some specific information or keywords related to the image to start your search.

AI-driven image retrieval systems use machine learning algorithms to understand the content of the images themselves. They can analyze visual elements such as color, shape, texture, and even abstract concepts like the emotion an image might evoke. This allows them to find matches based on visual similarity rather than relying solely on text descriptors.

So, if you’re using AI for this purpose, you don’t necessarily need to know specific details about the artwork. You can provide a description of what you remember, and the AI can interpret that description to find images that are visually similar to what you’re describing. It’s a more intuitive process that mimics the way humans might try to find something based on vague recollections, rather than the precise keyword matching used by traditional search engines

Create Cool 3D Cartoons with Toontastic 3D

Google just launched a complete overhaul of the popular Toontastic app – meet Toontastic 3D – a 3D cartoon storytelling tool. It really hits a sweet spot between ease of use and just enough customization to unleash your inner Pixar.

While it’s being promoted for elementary and middle school students, I think people of all ages could have fun with it. It’s a free download and runs on iOS or Android phones, tablets and “some” Chromebooks.

You begin the process by picking a story organizer. Choices include “Short Story” with 3 scenes, “Classic Story” with 5 scenes and Science Report. (Much cooler than Powerpoint and shown below). Or you can create your own story structure.

The app provides a step-by-step guide for organizing your cartoon. For example the “Classic Story” includes – set up, conflict, challenges, climax and resolution (with helpful thinking prompts). Then select and customize your characters. You can even use an in-app tool to add your face to a character. (Yes, that’s me below.) Next you’re guided through the design of each scene. You move your characters in the scene by tapping on the screen and adding your voice tracks for each. You can also activate their special actions (in this video, my character can break dance). Many of the background objects are interactive and can be activated with a tap. Finally you can add mood music from the app library with some simple controls to customize the soundtrack. Scenes can be reorganized before saving your final project.

Your finished cartoons can be save locally in-app or on the device. You can export them to your device’s photos app or library. The finished high-resolution video is saved as an mp4 and easy to share – you can import it into projects or upload to YouTube or other sharing services. Once it’s on YouTube it’s easy to embed into a blog or other Google tool.

Best of all, it’s designed to be school friendly – no ads or in-app purchases, no email or login required and you can even use it off line. Google states that they do not store your finished content nor any user info.

I plan to use this app with my EdTech Methods class. I’ll share some of their work when I do. Till then, here’s a finished video by DeeDee I found for you to enjoy.

Tell Then and Now Image Stories with JuxtaposeJS

Created with two archival photographs
Tom Torlino – a student at Carlisle Indian School, 1882 and 1885.
More about Tom at my post on Medium.
Pro tip: get the eyes aligned

I’m excited about JuxtaposeJS – a new free web-based “storytelling” tool from the Knight Lab at Northwestern University. As they describe it: “JuxtaposeJS helps storytellers compare two pieces of similar media, including photos, and GIFs. It’s ideal for highlighting then/now stories that explain slow changes over time (growth of a city skyline, regrowth of a forest, etc.) or before/after stories that show the impact of single dramatic events (natural disasters, protests, wars, etc.).”

I think it’s a great tool for students and teachers who want to explore themes of continuity and change. While it could be used to compare and contrast in subjects across the curriculum, I’ve created a few examples using historical content.

I selected pairs of historical and contemporary images with elements that are consistent and aspects that change. But the challenge is to size and crop the images so that the consistencies align. To accomplish that, I used another free tool – Google Slides – to position and crop each pair of images and export as JPGs before importing into JuxtaposeJS. (Scroll to the bottom of this post for my workflow video that illustrates each step of the process.)

 
Timeline slider

Created with archival photograph paired with a screenshot I took from Google Street View.
Portland Ore Engine No 2 – 510 NW 3rd Ave.
Pro tip: choose a historic image that is shot from an angle similar to Street View. Street View is made up of a series of still images. You may need to navigate slightly on the street to get a shot that matches. Street View has been shooting for years. Use the drop down timeline (highlighted here) in upper left of Street View that has the angle and lighting that works best for your Juxtapose

Archival photograph of paired with photograph I took in the same location.
Taylor Hotel entrance Circa 1920
Pro tip: bring along a print out of historic photo to line up you new shot. Maybe you’ll get lucky (like I did) and find a SUV parked in the right spot. 

Here’s a video that details my workflow for this project
You’ll see how I used the transparency feature in Google Slides to create two well-aligned images that I imported into JuxtaposeJS via Dropbox. JuxtaposeJS supports both vertical and horizontal sliders. Pick the orientation that does a better job of concealing or revealing the continuity and change. Once the images are “published” at JuxtaposeJS they can be imported into your web via an iFrame embed as I have done in this post.

Image credits:
Tom Torlino
Portland Ore Engine No 2
Taylor Hotel Entrance. 347 SW 3rd Ave Portland Oregon Courtesy of Oregon Nikkei Legacy Center ONLC 533

PD Should Model What You Want To See in the Classroom

It’s August and that’s back to school time. All across America teachers are sitting is staff development workshops. Some sessions are valuable, others will leave teachers wishing they could be setting up their classrooms.

Recently I had the chance to work with Marta Turner / NWRESD to design and administer a staff development grant from the Library of Congress and the TPS Western Region. The goal of the project was to give participating teachers skills in designing historical thinking skills lessons utilizing primary source documents from the Library of Congress’ vast online collection.

I saw it as a chance to demonstrate my first law of staff development
PD should model what you want to see in the classroom. 

So in addition to mastering historical thinking skills utilizing LOC.gov, this workshop became a demonstration of the following:

How to flip your class:
Orientation to the LOC site was something better done on participants’ own time than in whole group. We utilized Versal (a free and stylish LMS) to offload that task to a flipped pre-course. Teachers arrived at the workshop with a working knowledge of LOC online resources , strategies for teaching historical thinking skills and ideas (and LOC documents) for their demonstration lesson.

Thanks for shepherding us through the process – a motivating demonstration of what’s possible with kids ~ Paul Monheimer, participant

Leveraging tech tools for design and collaboration:
Teachers collaborated in the pre-course using Google docs to design and curate examples of historical sourcing. I created YouTube tutorials to use throughout the pre-course and workshop session to blend the learning.

Teachers collected historical documents from the LOC into shared Google slides. This facilitated easy peer review and also served as an archive for materials in preparation for transfer to iBooks Author.

We used Google Hangouts to explore “how historians think” with Dr. Adam Franklin-Lyons – associate professor of history at Marlboro College.

Motivate with project-based learning:
Teachers were pleased that the workshop would produce lessons they could use. But right from the start they knew that they were not simply getting together to learn some strategies and create some lessons. They had an iBook to create and we only had two days onsite to do so. As educators, we talk about value of the authentic audience for our students but it applies to our teacher PD as well. (I held myself accountable to the same standard, since the major elements of the workshop were shared on my blog and via the Versal pre-course.)

Our participant teachers left the 2-day workshop energized knowing that their work was documented for our grant funders to replicate in other projects and proud that their lessons would be available as an iBook on iTunes in 51 countries around the world. Note: Time did not allow me to teach iBooks Author to the teachers, so I designed and edited the iBook later. For more on how I teach iBooks Author, see this iBA workflow post.

We are proud to share our iBook The Student As Historian ~ Teaching with Primary Sources from the Library of Congress. This ebook contains both the training materials and fourteen teacher-designed document-based questions for grades 4 through high school.

The lessons draw from a fascinating collection of text and multimedia content – documents, posters, photographs, audio, video, letter and other ephemera. “Stop-and-think” prompts based on CCSS skills guide students through analysis of the primary sources. Essential questions foster critical thinking. All documents include links back to the original source material so readers can remix the content into their own curated collections.

Download free at iTunes here. It’s viewable on Mac, iPad and iPhone 5 or newer. If those options don’t work for you, you can download it as a PDF The Student as Historian-PDF version 14 MB.  (Interactive widgets will not function in pdf version)

Note: This is not an official publication of the Library of Congress and does not represent official Library of Congress communications.

Image credit: stokpic / Pixabay
Creative Commons CC0 Source

Flip PD with Versal and Create More Collaboration Time

Deconstructing Currier and Ives Deconstructing Currier and Ives

Last week Marta Turner (NWRESD) and I had the privilege to work with a team of Oregon teachers in a workshop “The Student as Historian.” The session was jointly sponsored by the Library of Congress, the TPS Western RegionNWRESD.

We preceded the onsite workshop with some “flipped” learning using Versal (a free and stylish LMS) and leveraged our on-site workshop time to design lessons using primary sources from the Library of Congress digital resources for teachers.  

Versal provides for easy import of a variety of other web tools with a simple drag and drop. I used it embed a number of Disqus forums, YouTube videos and collaborative Google Docs. Before we even met, participating teachers were able to use Versal to get to know each other, use tutorials from the Library of Congress website, study historical thinking skills, pose and respond to historical sourcing scenarios and post research proposals. During our onsite workshop I continued to use Versal as our LMS to host our live Google Hangout and collaboratively design research projects via an embedded Google Slide show. For more on what Versal can do click here.

Here’s our Versal pre-course below. For a direct link click here
Scroll to bottom of embed – use the 3 bars in lower left to navigate the lessons. Or click “next lesson” in lower right.