Do Not Use iBooks Author to Author an iBook

After loads of research and design work, this week I eagerly uploaded my interactive, multi-touch book -“Why We Fight: WWII and the Art of Public Persuasion” for approval at the iBookstore.

A day after my upload, I received an error ticket for using the term “iBook” within my work.

Use of Apple Inc. Copyrighted Terms (Description) Books must not:
Use the phrase “iBook” to describe the book. iBooks is the trademark for Apple’s book reading software, and iBooks Author is the trademark for its electronic book creation software. Books created with Apple’s iBooks Author software and/or sold on the iBookstore should be described as a book, ebook, electronic book or interactive book, but not an “”iBook.”

Perhaps I’ll rewrite into something like “Here’s how to navigate this book on your Pad.”

How-To Tips for Working With iBooks Author

I’ve spent the last month creating my first iBook – “Why We Fight: WWII and the Art of Public Persuasion.” It’s in the “approval” process at the iBookstore. (Look for a post when it’s available).
I learned a lot about making multi-touch iBooks the hard way – trial and error. I thought I’d share a few tips for using iBooks Author (IBA). This post is not an IBA step-by-step. It assumes you are already a bit familiar with IBA.  Note: I have collected IBA how-to’s at this Scoop-It.

Carefully plan your pages

Here’s one big lesson I learned in IBA  - you can’t move pages. Chapters and sections of chapters can be easily re-arranged in an iBook. Just highlight them and slide to new location. You can also right click a chapter or section and cut, copy, duplicate and paste. You can even use those commands to move them between two different IBA projects that you have open. BUT moving pages is not allowed. I should note that my book had very little text and loads of graphics and widgets. So, for example, if I wanted my current page 10 to become page 5, I had to recreate pages 6-9 as part of the process. Lesson learned – plan ahead! (This is not a problem if you have a largely text oriented iBook. You could easily cut the text from page 10 and insert it into into a place in the flowing text that would put it at page 5.)

Size matters

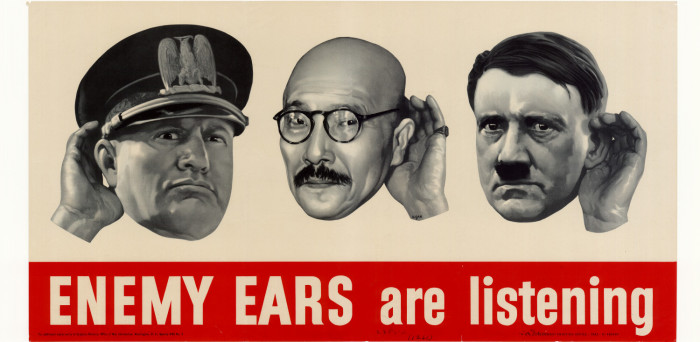
File size that is. I planned a multimedia-rich look at the US propaganda effort in WWII. Lots of videos, audios and poster art meant that my iBook file was quickly becoming too large. I used video files from Archive.org that that were in mp4 format. IBA only accepts m4v format and it’s very picky about the types of m4v it accepts. I tried converting mp4 files using Handbrake (a very popular free app). IBA wouldn’t accept Handbrake converted m4v files. I used QuickTime player to convert by opening the mp4 and using QT File / export, but for some reason QT greatly increases file size when exporting.

My final solution to growing file size was three fold. One – I invested in Apple Compressor to convert mp4 to m4v and compress file size. Two – I used iMovie to edit some to the movies to tighten them up. Three – My planned iBook eventually got split into 3 iBooks of smaller file size. One other solution you could use would be to not put the video file in the iBook, but to link to it on YouTube via an embedded widget. (You can easily create a widget for that at a free site – Class Widgets).

Who wrote my iBook? 

IBA allows you to preview your iBook by connecting an iPad and choosing File / Preview. It gives you the choice to either preview the entire book on your iPad or just preview the section you are working on. For the longest time, when I previewed my iBook it would appear on my iPad as “Author Unknown.” Finally, I figured out I needed to set the title and author in the “Document” section of the Inspector. Lesson learned.

Stylin’

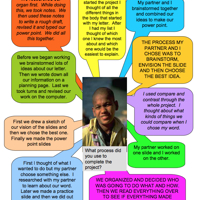
I decided to use frequent stop and think prompts in the book to focus students on reflection. It was also away to reinforce CCSS skills throughout the book in a user friendly manner. I created a yellow post-it style text box and liked the way it looked. One I had the format I wanted I was able to copy and paste using the tool bar icons. BTW  - You can also edit / copy and edit / paste widgets. A nice way to move them around. 

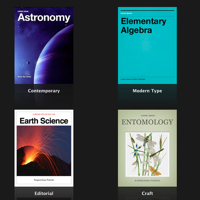
Don’t mess with chapter image placeholders

My iBook was loaded with media content, so I used the “Basic” template offered by IBA. One of the first things I did was strip it down to blank white pages. My mistake was revealed when I looked at my iBook in the “Table of Contents” view. I noticed that my chapter start pages lacked the graphics I had put on them. I finally figured it out.

When you create a new chapter you are offered an image place holder on the right side of the page. Don’t delete it like I did. Instead, just drag your image into it. That way the image will appear in the ”Table of Contents” view. Once I deleted the image placeholders there was no way to get them back. You guessed it – I needed to create a “new chapter” and rebuild all the content. Ouch!

Customize layout for your widgets

I was going for a very clean minimal look that would showcase the content. So I wanted my widgets to have minimal styling.

To do that  - go to Widget in the Inspector panel. Choose “Layout” tab and deselect background. Lots of other options for Label and Caption. You can also show thumbnails (as I did on the left) by selecting them in the “Interaction” tab.

Sneaking up on hyperlinks and bookmarks

You can hyperlink from the iBook to external links or create Bookmarks to jump between content within your iBook. Use the Inspector to create them. Here’s a few tips. You can only hyperlink from text. No image hyperlinks. You can hyperlink from any body text or text within inserted text boxes to URLs outside your iBook. Be sure to copy / paste you new URL into the Inspector or you’ll be creating a hyperlink to Apple.

Bookmarks are a bit fussier. First you need to turn some text in your iBook into a bookmark using the Inspector  - select the text and click on the + sign to add new bookmark. Here’s the catch – you can only create a bookmark from body text – you cannot bookmark text in a text box. Once you have anchored a bookmark you select some other text in your iBook and use Inspector to hyperlink to your bookmark.

Working with hyperlinks after you create them is a bit quirky. If you click on a previously created hyperlink in your iBook, it work. In other words you’ll leave the iBook and go to the URL in Safari. So you have to “sneak up” on hyperlinks. Click your cursor into adjacent text and use your keyboard arrows to navigate into the hyperlinked text. It will go active and you can use the Inspector to make changes. 

Where’s the Find and Replace?

IBA has a some good editing tools. You can use Edit / Proofreading to get to a reasonable proofreading panel. I found it useful. Looking for the find and replace feature? Use keyboard Command – F.

Why We Fight: Selling a War to America

My iBook Why We Fight: WWII and the Art of Public Persuasion free at iBookstore

Designed as multi-touch student text, it focuses on the American response to WWII – especially the very active role played by government in shaping American behavior and attitudes. “Why We Fight” gives students a chance to step back to the 1940s and experience the perspective of Americans responding to the Pearl Harbor attack and WWII. Americans were hungry for information, and Washington responded with a PR blitz to sell the war to the American public.

It features 13 videos including rarely-seen cartoons like “Herr Meets Hare” (1945) starring Bugs Bunny, government films “What To Do in a Gas Attack” (1943) and Hollywood wartime flicks like the “Spy Smasher” cliff hanger series (1942).

View naval deck logs detailing the attack on Pearl Harbor. Listen to FDR’s “Day of Infamy” speech while you read his handwritten notes on the first draft of the speech. Listen to man-in-the-street interviews recorded the day after the Pearl Harbor attack. Swipe through an interactive timeline map detailing early Axis victories of the war. Use an interactive guide to interpret over 40 wartime posters.

All of the historic content is in the public domain. And the iBook provides access to the digital content, so users can remix the historic documents into their own galleries and projects.  Students can use an iPad-friendly historic document guide to analyze all the source material and share their observations with peers and teachers. “Why We Fight” is filled with “stop and think” prompts keyed to Common Core State Standards and includes a student guide to learning from historic documents and links to a teacher’s guide to related activities and free iPad apps.

This first of a series, “Why We Fight,” focuses on why Americans went to war and how the government defined the reasons for war and the nature of our enemies. Students build critical thinking skills as they are guided through the documents in consideration of three questions:

  • Why did Americans go to war?
  • Was Washington’s public relations blitz crafted to inform the public or manipulate? Did it appeal to reason or emotions? Did it rely on facts or stereotypes?
  • How do the themes in this book apply to your life and America today?

The next iBook in my Homefront USA series will consider how Americans were asked to change their lives, work harder and sacrifice in support of the war effort. Additional iBooks will look at how the war brought dramatic changes to American society – contrasting the growing opportunities for women with the internment of Japanese Americans.

Image credits:
Title: Enemy ears are listening.
Artist: Ralph ligan
United States. Office of War Information. Graphics Division.
Washington, D. C
Date: 1942
UNT Digital Library.

Title: Avenge December 7
Artist: Bernard Perlin
Publisher: Washington, D.C. : U.S. G.P.O. Office of War Information,
Date: 1942.
Northwestern University Library

How to Motivate Student Writers

My last post, What is Writing For?, concluded by offering three ideas for motivating student writers:

  • Let students make some choices about their writing.
  • Let them write for a more authentic audience than the teacher.
  • Use more peer evaluation and self reflection.

We read everything over to see if it made sense to our audience ~ 6th grader’s reflection

I thought readers deserved an example of these principles in action. Here’s a project I did that exemplifies choice, authentic audience and self-reflection.

I worked with a team of 6th grade teachers to demonstrate the power of comparison skills to help their students build vocabulary and content knowledge about the functions of various organs of the human body. (Based on Robert Marzano’s Building Background Knowledge for Academic Achievement and Classroom Instruction That Works). Additionally we wanted to enhance technology skills and demonstrate the power of student choice and self reflection in a PBL setting.

Students are motivated by writing for an authentic audience. “Publishing” helps students master content and develop project management and teamwork skills. The power of publishing enables students to think like writers, to apply their learning strategies and to organize and express their learning. It exemplifies the best of the information revolution – students as creators of content rather than as passive audience. 

Project overview:

  1. Students were tasked with developing books to teach the organs of the human body to third graders.They decided that the best idea was an ABC book - ”Traveling Through the Human Body with ABCs”
  2. Teams of students chose an organ and had to develop a description of function suitable for 3rd grade audience. Then they were asked to compare the organ to something that functioned in the same way and develop a comparison that 3rd graders would understand.
  3. All the content developed by students went through a peer review process for accuracy and suitability for 3rd grade audience.
  4. PowerPoint was used to layout graphics and text. Update: you might consider design and publication using iBook Author.
  5. Students and teacher were guided through a series of reflective prompts.
  6. The PowerPoints were converted to PDF files and used to publish a few copies of each classes book using Lulu print of demand. 

Teacher reflections included:

  • Students learn best from doing and from doing it together with support but no interference from adults. Students can explain concepts and ideas to each other in “kid-friendly” language more easily, sometimes, than adults can.
  • The lessons are more lasting because they happened in a social context rather than the “top-down” structure of a traditional classroom.
  • Project-based learning creates a student centered classroom with the students doing the real work of real learners. The teachers’ work is primarily off-line.

The book is available in print from Lulu as an iBook at iTunes.

Common Core Skills: Deeper Reading and Critical Thinking


First automobile on the Index-Galena road -1911

Across the county teachers are looking for lessons and resources to implement new Common Core standards. While some see Common Core skills as something new, most of these skills are exemplified in the well established, document-based approach to instruction.

  • Close reading of non-fiction
  • Interpreting primary source documents
  • Comparing multiple texts
  • Finding evidence and using it to support arguments
  • Recognizing historical context and point of view
  • Utilizing higher-level thinking to analyze and form judgements

As a long-time advocate of DBQ’s, I’ve re-posted sample lessons that demonstrate how to build student skills in literacy and critical thinking, while supporting mastery of the Common Core.

Lessons that demonstrate how to think and behave like a historian

Elementary – Interpret Using Summaring Skills 
US Westward Expansion on the Frontier

In life, we purposefully craft summaries for a specific audience (directions for the out-of-towner, computer how-to for the technophobe). In school, the tacit audience for most summaries is the teacher. If students are going to learn to summarize they need to be given a chance to genuinely share what they think is important for an audience other than the teacher.

Here’s a three-step summarizing process I followed in a second grade classroom using a popular Currier and Ives print from the mid-19th century. We scaffold the lesson from “right-there” observations, to telling what they think is important, to framing a summary.

Middle School – Recognize Historic Point of View
European Views of the New World

This lesson improves content reading comprehension and critical thinking skills and examines European views of Native American and the New World in the Age of Exploration. While it is a rather one-sided account, the documents also reveal a great deal about the cultural “lenses” that the Europeans “looked though.”

I developed this lesson to assist high school history teachers working with struggling readers. I wanted to show them how they could scaffold learning so that all students could participate in doing the work of historians. I built the lesson around a theme which was central to their curriculum. It was designed as an essential question that would engage students in reflection about how they allowed prejudice to color their perceptions. I selected images which could be “decoded” by students with a minimum of background knowledge.

High School – Analyze and Make Judgements
The Impact of Industrialization

The Industrial Revolution transformed humanity’s age-old struggle with material scarcity by using capital, technology, resources, and management to expand the production of goods and services dramatically. But while new technologies improved the American standard of living, industrialization concentrated great wealth and power in the hands of a few captains of industry. As economic growth increasingly touched every aspect of American society, it created both new opportunities and new social problems.

Three DBQ’s are designed to improve content reading comprehension through the examination of a selection of primary and secondary documents, graphics, cartoons, tables, and graphs. Each is keyed to a historic theme and focused on an essential question of enduring relevance. They are designed to demonstrate how student engagement can be “powered” by an essential question.

Secondary - Interpreting Primary Source Documents and Comparing Multiple Texts
Why We Fight: WWII and the Art of Public Persuasion

Designed as multi-touch student text, it focuses on the American response to WWII – especially the very active role played by government in shaping American behavior and attitudes. “Why We Fight” gives students a chance to step back to the 1940s and experience the perspective of Americans responding to the Pearl Harbor attack and WWII. Americans were hungry for information, and Washington responded with a PR blitz to sell the war to the American public.

The iBook provides access to the digital content, so users can remix the historic documents into their own galleries and projects. Students can use an iPad-friendly historic document guide to analyze all the source material and share their observations with peers and teachers. “Why We Fight” is filled with “stop and think” prompts keyed to Common Core State Standards and includes a student guide to learning from historic documents and links to a teacher’s guide to related activities and free iPad apps.

Image Credit: First automobile on the Index-Galena road, 1911 (Washington State)
University of Washington Libraries