Prezi – Engage Your Audience with a Zooming, Non-Lineal Presentation

I’ve been having great fun with Prezi a new web-based presentation software currently in private beta mode. (You can submit a request to be included in the beta.) Prezi allows you to easily create maps of texts, images, videos, PDFs, drawings and present them in a nonlinear way. The menu for adding elements has a very unique navigational approach. (Easier to experience than describe.) Once you’ve added your text and graphics you can define a path through the material. But you can also click on any element in the presentation and zoom until it fits the whole screen. Likewise you can zoom out to reveal the larger presentation canvas. Here’s a link to the Prezi online manual

Once completed the presentations can be saved on the Prezi server or downloaded to your computer as a fully functional file set for presentation. (Once downloaded to your computer the presentation is no longer editable.) Prezi will host your presentation to share with others via the web. You can set permissions open up or limit viewers. You can even collaborate by allowing group editing. 

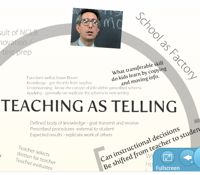
I’ve been working on a brainstorming Prezi (embedded below -click arrow to play). You can click on any element to fully enlarge. For example, click on the image of Ben Stein and the video clip will play. Click on any of the bracket or circle frames and the defined area will fill the screen. Hold down the “R” key on your keyboard and the left mouse will rotate the screen. Use your mouse wheel to zoom in or out. You can explore the presentation using your mouse to pan and zoom or use the path I defined by using the arrows in the lower right. There you will also find a fill screen icon. Here’s a direct link to the presentation


Search Strategies Revealed

I thought this recent article from the New York Times "At First, Funny Videos. Now, a Reference Tool" opened with the interesting quote on search strategies.  

Faced with writing a school report on an Australian animal, Tyler Kennedy began where many student begin these days: by searching the Internet. But Tyler didn’t use Google or Yahoo. He searched for information about the platypus on YouTube.

18ping.1901“I found some videos that gave me pretty good information about how it mates, how it survives, what it eats,” Tyler said. Similarly, when Tyler gets stuck on one of his favorite games on the Wii, he searches YouTube for tips on how to move forward. And when he wants to explore the ins and outs of collecting Bakugan Battle Brawlers cards, which are linked to a Japanese anime television series, he goes to YouTube again.

While he favors YouTube for searches, he said he also turns to Google from time to time.

“When they don’t have really good results on YouTube, then I use Google,” said Tyler, who is 9 and lives in Alameda. Calif.

Tyler is a self-directed and reflective learner, who monitors his progress. That's good news for educators as long as we can harness his growth, not stand in his way. As Eric Schmidt, Google CEO, once said “Search is highly personal and empowering. It’s the antithesis of begin told or taught.” 

Noah Berger for The New York Times
Tyler Kennedy, 9, at home in California, uses YouTube to research reports for school and to hunt tips to advance in his video games.

Build Literacy Skills with Wordle

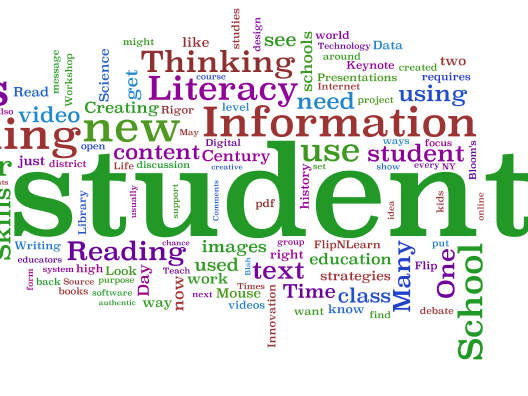
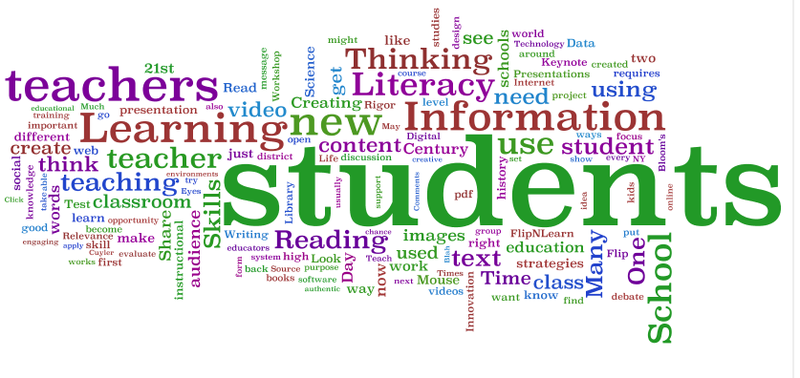
I’ve always been interested in quantitative displays of information. I’ve been having lots of fun with Wordle – a free website that creates “word clouds” (or “tag clouds”) for text analysis. Simply copy/paste text and in seconds Wordle gives you a visual representation of word frequency. The example below was created by analyzing all the words used in my blog in 2008. Click the screen shots below to enlarge.
Picture 1

While you can directly type into the Wordle text box, I would recommend you copy and past text into it. That allows you to get text directly from online sources or your own text document. Student can either work on their individual Wordles or collaborate together on one. In the later case, it’s probably most efficient to gather all their writing into one text document before copy/pasting it into a Wordle. Use tilde sign to create phrases. Example: learning~strategies. Another tip: After you create a Wordle, right click a term to remove it from the Wordle results. 

Picture 2
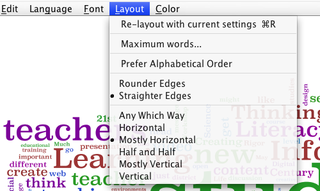
The site allows you to modify the color scheme, font, alignment and even set the maximum number of words to include in the analysis (example top 100 words, top 50 words, etc) For inspiration on layout see these Wordle samples at Flickr

Wordle output – If you PDF generating software, you can “print” a Wordle to a PDF file. Or you can do a screen capture of the Wordle. Do live Wordles on your smartboard. For a how-to on screenshots click here.

So how could your students use Wordle?
Defining  skills – Before the dictionary comes out, give your students a new vocabulary word and ask them to brainstorm all the word they associate with it. Gather up all the brainstormed words for a Wordle. After the term has been formally defined, repeat the process and compare to the “pre-dictionary” Wordle.

Summarizing skills – As a pre-reading exercise – copy/paste text of reading into  a Wordle and ask students to predict what the main ideas of the reading will be. Another pre-reading option – give them a Wordle of a non-fiction reading and ask them to use the Wordle to generate a title or headline before they see the real article. Post reading – ask them to reflect on the reading based on a prompt (examples – main idea, what you’ve learned, funniest element, etc). Then collect all their reflections into a Wordle.

Comparison skills – Give them two different accounts / essays on the same theme / event – let them compare the Wordles generated by each. Or you could generate Wordles for two different reading – then let student see if they can match the Wordle to it’s corresponding reading.

I’ve been collaborating with fellow educators on a Google Doc guide to using Wordle in the classroom

Keeping Track of Administrator Walkthroughs?

I've been conducting walk-through training for principals and teachers. It's a great way to help a school forge a shared vision for teaching and learning. The walk throughs foster a great dialogue about instruction – what kinds of thinking are students being asked to do? How does information move around the classroom? For more on one of my walk-through workshops click here

But I have to share this great ad made by Nextel to promote their phones. Technology at work!

Creating Presentation Handouts in Apple Keynote

I’m a recovering PowerPoint user that’s been using Apple Keynote for my presentations for about a year. I find it much friendlier to graphics and media. It took me a while to figure out how to create B/W six slide / page handouts that I could easily PDF to clients. Thought I’d pass it along. If you have any more suggestions, let me know!
PS. I use the Mac native pdf creation tools (too cheap to buy Adobe Acrobat for my Mac). For this illustration I’m working with a 108 slide Keynote presentation with lots of graphics.
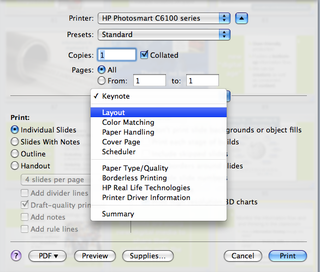
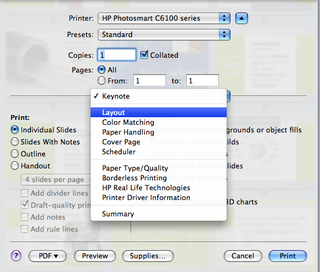
Step 1: I open my Keynote handout presentation. I select File/ Print. Keynote defaults to Keynote in drop down box – I select “Layout.”
 Picture 1
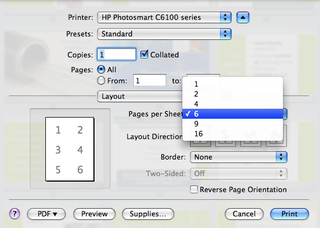
Step 2: In the “Pages Per Sheet” box, I choose 6. Note: This “Pages per Sheet” choice doesn’t appear on the default “Keynote” print screen.
Picture 2
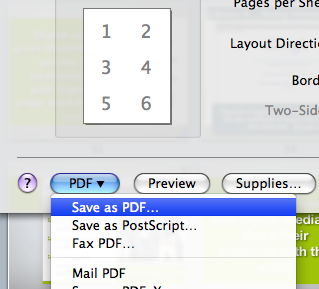
Step 3: I click “PDF” button in lower left and chose “Save as PDF” This gives me a color pdf – 6 slides per page. In the sample I’m working on, I have now created a 16 MB PDF file.
Picture 3
Now my goal is to convert to gray scale (for the client to photocopy) and to reduce the file size.
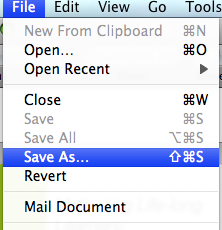
Step 4: Open the newly created PDF  handout in Apple Preview. I choose “File/Save As… “
Picture 4
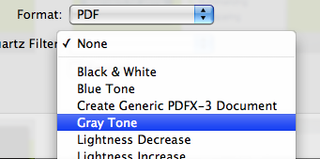
In the “Quartz Filter”  selection box, I choose “Gray Tone.” I save that new gray tone PDF. Nice looking handout, but I have greatly increased the file size. (from 16 to 103 MB). Too big to send to the client!
Picture 5
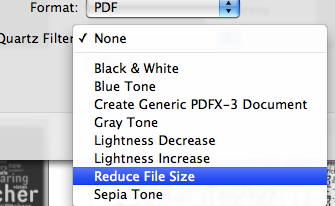
Step 5: I open the newly created Gray Tone version of the pdf in Preview and do another “Save As…” Just like in step 4. This time in the  “Quartz Filter” selection box, I choose “Reduce File Size.” That creates a new PDF with file size reduced from 103 MB to 5.7 MB (Even smaller than 16 MB color PDF I created in step 3)
Picture 6
Since I am usually sending of lots of handouts to multiple clients. I have another blog devoted to distributing them. That way I can email a link to my “Handout Blog”  and let them deal with downloads at their end.
Hope this helps!